メインコンテンツにスキップ

DigiLand DL701Q Screen Replacement

必要な工具と部品

  1. DigiLand DL701Q Screen Replacement, Back Case: 手順 1、 3の画像 1 DigiLand DL701Q Screen Replacement, Back Case: 手順 1、 3の画像 2 DigiLand DL701Q Screen Replacement, Back Case: 手順 1、 3の画像 3
    • Make sure your device is turned off.

    • Hold the device firmly, in landscape view.

    • Locate the crevice that separates the front cover from the back cover. Then hold the plastic opening tool and insert the wedge portion of the tool into the crevice.

    • Some force may need to be applied and there may be a cracking sound. This is normal.

    • Slowly slide the wedge portion of the plastic opening tool while applying some upward force around the device until the back cover is completely loose.

    • Only apply enough force to loosen the back cover. Excessive force may damage the screen.

  2. DigiLand DL701Q Screen Replacement: 手順 2、 3の画像 1 DigiLand DL701Q Screen Replacement: 手順 2、 3の画像 2 DigiLand DL701Q Screen Replacement: 手順 2、 3の画像 3
    • Place the screen in the palm of your hand and then with your other hand carefully grab the case and remove the cover like flipping the page of a book.

    • Lay the device down and notice that the speaker will be attached to the back cover with a wire. Carefully lift the speaker upward from the back cover and place it near the battery.

    • The speaker may be glued in so treat with care and remove the speaker by gently moving your finger around it and lifting up.

  3. DigiLand DL701Q Screen Replacement, Battery: 手順 3、 3の画像 1 DigiLand DL701Q Screen Replacement, Battery: 手順 3、 3の画像 2 DigiLand DL701Q Screen Replacement, Battery: 手順 3、 3の画像 3
    • Lay device flat on the table.

    • Firmly grip the device on the edges. Take the wedge portion of the spudger tool and push in between the battery and the screen with force. Begin pushing the spudger with the wedge underneath the battery all the way around in order to break the glue.

    • Repeat this step pushing further across and underneath until the battery is loose.

    • The battery is heavily glued to the screen and much force may be needed to break the glued bond.

  4. DigiLand DL701Q Screen Replacement: 手順 4、 3の画像 1 DigiLand DL701Q Screen Replacement: 手順 4、 3の画像 2 DigiLand DL701Q Screen Replacement: 手順 4、 3の画像 3
    • Once the battery is loose slowly lift it up so you can get to the terminals as seen in the next picture.

    • Desolder the battery's connection terminals from the motherboard.

    • If you do not know how to desolder look at this soldering and desoldering guide

    • Remove the battery by pulling it out of the device.

    • In order to avoid damage to the device, the battery must be physically removed from the device before proceeding with any further repairs . Leaving a battery close to a device being worked on can be extremely hazardous. Leads can bump into the motherboard or into each other by accident causing damage to the device.

  5. DigiLand DL701Q Screen Replacement, Speaker: 手順 5、 3の画像 1 DigiLand DL701Q Screen Replacement, Speaker: 手順 5、 3の画像 2 DigiLand DL701Q Screen Replacement, Speaker: 手順 5、 3の画像 3
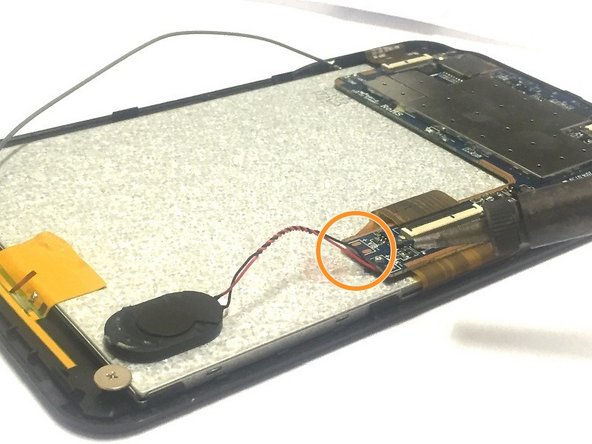
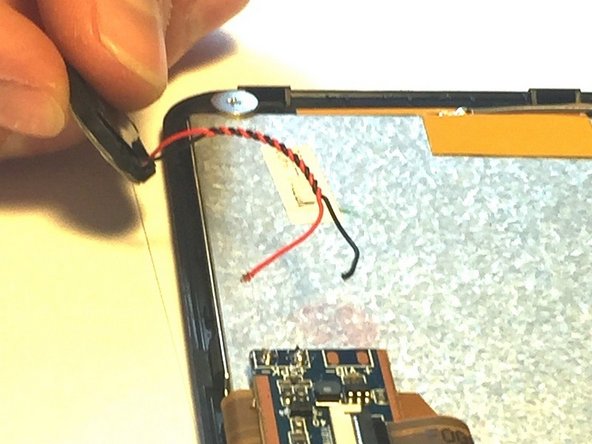
    • Orient the device with the screen facing down as shown in the picture and locate the speaker.

    • Locate where the flash's wires connect to the motherboard.

    • Desolder the speaker's wires from the motherboard and remove the speaker by pulling gently to see if the wires have been desoldered.

    • If you do not know how to desolder look at this soldering and desoldering guide

  6. DigiLand DL701Q Screen Replacement, Camera: 手順 6、 3の画像 1 DigiLand DL701Q Screen Replacement, Camera: 手順 6、 3の画像 2 DigiLand DL701Q Screen Replacement, Camera: 手順 6、 3の画像 3
    • First orient the device to a portrait position as seen in the picture.

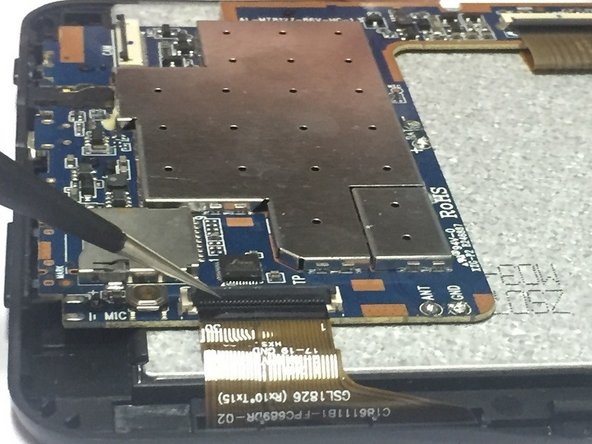
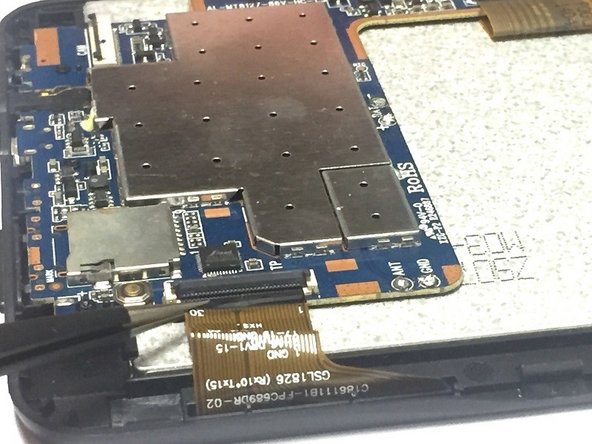
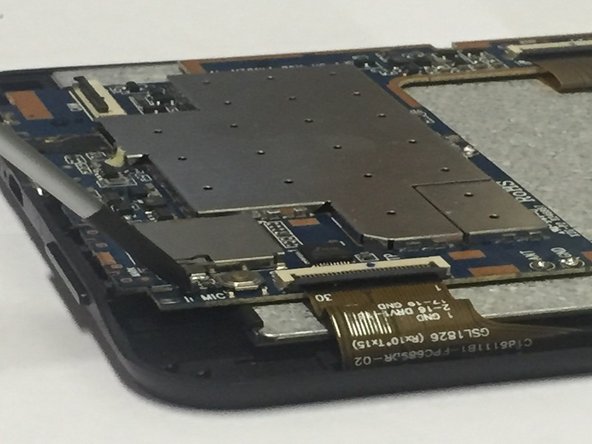
    • Locate the zero insertion force (ZIF) connector shown in the figure.

    • Use the tweezers to pull up on the zero insertion force (ZIF) connector and release the ribbon.

    • Next, take the tweezers and grab the ribbon and pull outward from the socket.

  7. DigiLand DL701Q Screen Replacement: 手順 7、 2の画像 1 DigiLand DL701Q Screen Replacement: 手順 7、 2の画像 2
    • Then take the tweezers and grip the tape on the back of the camera and pull outward.

    • Lastly, take the spudger and pry the back camera from the bottom applying force upward.

    • The camera should be loose from the device and now you can lift it up and remove it.

    • The camera should be removed before proceeding with any further repairs in order to avoid damage to the ribbons and/or camera when removing the motherboard.

  8. DigiLand DL701Q Screen Replacement, Motherboard: 手順 8、 3の画像 1 DigiLand DL701Q Screen Replacement, Motherboard: 手順 8、 3の画像 2 DigiLand DL701Q Screen Replacement, Motherboard: 手順 8、 3の画像 3
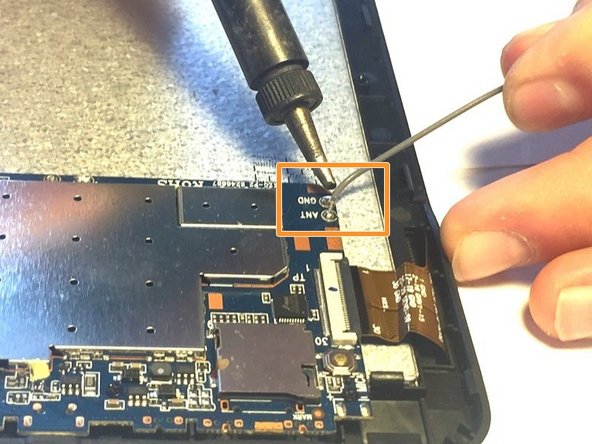
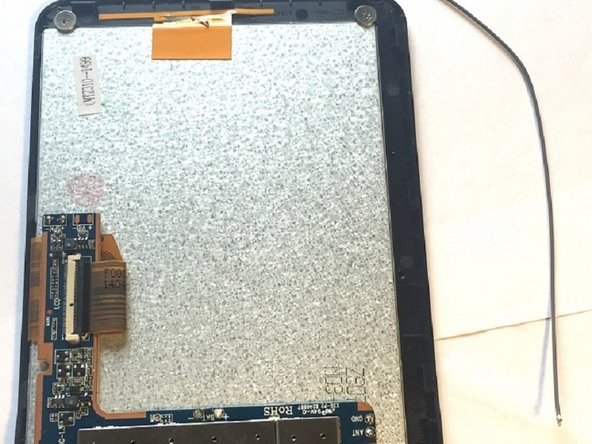
    • With the device flat on the table in the portrait position, grip the device and locate the antenna.

    • There is a connection at the top of the device. Desolder the connection.

    • Now locate the last connection that is attached near the bottom of the device. Desolder this connection.

    • There should no longer be any wires in the device.

  9. DigiLand DL701Q Screen Replacement: 手順 9、 3の画像 1 DigiLand DL701Q Screen Replacement: 手順 9、 3の画像 2 DigiLand DL701Q Screen Replacement: 手順 9、 3の画像 3
    • Grip the device firmly in hand and locate the black tab.

    • Pull up on the zero insertion force (ZIF) connector with the tweezers to unlock the ribbon.

    • Remove the ribbon by pulling it out using the tweezers.

  10. DigiLand DL701Q Screen Replacement: 手順 10、 3の画像 1 DigiLand DL701Q Screen Replacement: 手順 10、 3の画像 2 DigiLand DL701Q Screen Replacement: 手順 10、 3の画像 3
    • Locate the second ribbon that is attached to the motherboard.

    • Pull up on the zero insertion force (ZIF) connector using the tweezers. This will release the ribbon that is locked into place.

    • Pull the ribbon out using the tweezers to remove it from the motherboard.

  11. DigiLand DL701Q Screen Replacement: 手順 11、 3の画像 1 DigiLand DL701Q Screen Replacement: 手順 11、 3の画像 2 DigiLand DL701Q Screen Replacement: 手順 11、 3の画像 3
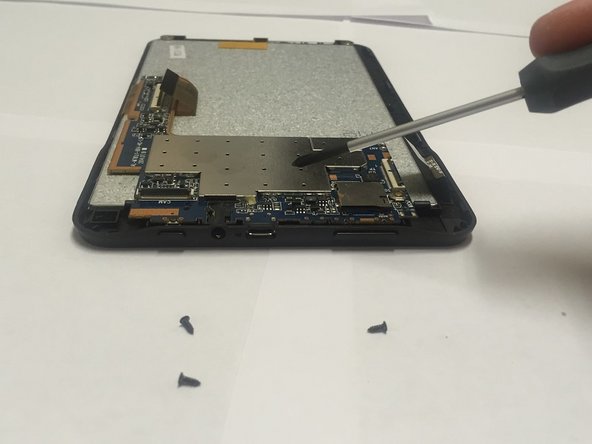
    • Locate the three 4mm screws that attach the motherboard to the device.

    • Use a PH0 screw driver to remove the 4mm screws shown.

  12. DigiLand DL701Q Screen Replacement: 手順 12、 1の画像 1
    • Grip the motherboard and lift up gently and remove the motherboard from the device.

  13. DigiLand DL701Q Screen Replacement, Screen: 手順 13、 3の画像 1 DigiLand DL701Q Screen Replacement, Screen: 手順 13、 3の画像 2 DigiLand DL701Q Screen Replacement, Screen: 手順 13、 3の画像 3
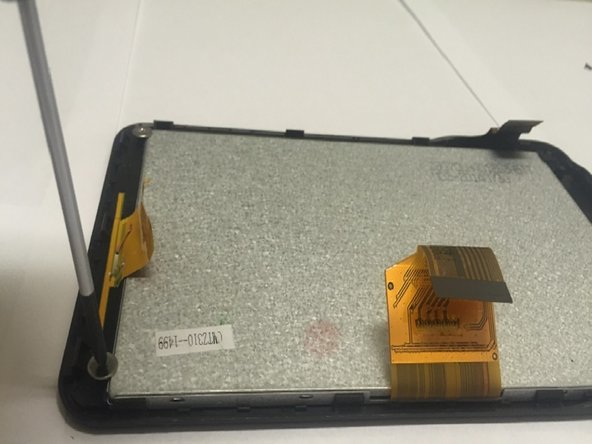
    • Use the tweezers to pry up the antenna strip

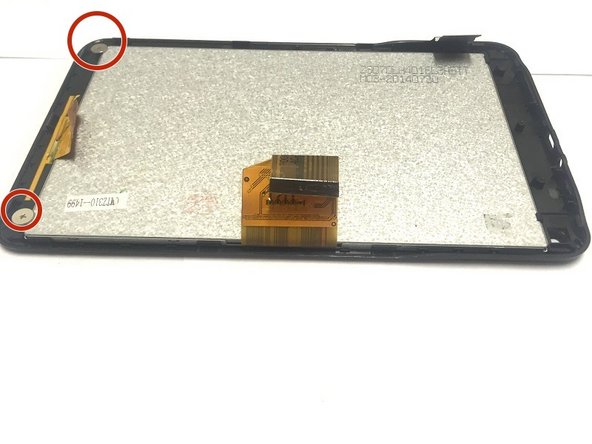
    • Locate the two 3mm screws.

    • Remove the two 3mm screws using the PH0 screwdriver.

  14. DigiLand DL701Q Screen Replacement: 手順 14、 2の画像 1 DigiLand DL701Q Screen Replacement: 手順 14、 2の画像 2
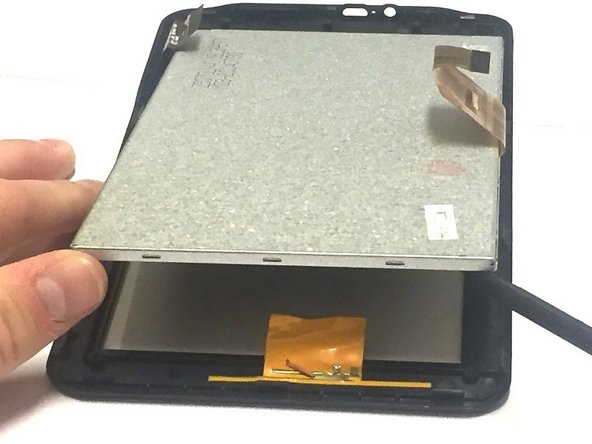
    • Insert the spudger below the corner of the screen and lift the screen up.

    • Gently remove the screen from the device.

終わりに

To reassemble your device, follow these instructions in reverse order.

7 の人々がこのガイドを完成させました。

作成者

2人の作成者と共同で作成されました。
Jonathan Mysona

メンバー登録日: 03/21/16

1,135 ポイント

7のガイドは作成済み

チーム

Clemson, Team 6-1, Benson Spring 2016 Clemson, Team 6-1, Benson Spring 2016人のメンバー

CLEM-BENSON-S16S6G1

3 メンバー

7のガイドは作成済み

0 件のコメント

コメントを追加

統計データ:

過去 24時間: 0

過去 7 日: 1

過去 30 日: 2

今までの合計 2,041