メインコンテンツにスキップ

Dewalt Nailers DCN680D1 2018 PTO Assembly Replacement

必要な工具と部品

  1. Dewalt Nailers DCN680D1 2018 PTO Assembly Replacement, Remove the battery: 手順 1、 3の画像 1 Dewalt Nailers DCN680D1 2018 PTO Assembly Replacement, Remove the battery: 手順 1、 3の画像 2 Dewalt Nailers DCN680D1 2018 PTO Assembly Replacement, Remove the battery: 手順 1、 3の画像 3
    • Before you begin the repair, remove the battery from the device.

  2. Dewalt Nailers DCN680D1 2018 PTO Assembly Replacement, Loosen the outer housing: 手順 2、 1の画像 1
    • Remove the following screws securing the outer housing:

    • Twelve T10 screws

    • One 2.5 mm hex screw

    • Some of these screws are deeply recessed. You can use a flathead screwdriver to loosen these screws.

  3. Dewalt Nailers DCN680D1 2018 PTO Assembly Replacement, Remove the right housing: 手順 3、 2の画像 1 Dewalt Nailers DCN680D1 2018 PTO Assembly Replacement, Remove the right housing: 手順 3、 2の画像 2
    • Lift and remove the right housing from the device.

  4. Dewalt Nailers DCN680D1 2018 PTO Assembly Replacement, Loosen the internal parts: 手順 4、 2の画像 1 Dewalt Nailers DCN680D1 2018 PTO Assembly Replacement, Loosen the internal parts: 手順 4、 2の画像 2
    • Remove the lock button from its recess.

    • During reassembly, make sure that the button is properly seated and engages the trigger.

  5. Dewalt Nailers DCN680D1 2018 PTO Assembly Replacement: 手順 5、 2の画像 1 Dewalt Nailers DCN680D1 2018 PTO Assembly Replacement: 手順 5、 2の画像 2
    • Slide the battery connector out of its recess.

  6. Dewalt Nailers DCN680D1 2018 PTO Assembly Replacement: 手順 6、 3の画像 1 Dewalt Nailers DCN680D1 2018 PTO Assembly Replacement: 手順 6、 3の画像 2 Dewalt Nailers DCN680D1 2018 PTO Assembly Replacement: 手順 6、 3の画像 3
    • Remove the switch board, switch, and spring from its housing recess.

    • During reassembly, use the third photo as a reference to help you set the components back in the housing.

  7. Dewalt Nailers DCN680D1 2018 PTO Assembly Replacement, Remove the left housing: 手順 7、 3の画像 1 Dewalt Nailers DCN680D1 2018 PTO Assembly Replacement, Remove the left housing: 手順 7、 3の画像 2 Dewalt Nailers DCN680D1 2018 PTO Assembly Replacement, Remove the left housing: 手順 7、 3の画像 3
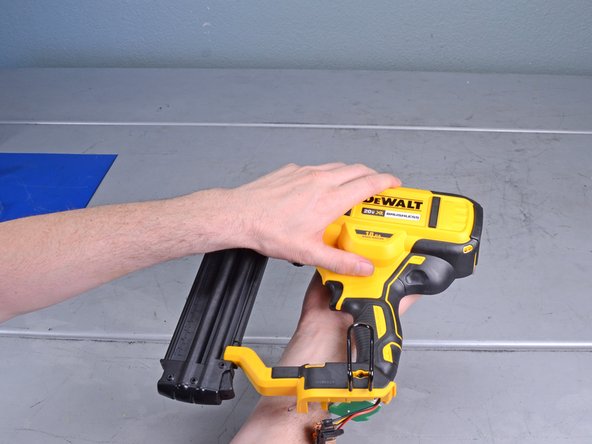
    • Carefully flip the device over.

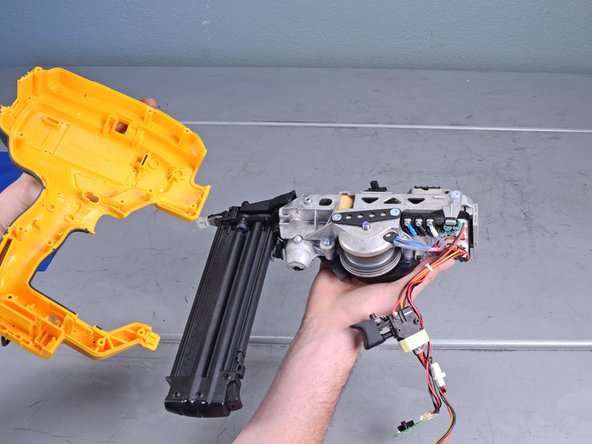
    • Remove the left housing from the device.

  8. Dewalt Nailers DCN680D1 2018 PTO Assembly Replacement: 手順 8、 3の画像 1 Dewalt Nailers DCN680D1 2018 PTO Assembly Replacement: 手順 8、 3の画像 2 Dewalt Nailers DCN680D1 2018 PTO Assembly Replacement: 手順 8、 3の画像 3
    • The spring under the release button has a tendency to fly out. Be careful not to lose the spring.

    • Carefully remove the release button from the device.

    • Remove the button spring from the device.

  9. Dewalt Nailers DCN680D1 2018 PTO Assembly Replacement, Remove the back support: 手順 9、 2の画像 1 Dewalt Nailers DCN680D1 2018 PTO Assembly Replacement, Remove the back support: 手順 9、 2の画像 2
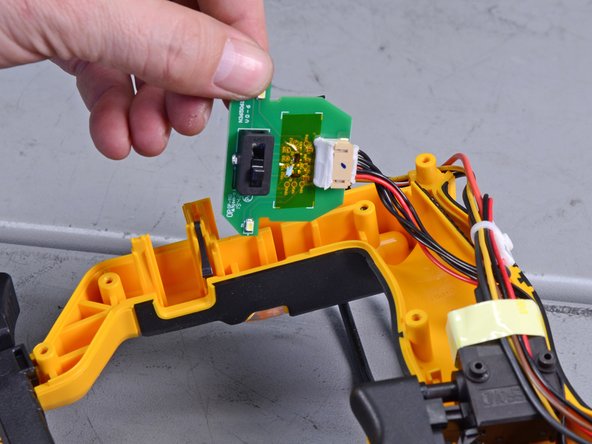
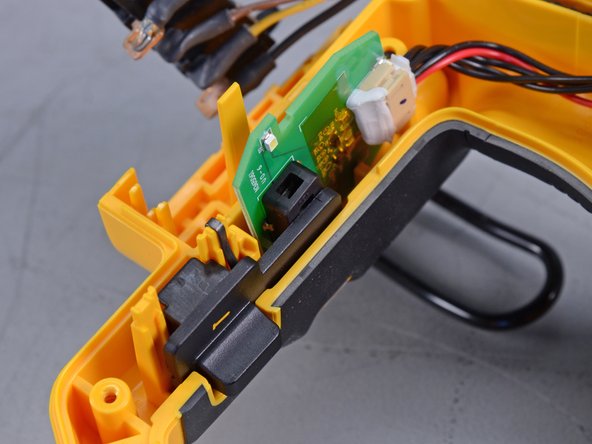
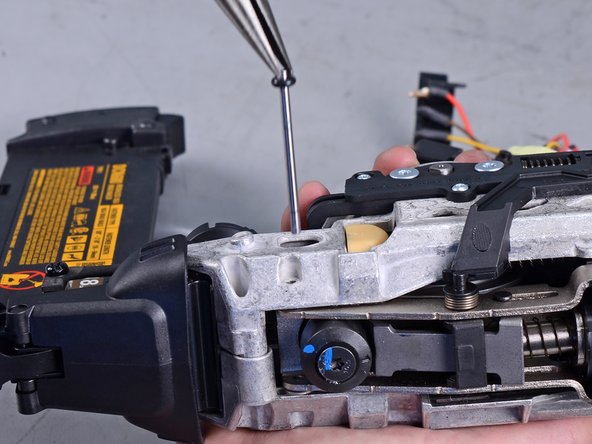
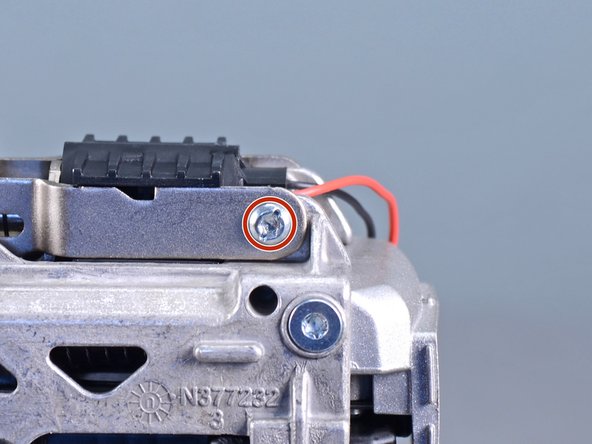
    • Use a T20 driver to remove the two screws (one on either side) securing the back support .

  10. Dewalt Nailers DCN680D1 2018 PTO Assembly Replacement: 手順 10、 2の画像 1 Dewalt Nailers DCN680D1 2018 PTO Assembly Replacement: 手順 10、 2の画像 2
    • Loosen the two solenoid wires from the back support.

  11. Dewalt Nailers DCN680D1 2018 PTO Assembly Replacement: 手順 11、 2の画像 1 Dewalt Nailers DCN680D1 2018 PTO Assembly Replacement: 手順 11、 2の画像 2
    • Pull the back support straight out of the device.

  12. Dewalt Nailers DCN680D1 2018 PTO Assembly Replacement, Dewalt Nailers DCN680D1 2018 Solenoid Removal: 手順 12、 2の画像 1 Dewalt Nailers DCN680D1 2018 PTO Assembly Replacement, Dewalt Nailers DCN680D1 2018 Solenoid Removal: 手順 12、 2の画像 2
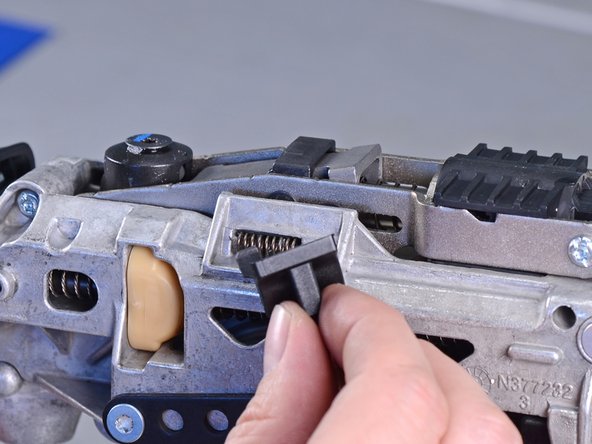
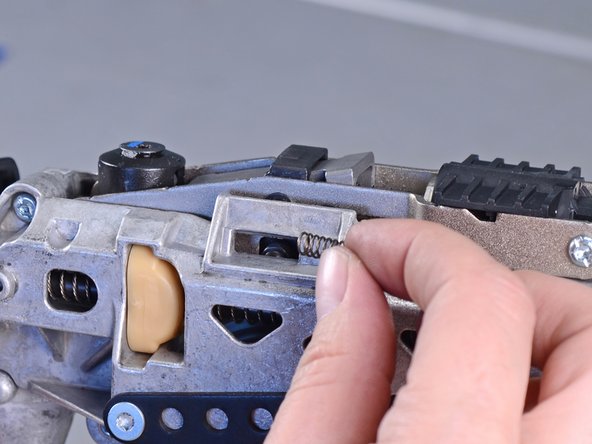
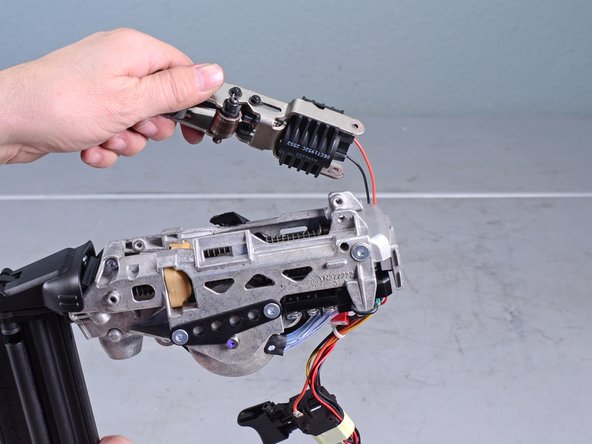
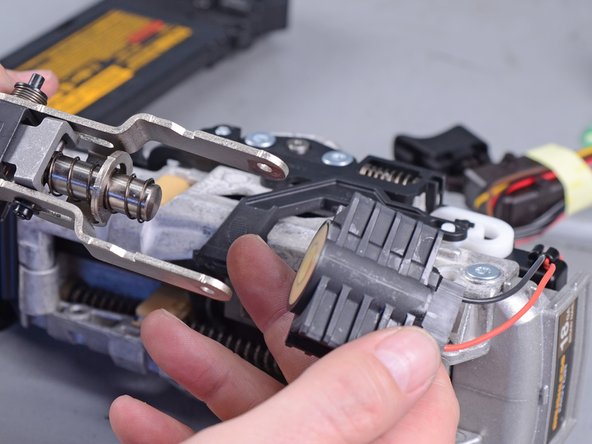
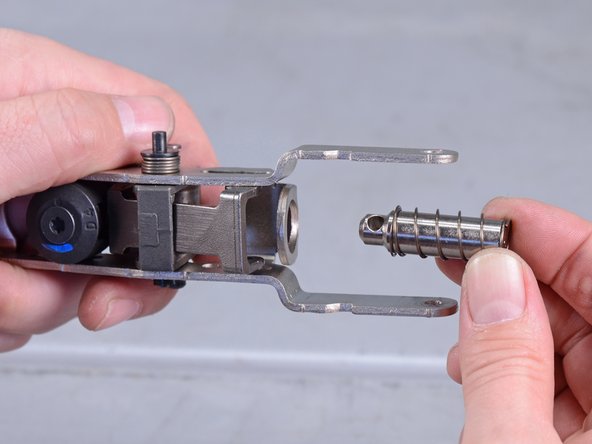
    • Slide the dowel pin securing the PTO assembly out of the device.

  13. Dewalt Nailers DCN680D1 2018 PTO Assembly Replacement, Loosen the solenoid assembly: 手順 13、 2の画像 1 Dewalt Nailers DCN680D1 2018 PTO Assembly Replacement, Loosen the solenoid assembly: 手順 13、 2の画像 2
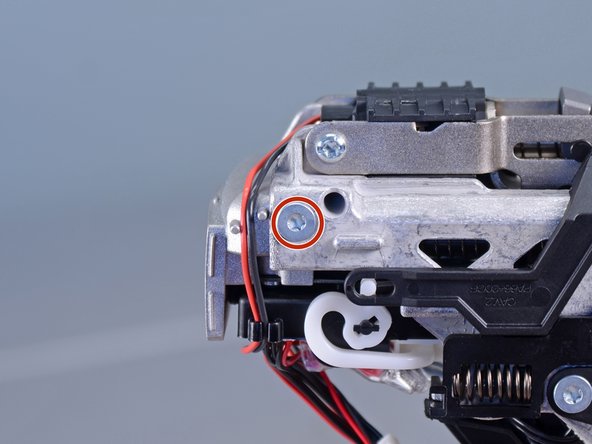
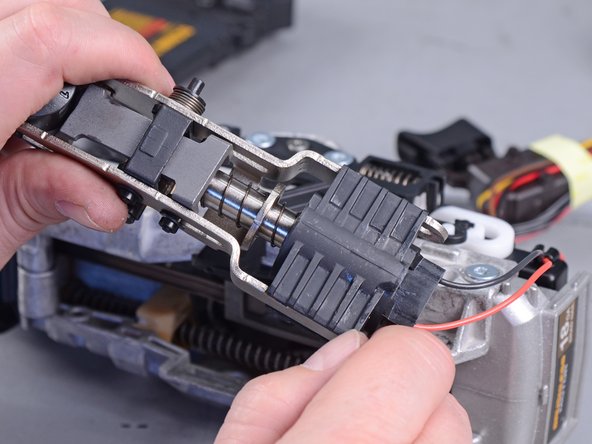
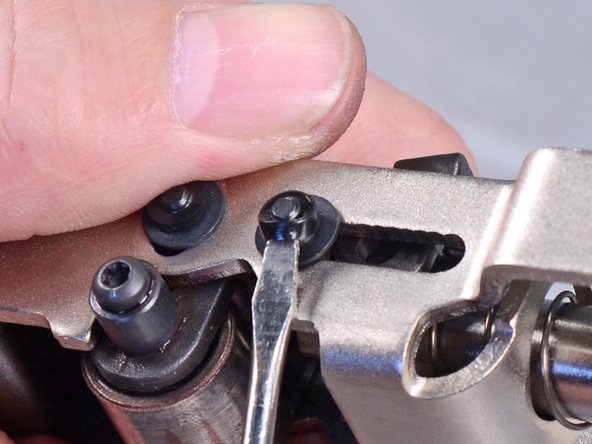
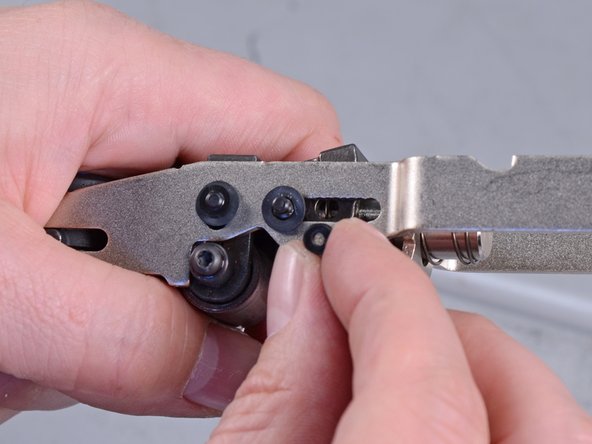
    • Use a T10 driver to remove the two screws securing the solenoid.

  14. Dewalt Nailers DCN680D1 2018 PTO Assembly Replacement: 手順 14、 3の画像 1 Dewalt Nailers DCN680D1 2018 PTO Assembly Replacement: 手順 14、 3の画像 2 Dewalt Nailers DCN680D1 2018 PTO Assembly Replacement: 手順 14、 3の画像 3
    • Lift the solenoid away from the device.

    • The solenoid is still connected to the device by two wires. Be careful not to strain the wires.

  15. Dewalt Nailers DCN680D1 2018 PTO Assembly Replacement: 手順 15、 3の画像 1 Dewalt Nailers DCN680D1 2018 PTO Assembly Replacement: 手順 15、 3の画像 2 Dewalt Nailers DCN680D1 2018 PTO Assembly Replacement: 手順 15、 3の画像 3
    • Slide the solenoid off the PTO assembly's rails.

  16. Dewalt Nailers DCN680D1 2018 PTO Assembly Replacement, Reassembly tip: 手順 16、 2の画像 1 Dewalt Nailers DCN680D1 2018 PTO Assembly Replacement, Reassembly tip: 手順 16、 2の画像 2
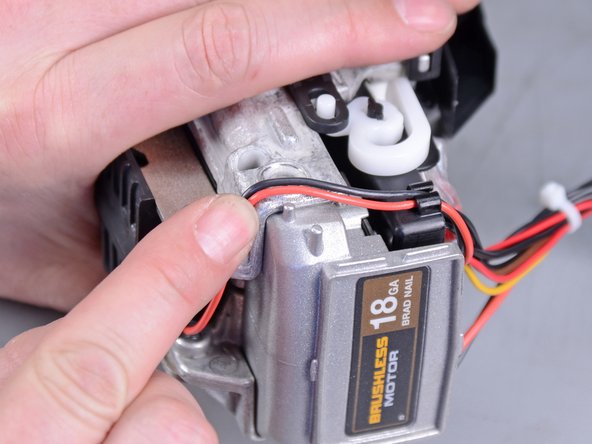
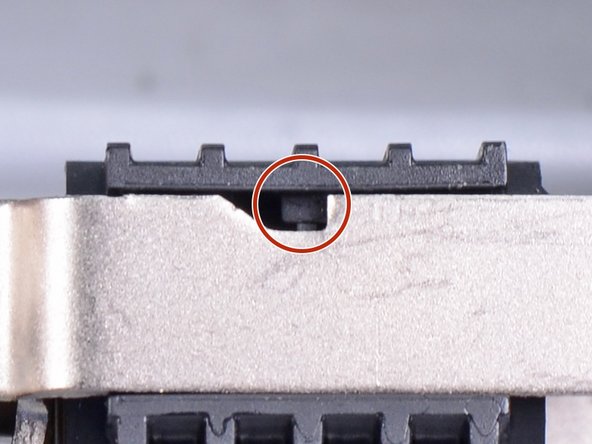
    • Reassembly tip: When you slide the solenoid back onto the PTO assembly, make sure to align the plastic pin to the notch.

  17. Dewalt Nailers DCN680D1 2018 PTO Assembly Replacement, Transfer the minor components: 手順 17、 3の画像 1 Dewalt Nailers DCN680D1 2018 PTO Assembly Replacement, Transfer the minor components: 手順 17、 3の画像 2 Dewalt Nailers DCN680D1 2018 PTO Assembly Replacement, Transfer the minor components: 手順 17、 3の画像 3
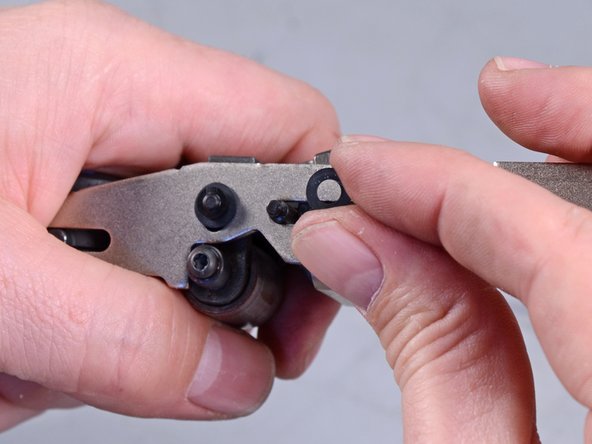
    • Use a flathead screwdriver to pry off the rubber stopper securing the plunger pin.

    • Retain the rubber stopper and washer for your replacement assembly.

  18. Dewalt Nailers DCN680D1 2018 PTO Assembly Replacement: 手順 18、 2の画像 1 Dewalt Nailers DCN680D1 2018 PTO Assembly Replacement: 手順 18、 2の画像 2
    • Remove the plunger pin from the PTO assembly.

  19. Dewalt Nailers DCN680D1 2018 PTO Assembly Replacement: 手順 19、 2の画像 1 Dewalt Nailers DCN680D1 2018 PTO Assembly Replacement: 手順 19、 2の画像 2
    • Remove the plunger and spring from the PTO assembly.

    • Install the plunger, spring, and pin onto your replacement assembly.

  20. Dewalt Nailers DCN680D1 2018 PTO Assembly Replacement: 手順 20、 1の画像 1
    • Only the PTO assembly remains.

終わりに

To reassemble your device, follow these instructions in reverse order.

作成者

1人の作成者と共同作成されました。

Arthur Shi

メンバー登録日: 01/03/18

258,913 ポイント

531のガイドは作成済み

チーム

iFixit iFixit人のメンバー

Staff

140 メンバー

18,077のガイドは作成済み

0 件のコメント

コメントを追加

統計データ:

過去 24時間: 0

過去 7 日: 0

過去 30 日: 10

今までの合計 270