はじめに
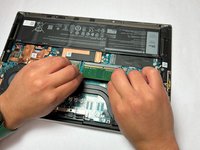
If your device is experiencing issues with its short-term memory, the RAM may need replacement. This guide illustrates how to remove the RAM (Random Access Memory) from the motherboard of a Dell XPS 15 9510 laptop. Correctly pulling the RAM out of the motherboard results in a faint clicking sound.
Before using this guide, make sure to review the troubleshooting page to ensure that the RAM is the actual problem.
If you need more RAM than the original laptop has, you can upgrade to one that has better speeds and storage. This device supports the following: 8 GB DDR4 at 3200 MHz (2 x 4 GB), dual channel 16 GB DDR4 at 3200 MHz (2 x 8 GB), dual channel 32 GB DDR4 at 3200 MHz (2 x 16 GB), dual channel 64 GB DDR4 at 3200 MHz (2 x 32 GB).
Make sure to power off your laptop completely and disconnect from any external power source before to beginning the process.
必要な工具と部品
-
-
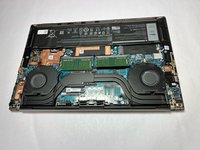
Remove eight 3 mm screws from the underside of the case using a T5 Torx screwdriver.
-
-


To reassemble your device, follow these instructions in reverse order.
To reassemble your device, follow these instructions in reverse order.
ある他の人がこのガイドを完成しました。

チーム

IUPUI, Team 2-1, Harley Summer 2023 IUPUI, Team 2-1, Harley Summer 2023人のメンバー
IUPUI-HARLEY-SU23S2G1
4 メンバー
3のガイドは作成済み