メインコンテンツにスキップ

Dell Precision 7560 Touchpad Replacement

必要な工具と部品

  1. Dell Precision 7560 Touchpad Replacement, Battery: 手順 1、 3の画像 1 Dell Precision 7560 Touchpad Replacement, Battery: 手順 1、 3の画像 2 Dell Precision 7560 Touchpad Replacement, Battery: 手順 1、 3の画像 3
    • The screws holding the back cover in place can not be removed.

    • Use a Phillips #0 screwdriver to loosen the the eight 5 mm captive screws in the bottom cover.

    • Remove the back cover by lifting at the corners.

  2. Dell Precision 7560 Touchpad Replacement: 手順 2、 3の画像 1 Dell Precision 7560 Touchpad Replacement: 手順 2、 3の画像 2 Dell Precision 7560 Touchpad Replacement: 手順 2、 3の画像 3
    • Unscrew and remove the five 2 mm screws that secure the battery.

    • Locate the battery connector.

  3. Dell Precision 7560 Touchpad Replacement: 手順 3、 3の画像 1 Dell Precision 7560 Touchpad Replacement: 手順 3、 3の画像 2 Dell Precision 7560 Touchpad Replacement: 手順 3、 3の画像 3
    • Pull the connector towards you to disconnect it.

    • Use your fingers or a plastic opening tool to pry the battery up and remove it from the laptop.

  4. Dell Precision 7560 Touchpad Replacement, Speaker: 手順 4、 3の画像 1 Dell Precision 7560 Touchpad Replacement, Speaker: 手順 4、 3の画像 2 Dell Precision 7560 Touchpad Replacement, Speaker: 手順 4、 3の画像 3
    • Loosen the eight captive screws that secure the fan assembly using a Phillips #0 screwdriver.

    • Lifting from the bottom, carefully remove the fan.

  5. Dell Precision 7560 Touchpad Replacement: 手順 5、 3の画像 1 Dell Precision 7560 Touchpad Replacement: 手順 5、 3の画像 2 Dell Precision 7560 Touchpad Replacement: 手順 5、 3の画像 3
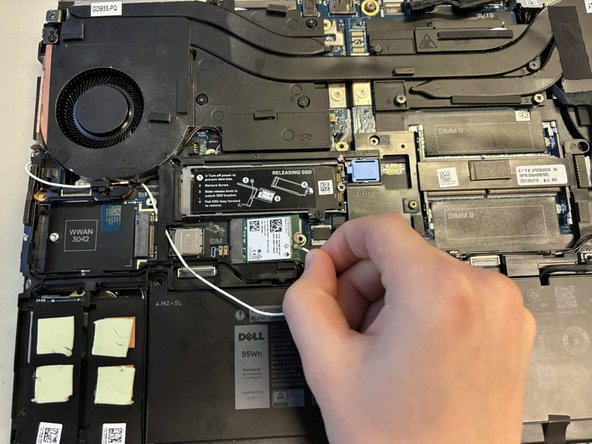
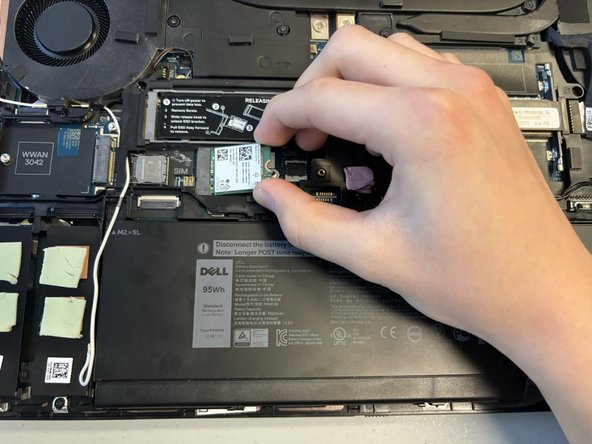
    • Remove the 5 mm screw holding the Wi-Fi card in place using a Phillips #0 screwdriver.

    • Remove the metal overlay.

    • Disconnect the wires attached to the Wi-Fi card.

    • Remove the Wi-Fi card.

  6. Dell Precision 7560 Touchpad Replacement: 手順 6、 2の画像 1 Dell Precision 7560 Touchpad Replacement: 手順 6、 2の画像 2
    • Remove the 2 mm screws holding the metal frame in place using a Phillips #0 screwdriver.

    • Remove, carefully and completely, any wires running over the frame.

    • Lift the metal frame.

  7. Dell Precision 7560 Touchpad Replacement: 手順 7、 2の画像 1 Dell Precision 7560 Touchpad Replacement: 手順 7、 2の画像 2
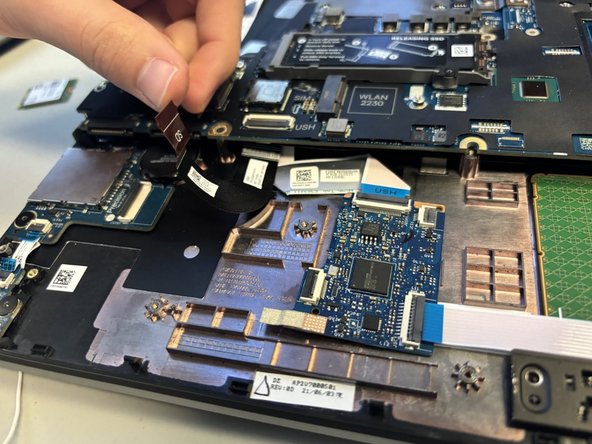
    • Flip up the metal edge holding down the SD connection.

    • Gently pull to disconnect the metal connecting wire.

  8. Dell Precision 7560 Touchpad Replacement: 手順 8、 3の画像 1 Dell Precision 7560 Touchpad Replacement: 手順 8、 3の画像 2 Dell Precision 7560 Touchpad Replacement: 手順 8、 3の画像 3
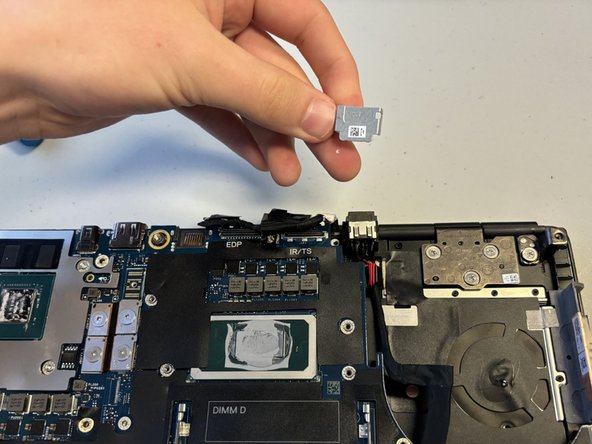
    • Remove the 5 mm screw holding the metal cap over the wire connection using a Phillips #0 screwdriver.

    • Remove the metal cap.

    • Disconnect the wire bundle.

  9. Dell Precision 7560 Touchpad Replacement: 手順 9、 3の画像 1 Dell Precision 7560 Touchpad Replacement: 手順 9、 3の画像 2 Dell Precision 7560 Touchpad Replacement: 手順 9、 3の画像 3
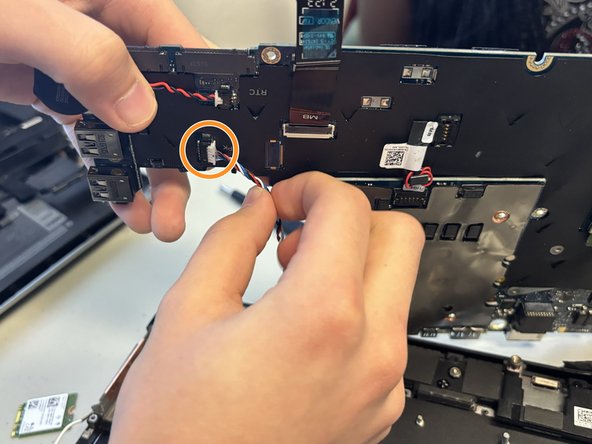
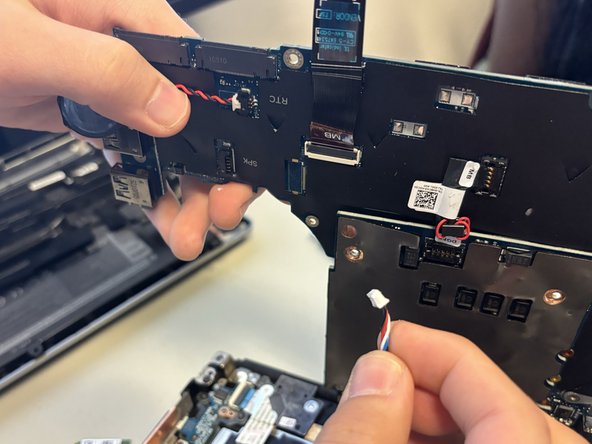
    • Using a Phillips #0 screwdriver, remove the eight 2 mm screws holding the motherboard.

    • Carefully remove the speaker wire from the motherboard.

  10. Dell Precision 7560 Touchpad Replacement: 手順 10、 2の画像 1 Dell Precision 7560 Touchpad Replacement: 手順 10、 2の画像 2
    • Using both hands, carefully lift and remove the speaker.

  11. Dell Precision 7560 Touchpad Replacement, Touchpad: 手順 11、 2の画像 1 Dell Precision 7560 Touchpad Replacement, Touchpad: 手順 11、 2の画像 2
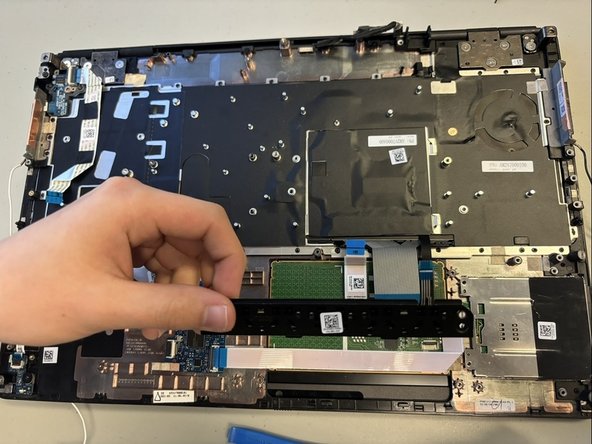
    • Gently remove and disconnect the connecting strip from the touchpad.

    • Remove the two 2 mm screws using a Phillips #0 screwdriver.

    • Remove the black tab from the bottom of the touchpad.

  12. Dell Precision 7560 Touchpad Replacement: 手順 12、 3の画像 1 Dell Precision 7560 Touchpad Replacement: 手順 12、 3の画像 2 Dell Precision 7560 Touchpad Replacement: 手順 12、 3の画像 3
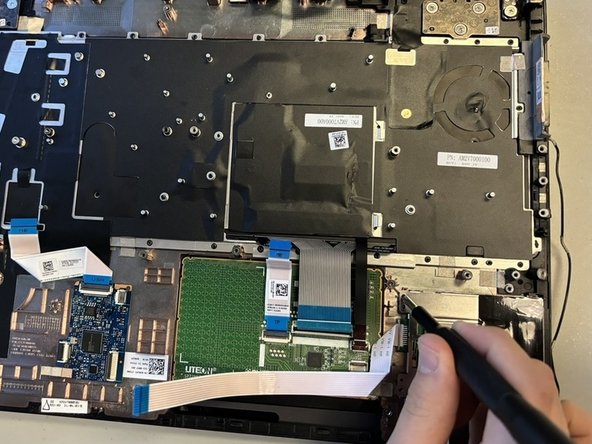
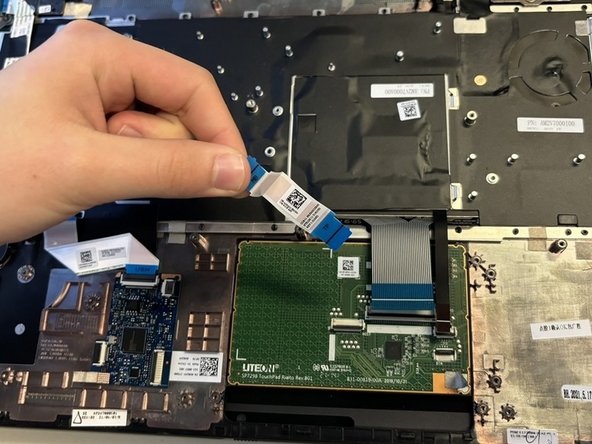
    • Lift up the white connecting strip with your finger.

    • Using a Phillips #0 screwdriver, remove the two 2 mm screws.

    • Remove the metal bracket.

  13. Dell Precision 7560 Touchpad Replacement: 手順 13、 2の画像 1 Dell Precision 7560 Touchpad Replacement: 手順 13、 2の画像 2
    • Detach the blue and white connecting tab using an opening tool.

  14. Dell Precision 7560 Touchpad Replacement: 手順 14、 3の画像 1 Dell Precision 7560 Touchpad Replacement: 手順 14、 3の画像 2 Dell Precision 7560 Touchpad Replacement: 手順 14、 3の画像 3
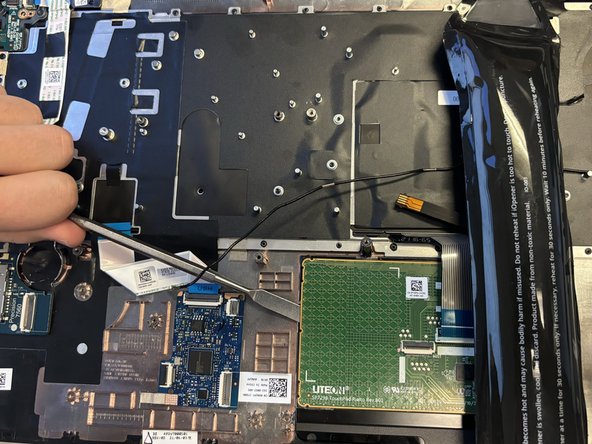
    • Warm all sides of the touch pad using an iOpener to loosen the glue.

    • Lift the warmed up sides with a metal spudger.

  15. Dell Precision 7560 Touchpad Replacement: 手順 15、 2の画像 1 Dell Precision 7560 Touchpad Replacement: 手順 15、 2の画像 2
    • Use your fingers to take out the touchpad.

終わりに

To reassemble your device, follow these instructions in reverse order.

ある他の人がこのガイドを完成しました。

作成者

3人の作成者と共同で作成されました。

Ruby Nsah

メンバー登録日: 02/13/24

121 ポイント

1ガイドが承認済み

チーム

University of North Texas, Team 5-4, Coppersmith Spring 2024 University of North Texas, Team 5-4, Coppersmith Spring 2024人のメンバー

UNT-COPPERSMITH-S24S5G4

4 メンバー

4のガイドは作成済み

0 件のコメント

コメントを追加

統計データ:

過去 24時間: 2

過去 7 日: 3

過去 30 日: 8

今までの合計 47