メインコンテンツにスキップ

Dell Inspiron 1750 Internal Fan Replacement

必要な工具と部品

  1. Dell Inspiron 1750 Internal Fan Replacement, Battery: 手順 1、 2の画像 1 Dell Inspiron 1750 Internal Fan Replacement, Battery: 手順 1、 2の画像 2
    • Unplug the laptop before changing the battery to avoid electric shock.

    • Place the laptop on a flat stable surface.

    • Flip the laptop over so the underside is visible.

  2. Dell Inspiron 1750 Internal Fan Replacement: 手順 2、 2の画像 1 Dell Inspiron 1750 Internal Fan Replacement: 手順 2、 2の画像 2
    • Locate the battery lock switch.

    • Slide the lock switch to the left (away from the lock symbol).

    • Slide the battery out away from the laptop.

  3. Dell Inspiron 1750 Internal Fan Replacement, Dell Inspiron 1750 Teardown: 手順 3、 1の画像 1
    • Separate the screws by size and head type. Be sure to keep them in a safe place.

    • Remove the sixteen 2mm Phillips #00 screws from the bottom of the laptop.

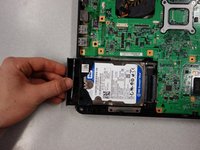
    • Remove the two 2mm Phillips #0 screws from the hard drive port.

  4. Dell Inspiron 1750 Internal Fan Replacement: 手順 4、 3の画像 1 Dell Inspiron 1750 Internal Fan Replacement: 手順 4、 3の画像 2 Dell Inspiron 1750 Internal Fan Replacement: 手順 4、 3の画像 3
    • Keep your hand pressed firmly on the back panel to prevent it from falling.

    • Flip the laptop over horizontally and open up the lid.

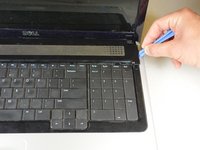
    • Insert the tip of the plastic opening tool into the upper left corner of the panel.

    • Keeping its tip under the top panel, slide the plastic opening tool around the panel until the panel is completely loose. Next gently remove the panel.

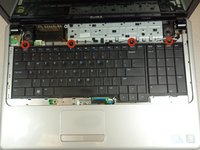
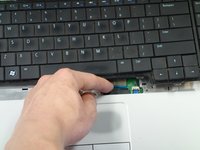
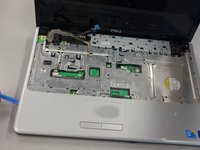
    • Remove the four 2mm Phillips #0 screws at the top of the keyboard.

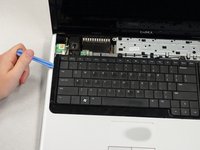
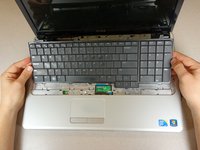
    • Slide the plastic opening tool around the keyboard until the keyboard is completely loose. Gently remove the keyboard.

  5. Dell Inspiron 1750 Internal Fan Replacement: 手順 5、 3の画像 1 Dell Inspiron 1750 Internal Fan Replacement: 手順 5、 3の画像 2 Dell Inspiron 1750 Internal Fan Replacement: 手順 5、 3の画像 3
    • Do not lift the keyboard completely free to avoid damaging its connections to the laptop interior.

    • Locate the small black latch attached to blue tape.

    • Lift the small latch with your finger and pull the blue tape from its port.

    • Slide the keyboard away from the mousepad and set it aside.

  6. Dell Inspiron 1750 Internal Fan Replacement: 手順 6、 3の画像 1 Dell Inspiron 1750 Internal Fan Replacement: 手順 6、 3の画像 2 Dell Inspiron 1750 Internal Fan Replacement: 手順 6、 3の画像 3
    • Always pull wires from their plastic ends, not their cables, to avoid wire damage.

    • Locate the three wires in the top left corner of the metal panel.

    • Use the spudger to push the two cables out of their ports.

    • Pull the blue tab directly up to remove middle wire.

  7. Dell Inspiron 1750 Internal Fan Replacement: 手順 7、 2の画像 1 Dell Inspiron 1750 Internal Fan Replacement: 手順 7、 2の画像 2
    • Remove the three 1mm Phillips #00 screws on the metal plate.

    • Lift the black cover and slide the blue tab away from the cover.

  8. Dell Inspiron 1750 Internal Fan Replacement: 手順 8、 3の画像 1 Dell Inspiron 1750 Internal Fan Replacement: 手順 8、 3の画像 2 Dell Inspiron 1750 Internal Fan Replacement: 手順 8、 3の画像 3
    • Always pull wires from their plastic ends, not their cables, to avoid wire damage.

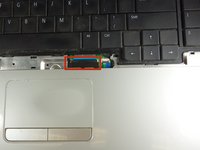
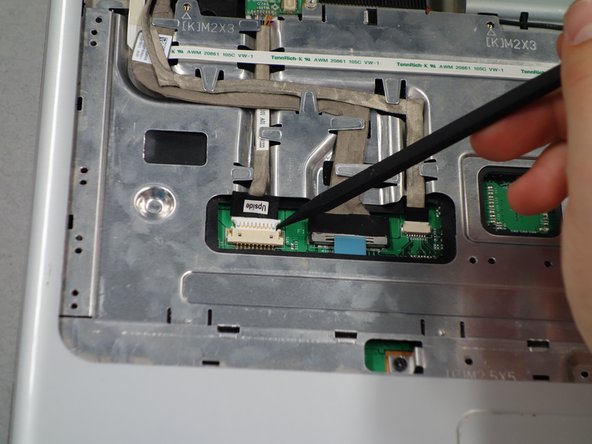
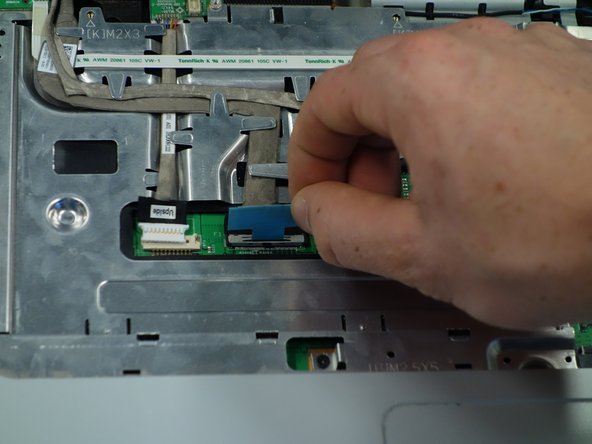
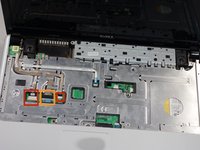
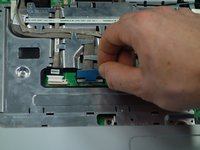
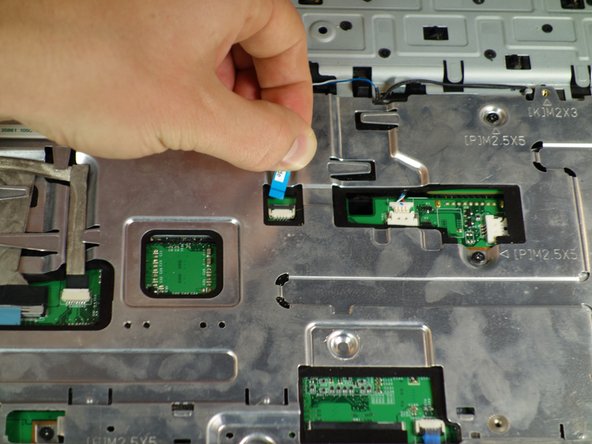
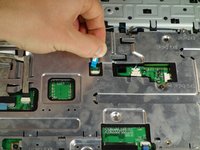
    • Gently remove the three grey wires from the metal tabs.

    • Insert the tip of the plastic opening tool into the bottom left corner of the panel.

    • Keeping its tip under the top panel, slide the plastic opening tool around the panel until the panel is completely loose.

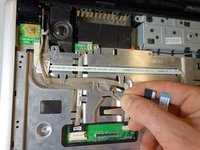
    • Gently lift off the top metal panel.

  9. Dell Inspiron 1750 Internal Fan Replacement, Internal Fan: 手順 9、 1の画像 1
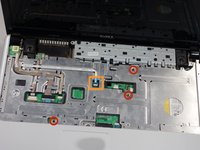
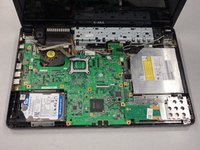
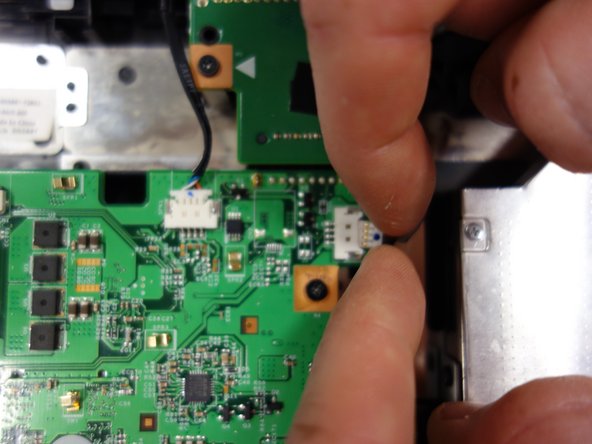
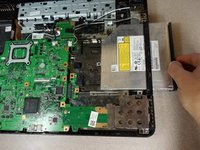
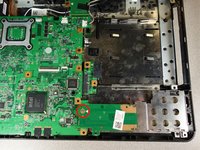
    • Remove the seven 2mm Phillips #0 screws.

    • Remove the two 2mm Phillips #00 screws.

  10. Dell Inspiron 1750 Internal Fan Replacement: 手順 10、 3の画像 1 Dell Inspiron 1750 Internal Fan Replacement: 手順 10、 3の画像 2 Dell Inspiron 1750 Internal Fan Replacement: 手順 10、 3の画像 3
    • Pull the three connections away from their ports using both fingers.

    • Remove the battery connection chip from the motherboard.

  11. Dell Inspiron 1750 Internal Fan Replacement: 手順 11、 2の画像 1 Dell Inspiron 1750 Internal Fan Replacement: 手順 11、 2の画像 2
    • Slide the hard drive out away from the laptop until it is free from the motherboard

    • Repeat this process for the disk drive.

    • You may leave these components in their trays.

  12. Dell Inspiron 1750 Internal Fan Replacement: 手順 12、 2の画像 1 Dell Inspiron 1750 Internal Fan Replacement: 手順 12、 2の画像 2
    • Remove the silver 2mm Phillips #00 screw.

    • Remove the card tray from the laptop by lifting it up and away the computer.

  13. Dell Inspiron 1750 Internal Fan Replacement: 手順 13、 3の画像 1 Dell Inspiron 1750 Internal Fan Replacement: 手順 13、 3の画像 2 Dell Inspiron 1750 Internal Fan Replacement: 手順 13、 3の画像 3
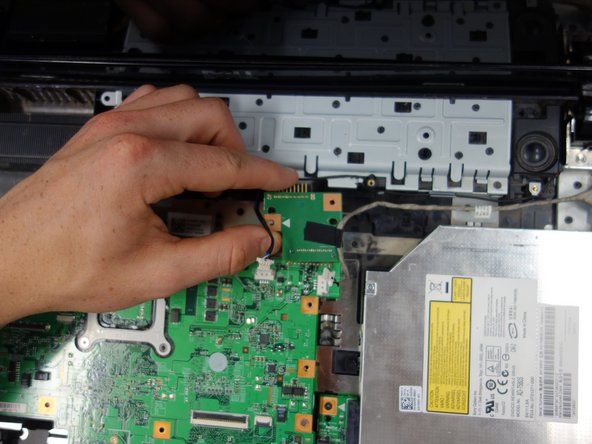
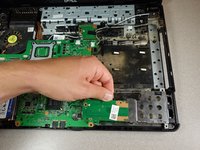
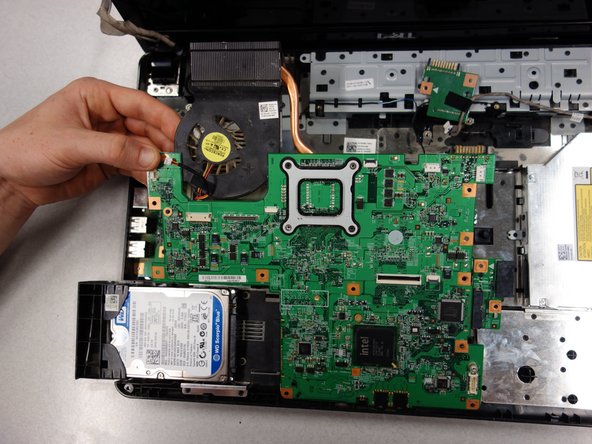
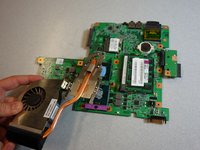
    • Lift the motherboard by its top end and remove it from the laptop.

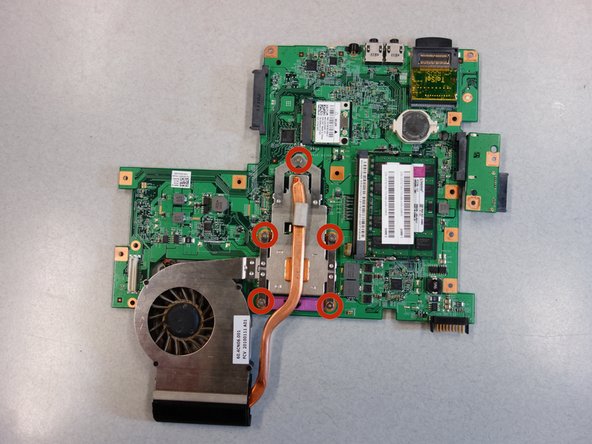
    • Flip the motherboard over to reveal the fan.

    • The screws in the next step are captive screws and will not come completely free, so do not try to remove from the fan.

    • Remove the five 1mm Phillips #00 captive screws from the internal fan.

    • Lift the fan away from the motherboard.

    • Refer to iFixit's guide for removal and cleaning of the thermal paste. 放熱グリスの塗布方法

終わりに

To reassemble your device, follow these instructions in reverse order.

7 の人々がこのガイドを完成させました。

作成者

4人の作成者と共同で作成されました。

Tina Rickard

メンバー登録日: 04/07/14

759 ポイント

5のガイドは作成済み

チーム

Cal Poly, Team 6-3, Forte Spring 2014 Cal Poly, Team 6-3, Forte Spring 2014人のメンバー

CPSU-FORTE-S14S6G3

5 メンバー

7のガイドは作成済み

3 件のコメント

the board for the battery shows a screw on the left hand side after you remove the plate, however when you go to replace if you put this screw in 1st then the plate will not lay flat, so be careful u might be unplugging all those little wires Again!

hobert - 返信

the board for the battery shows a screw on the left hand side after you remove the plate, however when you go to replace if you put this screw in 1st then the plate will not lay flat(may also be wrong head type), so be careful u might be unplugging all those little wires Again!

hobert - 返信

I have one of these. Thank you for the explanation but what a godawfully messy laptop design. Taking apart the complete laptop to replace something basic as a FAN???

My next laptop will not be a Dell...

Cheers,

Rob.

Rob Baartwijk - 返信

コメントを追加

統計データ:

過去 24時間: 0

過去 7 日: 1

過去 30 日: 4

今までの合計 4,275