メインコンテンツにスキップ

Dell Inspiron 13 7378 Heat Sink Replacement

必要な工具と部品

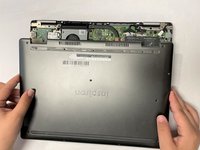
  1. Dell Inspiron 13 7378 Heat Sink Replacement, Back Cover: 手順 1、 1の画像 1
    • Set the laptop with its underside facing up for improved accessibility.

  2. Dell Inspiron 13 7378 Heat Sink Replacement: 手順 2、 2の画像 1 Dell Inspiron 13 7378 Heat Sink Replacement: 手順 2、 2の画像 2
    • Using a Phillips #00 screwdriver, extract the nine 3 mm screws located on the back of the laptop.

  3. Dell Inspiron 13 7378 Heat Sink Replacement: 手順 3、 3の画像 1 Dell Inspiron 13 7378 Heat Sink Replacement: 手順 3、 3の画像 2 Dell Inspiron 13 7378 Heat Sink Replacement: 手順 3、 3の画像 3
    • Carefully pry open the back of the back of the laptop using opening picks.

    • Carefully raise and detach the back cover from the laptop.

    • Exercise caution to prevent damaging or cracking the device's back cover.

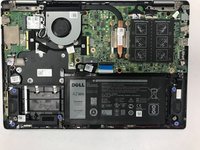
  4. Dell Inspiron 13 7378 Heat Sink Replacement, Heat Sink: 手順 4、 1の画像 1
    • Carefully remove the four screws securing the heat sink by using a Phillips screwdriver.

  5. Dell Inspiron 13 7378 Heat Sink Replacement: 手順 5、 2の画像 1 Dell Inspiron 13 7378 Heat Sink Replacement: 手順 5、 2の画像 2
    • Check to see if the fan will obstruct the removal process and if so, remove the fan first before removing the heat sink to prevent any damage.

    • In the absence of any obstacles impeding the removal process, gently lift and extract the heat sink from its position.

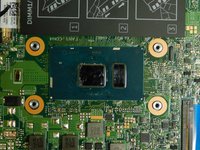
  6. Dell Inspiron 13 7378 Heat Sink Replacement: 手順 6、 1の画像 1
    • Before you install a new compatible cooling system, place a fresh coat of thermal paste in the center of where the previous cooling system used to be.

終わりに

Replace the back cover to complete the process.

3 の人々がこのガイドを完成させました。

作成者

6人の作成者と共同で作成されました。

Javier Perez

メンバー登録日: 02/08/22

277 ポイント

2のガイドは作成済み

チーム

Gateway, Team 1-3, Saknee Spring 2022 Gateway, Team 1-3, Saknee Spring 2022人のメンバー

GCC-SAKNEE-S22S1G3

5 メンバー

16のガイドは作成済み

0 件のコメント

コメントを追加

統計データ:

過去 24時間: 0

過去 7 日: 7

過去 30 日: 14

今までの合計 285