はじめに
Upgrading the RAM (Random Access Memory) in your Dell G15 5530 can significantly boost its performance, especially if you’re a gamer, content creator, or multitasker who needs to run demanding applications. The Dell G15 5530 is a versatile laptop that comes with a standard RAM configuration of 8GB or 16GB, but if you’ve noticed your computer slowing down when using resource-intensive programs, upgrading to 16GB or 32GB (depending on your device) can drastically improve speed and responsiveness.
This fix is necessary for users who want to extend the life of their device and improve overall system performance.
This guide provides a step-by-step process for replacing or upgrading the RAM in a Dell G15 5530. The fix involves:
- Safely shutting down the computer and removing power sources.
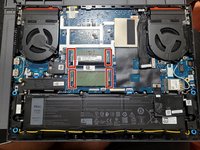
- Opening the bottom panel of the laptop.
- Disconnect the battery from the motherboard.
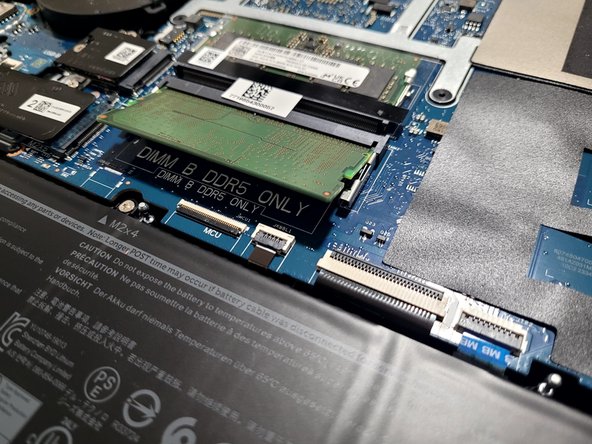
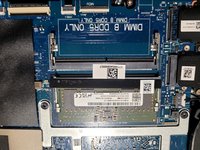
- Locating and replacing the existing RAM module.
- Reassembling the laptop and testing the new RAM.
The guide is ideal for users looking to enhance their laptop’s performance by upgrading the RAM for better multitasking and gaming.
必要な工具と部品


To reassemble your device, follow these instructions in reverse order. Take your e-waste to an R2 or e-Stewards certified recycler.
To reassemble your device, follow these instructions in reverse order. Take your e-waste to an R2 or e-Stewards certified recycler.
ある他の人がこのガイドを完成しました。

チーム

Austin Community College, Team 28-3, Watkins Fall 2024 Austin Community College, Team 28-3, Watkins Fall 2024人のメンバー
AUSTINCC-WATKINS-F24S28G3
1 メンバー
1のガイドは作成済み