メインコンテンツにスキップ

DeWalt DC970 Motor Replacement

必要な工具と部品

  1. DeWalt DC970 Motor Replacement, Battery: 手順 1、 1の画像 1
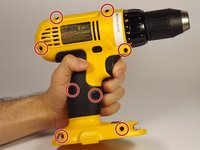
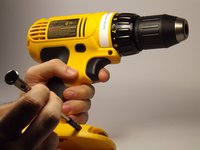
    • Compress the buttons on either side of the battery and lift the drill away from battery.

  2. DeWalt DC970 Motor Replacement: 手順 2、 1の画像 1
    • Remove battery from drill.

  3. DeWalt DC970 Motor Replacement, Drill Assembly: 手順 3、 2の画像 1 DeWalt DC970 Motor Replacement, Drill Assembly: 手順 3、 2の画像 2
    • Remove the eight 16 mm, Torx Security #15 screws.

  4. DeWalt DC970 Motor Replacement: 手順 4、 1の画像 1
    • Lay the drill on its side and gently lift the top half off it.

  5. DeWalt DC970 Motor Replacement, Motor: 手順 5、 1の画像 1
    • Lift drill mechanism out of the shell.

    • Desolder the red and black wires from the motor.

    • Learn more about soldering here.

  6. DeWalt DC970 Motor Replacement: 手順 6、 1の画像 1
    • Slightly twist and pull motor away from the clutch.

  7. DeWalt DC970 Motor Replacement: 手順 7、 1の画像 1
    • When installing the replacement motor into the clutch make sure you correctly align the gears in order to assure that the motor is properly fitted to the clutch.

終わりに

To reassemble your device, follow these instructions in reverse order.

2 の人々がこのガイドを完成させました。

作成者

2人の作成者と共同で作成されました。

Jonathan Hamel

メンバー登録日: 03/10/16

633 ポイント

4のガイドは作成済み

チーム

UMass Dartmouth, Team 4-2, Catania Spring 2016 UMass Dartmouth, Team 4-2, Catania Spring 2016人のメンバー

UMASSD-CATANIA-S16S4G2

3 メンバー

13のガイドは作成済み

3 件のコメント

Unplug the wires from the trigger switch....don't unsolder.

New motor comes with wires.

allen.anderson1 - 返信

Thanks for the heads up on the wires

Daniel Randall - 返信

Is there a fix to replace brushes?

pmac086 - 返信

コメントを追加

統計データ:

過去 24時間: 1

過去 7 日: 5

過去 30 日: 32

今までの合計 6,506