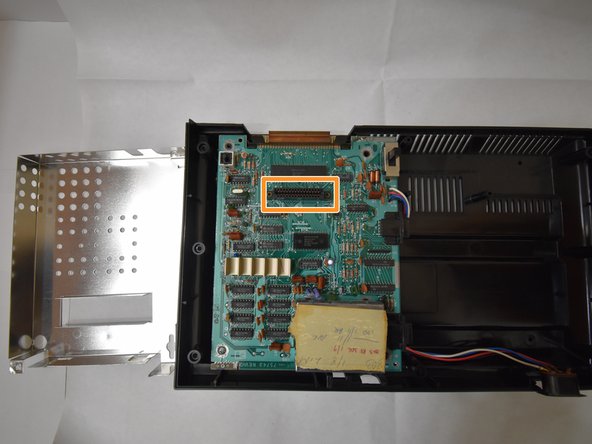
メインコンテンツにスキップ

ColecoVision Cartridge Reader Replacement

必要な工具と部品

  1. ColecoVision Cartridge Reader Replacement, Cartridge Reader: 手順 1、 1の画像 1
    • Flip the console upside down and remove the eight 15mm Phillips #1 screws.

  2. ColecoVision Cartridge Reader Replacement: 手順 2、 2の画像 1 ColecoVision Cartridge Reader Replacement: 手順 2、 2の画像 2
    • Use the metal spudger along the bottom rim of the front panel to safely remove the top of the console. Set aside the top.

  3. ColecoVision Cartridge Reader Replacement: 手順 3、 2の画像 1 ColecoVision Cartridge Reader Replacement: 手順 3、 2の画像 2
    • Remove the two 15mm Phillips #1 screws holding the casing in place.

    • Remove the casing to reveal the cartridge reader.

  4. ColecoVision Cartridge Reader Replacement: 手順 4、 3の画像 1 ColecoVision Cartridge Reader Replacement: 手順 4、 3の画像 2 ColecoVision Cartridge Reader Replacement: 手順 4、 3の画像 3
    この手順で使用する道具:
    Desoldering Pump
    $3.99
    購入する
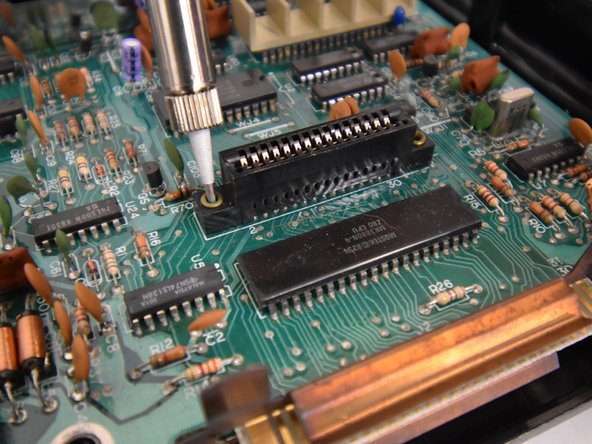
    • Desolder the sides of the cartridge reader using the soldering iron and desolder pump.

    • Refer to this soldering technique guide for reference

    • Patiently wait for the cartridge reader to cool down after being desoldered.

    • It's very important to remove all the tin from the motherboard and cartridge reader before lifting it from the motherboard. Failure to do so could damage the motherboard.

    • Carefully lift up the cartridge reader. A plastic spudger might be helpful in order to easily remove the cartridge reader.

終わりに

To reassemble your device, follow these instructions in reverse order.

作成者

3人の作成者と共同で作成されました。

Anastazia Kidder

メンバー登録日: 10/17/18

109 ポイント

1ガイドが承認済み

チーム

UW Tacoma, Team S1-G2, Rose Fall 2018 UW Tacoma, Team S1-G2, Rose Fall 2018人のメンバー

UWT-ROSE-F18S1G2

4 メンバー

12のガイドは作成済み

0 件のコメント

コメントを追加

統計データ:

過去 24時間: 1

過去 7 日: 6

過去 30 日: 19

今までの合計 1,521