メインコンテンツにスキップ

このバージョンは誤った内容を含んでいる可能性があります。最新の承認済みスナップショットに切り替えてください。

必要な工具と部品

  1. この手順は未翻訳です。 翻訳を手伝う。

    : 手順 1、 3の画像 1 : 手順 1、 3の画像 2 : 手順 1、 3の画像 3
    • Before you begin, switch the ignition off and remove the key.

    • Make sure the transmission is in Park (or first gear if you have a manual gearbox) and that the parking brake is engaged.

    • Put on work gloves and safety goggles if you have them available.

    • In addition to being dirty, the battery contains corrosive agents and may release flammable gases.

    • Gloves can also help protect you from an unpleasant shock if you accidentally mishandle the battery.

  2. この手順は未翻訳です。 翻訳を手伝う。

    : 手順 2、 3の画像 1 : 手順 2、 3の画像 2 : 手順 2、 3の画像 3
    • Most motor vehicle batteries are located in the engine bay, under the hood (a.k.a. bonnet). If your battery is located elsewhere, skip to Step 5.

    • If you're not sure, simply continue reading.

    • Pull the hood release lever. It's usually located inside the car, near the steering wheel.

  3. この手順は未翻訳です。 翻訳を手伝う。

    : 手順 3、 3の画像 1 : 手順 3、 3の画像 2 : 手順 3、 3の画像 3
    • Raise the hood by simultaneously lifting and pressing up on the hood latch release (usually located beneath the front edge of the hood, near the center or center-right).

  4. この手順は未翻訳です。 翻訳を手伝う。

    : 手順 4、 3の画像 1 : 手順 4、 3の画像 2 : 手順 4、 3の画像 3
    • At this point, depending on the vehicle, your hood may raise and support itself automatically.

    • If not, use one hand to hold the hood open temporarily while securing the hood with the prop rod:

    • Lift one end of the prop rod up or out to release it from the front area of the engine bay.

    • Swing the end of the prop rod up and slide it into the cutout on the underside of the hood.

    • Make sure the hood is well secured before you let go with your other hand, or it may fall and injure you.

  5. この手順は未翻訳です。 翻訳を手伝う。

    : 手順 5、 3の画像 1 : 手順 5、 3の画像 2 : 手順 5、 3の画像 3
    • Locate the battery. It's normally rectangular and roughly 8-14" across.

    • The battery may be easy to spot, or it may lie under a plastic cover—usually marked with positive (+) and/or negative (-) symbols.

    • On some models, the battery may be located in the trunk—usually under or behind the trunk lining. Look around or consult your owner's manual.

  6. この手順は未翻訳です。 翻訳を手伝う。

    : 手順 6、 3の画像 1 : 手順 6、 3の画像 2 : 手順 6、 3の画像 3
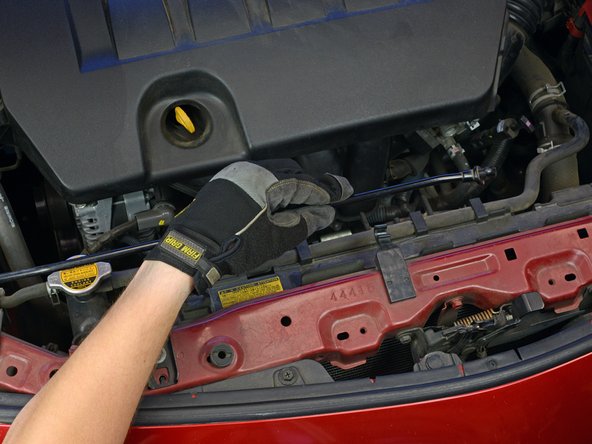
    • Using a correctly sized wrench or socket, loosen the nut/bolt securing the cable on the negative battery terminal.

    • Always disconnect the negative cable first (before removing the positive cable).

    • The negative terminal may be marked with a minus (-) symbol, or it may be unmarked. The positive terminal is almost always marked with a plus (+) symbol, often in red.

    • If the nut or bolt spins without loosening, it may be necessary to counter-hold the opposite side with a second wrench or socket.

  7. この手順は未翻訳です。 翻訳を手伝う。

    : 手順 7、 2の画像 1 : 手順 7、 2の画像 2
    • Remove the cable from the negative battery terminal.

    • When connecting the battery, it is advised to roughen up the battery terminals and clean the cable clamp beforehand.

    • Upon reconnecting the battery, make sure to seal the pole connections with an appropriate terminal grease or terminal spray.

  8. この手順は未翻訳です。 翻訳を手伝う。

    : 手順 8、 2の画像 1 : 手順 8、 2の画像 2
    • Prevent the cable from making accidental contact with the terminal by pushing it aside and/or wrapping the cable clamp with a dry rag.

  9. この手順は未翻訳です。 翻訳を手伝う。

    : 手順 9、 2の画像 1 : 手順 9、 2の画像 2
    • Remove the insulating cover from the positive battery terminal (if one is present).

  10. この手順は未翻訳です。 翻訳を手伝う。

    : 手順 10、 2の画像 1 : 手順 10、 2の画像 2
    • Using a correctly sized wrench or socket, loosen the nut/bolt securing the cable on the positive battery terminal.

    • If the nut or bolt spins without loosening, it may be necessary to counter-hold the opposite side with a second wrench or socket.

  11. この手順は未翻訳です。 翻訳を手伝う。

    : 手順 11、 2の画像 1 : 手順 11、 2の画像 2
    • Remove the cable from the positive battery terminal.

    • During reassembly, be sure to reconnect and tighten the positive cable clamp first (before the negative cable clamp).

  12. この手順は未翻訳です。 翻訳を手伝う。

    : 手順 12、 1の画像 1
    • Remove any bolts securing the battery.

  13. この手順は未翻訳です。 翻訳を手伝う。

    : 手順 13、 1の画像 1
    • Remove any bars or brackets securing the battery.

  14. この手順は未翻訳です。 翻訳を手伝う。

    : 手順 14、 2の画像 1 : 手順 14、 2の画像 2
    • Remove the battery.

    • A typical car battery can weigh 50 pounds or more, so lift carefully and get help if needed. Do not drop the battery, as this can release dangerous chemicals.

    • If your battery cable clamps look dirty and/or corroded, clean them up with a wire brush and a mixture of water and baking soda before installing your new battery.

    • To prevent corrosion in the future, coat the new battery's terminals with a little dielectric grease or petroleum jelly.

    • Don't throw the old battery in the trash. Many auto parts stores and service stations will accept old batteries for free safe disposal.

ゴール

21 の人々がこのガイドを完成させました。

作成者

4人の作成者と共同で作成されました。

Jeff Suovanen

メンバー登録日: 08/06/13

428,904 ポイント

259のガイドは作成済み

チーム

iFixit iFixit人のメンバー

Staff

136 メンバー

17,392のガイドは作成済み

3 件のコメント

You should not just tell people to follow the directions in reverse order for reassembly. There are some steps most mechanics will want you to perform (e.g. applying a compound to the terminals to prevent corrosion) in addition to simply reattaching the cables.

shamino - 返信

As with most guides on iFixit, reassembly tips are included on the applicable step where appropriate.

Jeff Suovanen -

good for car batery replacement

CanadaVisitorVisa - 返信

コメントを追加

統計データ:

過去 24時間: 2

過去 7 日: 43

過去 30 日: 273

今までの合計 11,827