はじめに
警告:このデバイスは、ハードワイヤーでバッテリーマザーボードに接続されています。バッテリーを交換するには、技術者マニュアルと「Polycom」と呼ばれる専用ソフトウェアにアクセスする必要があります。このソフトウェアがない場合は、交換を試みないでください。手順 5 の画像を参照してください。
スピーカーは作動しますか? Bose SoundLink Mini II のバッテリーを交換/解体する手順です。
注意;バッテリーの取り外しと再装着には、ハンダごてを使用し、慎重に分解する必要があります。また、「Polycomm」と呼ばれる特定の種類の専用ソフトウェアをダウンロードし、ボーズの技術者が会社から提供された修理の説明書に従う必要があります。説明書はおろか、このようなソフトウェアを調達するのは極めて困難です。
必要な工具と部品
-
-
-
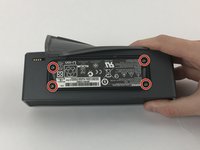
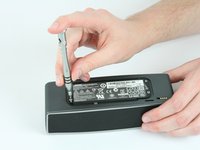
4つのゴールドのコンタクトピン付近の側面からバッテリーを慎重に持ち上げます。まだ完全に取り出さないでください。
-
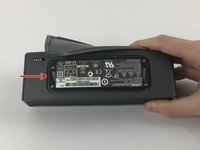
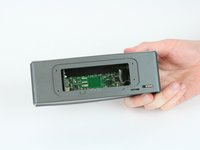
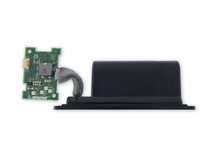
バッテリーを完全に外すには、電源ボードから4本のワイヤの半田を除去してください。ケースやボードにダメージを与えずに、半田ごて自由に動かせるスペースがありません。先にボードを取り外した方が良いでしょう。
-
はんだ付けとはんだ除去の作業ガイドを参照してください。
-


このインストラクションを見て、逆の順で組み立てて下さい。
44 の人々がこのガイドを完成させました。
以下の翻訳者の皆さんにお礼を申し上げます:
100%


これらの翻訳者の方々は世界を修理する私たちのサポートをしてくれています。 あなたも貢献してみませんか?
翻訳を始める ›

チーム

USF Tampa, Team 5-2, Passmore Spring 2017 USF Tampa, Team 5-2, Passmore Spring 2017人のメンバー
USFT-PASSMORE-S17S5G2
4 メンバー
19のガイドは作成済み
49件のガイドコメント
3 Contributors and none of them know how to remove the battery, brilliant... Honestly if you want to do this right, do it right from the begining. The battery is connected with a cable to the device, please explain how did you remove it properly.
Hey Timo,
no, there are just two different battery versions of the Soundlink Mini 2: One without a cable from the battery to the PCB (as shown in this tutorial, i think this is the older version of the Soundlink Mini2) and one with a cable...
I have one here with a cable and I?m desperate to find a new battery for it but can`t find it anywhere on the net... I`m thinking of trying a battery without the cables and try to connect four cables to the battery and then solder them to the PCB...
But how do I disconnect the battery having a cable?! - That’s actually the hard part.
You will have to take out the mesh on front and back. Then take out screws on speakerssside. The smalle print can be taken out then and you have to solder the battery. Just done this, and not a easy job.
Onno -
If you have the Soundlink Mini 2, you can send the battery to Bose and they will rebuild it for $75. It is not user replaceable, although if you are electronics savvy you can remove it.
Problem is there are no replacements out there, and these batteries have a control board soldered to the battery with a ribbon cable. This will require soldering and unsoldering if there was a battery replacement for it. This also requires taking the entire Soundlink Mini 2 speaker apart to remove the board and battery.
If you send the battery to Bose expect a 3 to 6 week turn around for a return, which includes about 10 business days of shipping both ways as its a Lithium battery and can only travel ground. Plus the $75 for the repair as mentioned earlier.
They really did a wonderful job in limiting your options on this item.
Bose Hold this L for us as in Losers!