メインコンテンツにスキップ

Blu Dash 5.0 Dual SIM Charging Port Replacement

必要な工具と部品

  1. Blu Dash 5.0 Dual SIM Charging Port Replacement, Battery: 手順 1、 1の画像 1
    • Find the small slot on the bottom left corner of the back panel.

    • Slide the spudger into the small slot and lightly twist it. This will cause the corner of the back panel to pop up.

    • When the back panel is loose enough, use your fingers to remove it completely.

  2. Blu Dash 5.0 Dual SIM Charging Port Replacement: 手順 2、 1の画像 1
    • With the back panel off, you should see a large white rectangle. This is the battery. Slide the spudger under the indent on the bottom right of the battery and pull it up.

  3. Blu Dash 5.0 Dual SIM Charging Port Replacement, Display Cable: 手順 3、 1の画像 1
    • Using the PH00 Phillips head screwdriver unscrew the screws holding the panel down, making sure to keep track of the position of the screws.

    • The screw holes with the red circle around them hold screws with a 3.5 mm length.

    • The screw holes with the orange circle around them hold screws with a 2.5 mm length.

  4. Blu Dash 5.0 Dual SIM Charging Port Replacement: 手順 4、 2の画像 1 Blu Dash 5.0 Dual SIM Charging Port Replacement: 手順 4、 2の画像 2
    • Insert the plastic opening tool into a corner of the plastic panel and gently pry it away from the rest of the phone.

    • Do this for each corner until the panel pops up.

  5. Blu Dash 5.0 Dual SIM Charging Port Replacement: 手順 5、 3の画像 1 Blu Dash 5.0 Dual SIM Charging Port Replacement: 手順 5、 3の画像 2 Blu Dash 5.0 Dual SIM Charging Port Replacement: 手順 5、 3の画像 3
    • Along the right side of the phone you will see a long black wire with 2 gold end pieces on the end. This is the display cable.

    • To disconnect the gold end pieces from the motherboard, take the tweezers and gently but firmly pull upwards. Do this for both ends and the wire will disconnect.

  6. Blu Dash 5.0 Dual SIM Charging Port Replacement, Motherboard: 手順 6、 3の画像 1 Blu Dash 5.0 Dual SIM Charging Port Replacement, Motherboard: 手順 6、 3の画像 2 Blu Dash 5.0 Dual SIM Charging Port Replacement, Motherboard: 手順 6、 3の画像 3
    • Using the tweezers, lift the tabs where the cables are connected, this unlocks the cables. The cables will slide out of sockets easily when they are unlocked. Pull from wire using tweezers as pictured.

    • The red rectangles represent where the cable's are located.

    • The orange rectangles are where the cables pug into the ports. This is where you want to apply the tweezers.

    • There are two black tabs and one blue tab.

  7. Blu Dash 5.0 Dual SIM Charging Port Replacement, Charging Port: 手順 7、 1の画像 1
    • Solder the pins on the back of the charging port. Here's a guide to soldering: How to solder

    • Soldering iron can be very hot!

  8. Blu Dash 5.0 Dual SIM Charging Port Replacement: 手順 8、 2の画像 1 Blu Dash 5.0 Dual SIM Charging Port Replacement: 手順 8、 2の画像 2
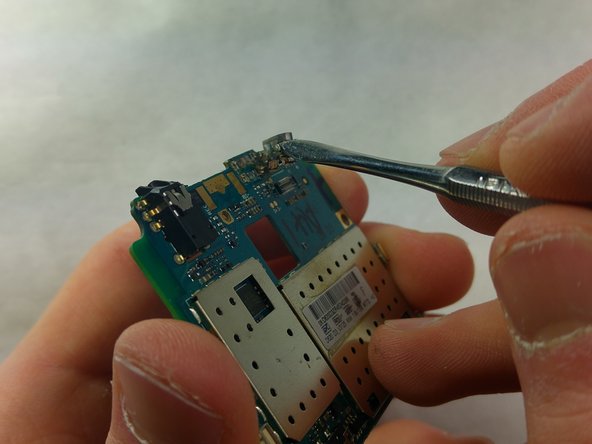
    • Pry charging port away from the board using the metal spudger.

    • It's easier to pry with the metal spudger inserted in the charging port.

終わりに

To reassemble your device, follow these instructions in reverse order.

ある他の人がこのガイドを完成しました。

作成者

2人の作成者と共同で作成されました。

Jack Manley

メンバー登録日: 01/30/17

114 ポイント

1ガイドが承認済み

チーム

IUPUI, Team 1-1, Baechle Spring 2017 IUPUI, Team 1-1, Baechle Spring 2017人のメンバー

IUPUI-BAECHLE-S17S1G1

4 メンバー

3のガイドは作成済み

0 件のコメント

コメントを追加

統計データ:

過去 24時間: 0

過去 7 日: 0

過去 30 日: 0

今までの合計 507