このバージョンは誤った内容を含んでいる可能性があります。最新の承認済みスナップショットに切り替えてください。
必要な工具と部品
-
-
この手順は未翻訳です。 翻訳を手伝う。
-
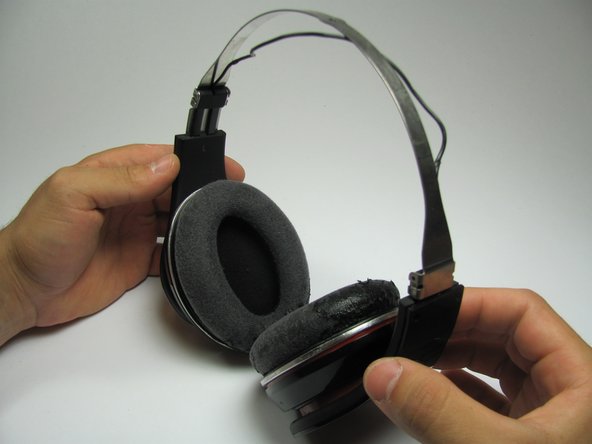
Using the plastic opening tool, gently pry the headband cushion directly away from the plastic portion of the headband as shown. Pry the plastic portion a small amount and then move the opening tool sideways along on the headband. Repeat on both sides until the cushion separates from the top plastic part of the headband.
-
-
この手順は未翻訳です。 翻訳を手伝う。
-
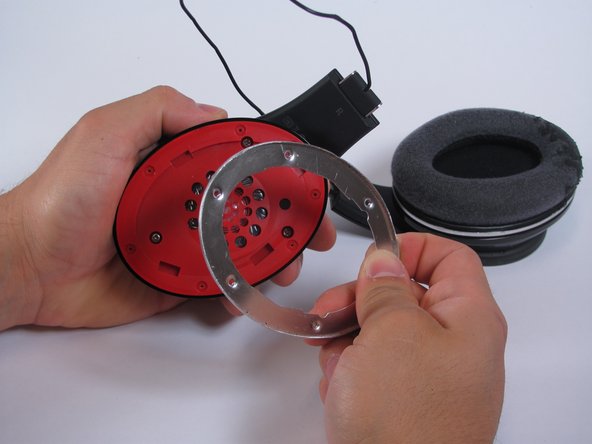
Carefully remove the metal band from each of the hinge housings on each side. These should come off quite easily, provided that you have removed the hinges as instructed in step 3.
-
Congratulations, you have completely removed the headband! This will allow for ease of accessibility to the speakers should you choose to delve further into the depths of your headphones.
-
-
この手順は未翻訳です。 翻訳を手伝う。
-
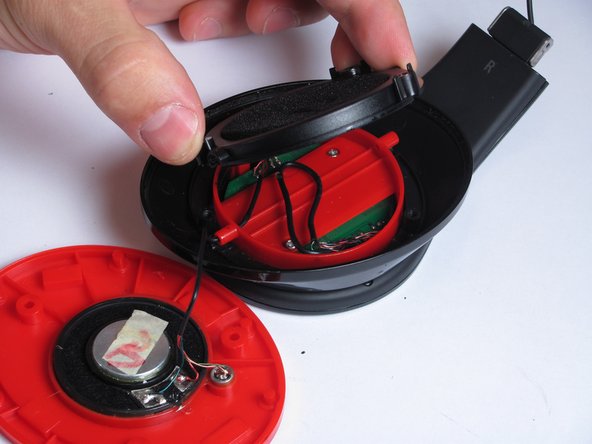
Use a 0 Phillips head screwdriver to remove the 8 mm Phillips screws holding the speaker assembly in place. There should be 3 screws in each earpiece.
-
When all screws have been removed, the speaker assembly can be moved by hand. Remove the speaker carefully since the wires connect to it on the backside.
-


13 の人々がこのガイドを完成させました。
チーム

Cal Poly, Team 9-18, Regan Spring 2014 Cal Poly, Team 9-18, Regan Spring 2014人のメンバー
CPSU-REGAN-S14S9G18
4 メンバー
11のガイドは作成済み
5 件のコメント
where do you find the replacement parts for what they really cost? not what beats by dre is trying to charge?
where can I buy the actual speaker that goes in the headphone
where can I buy the speakers for the Beats Studio headphones
where can I buy the actual speakers for the Beats Studio headphones