はじめに
The microphone on your device picks up your voice and other noises used in calls and videos. If you are having difficulty with your microphone quality and it needs to be replaced, this guide will aid you in replacing it
必要な工具と部品
-
-
Use the SIM Card Eject Tool to remove the SIM card slot from the phone.
-
Using a Phillips 000 screwdriver, remove the 1.5 mm metal screw located inside the SIM card slot gap.
-
-
-
Use the plastic opening tool and run it under the entire seam that separates the screen and the plastic back of the phone.
-
Lodge the plastic opening tool under the back cover and use it to pry the two parts apart slowly.
-
This step will take a decent amount of force and it may seem as though the device will fracture, but you must keep pulling until the back releases.
-
-
-
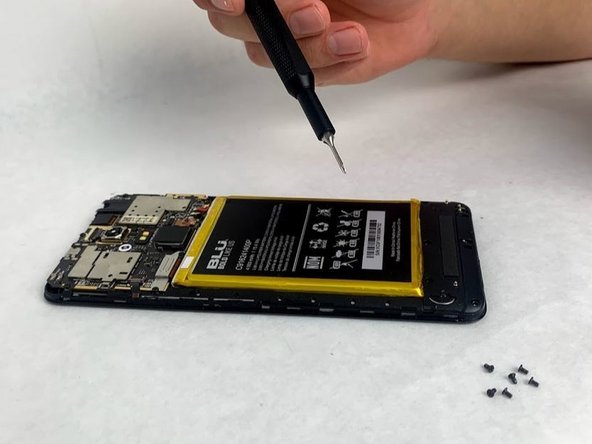
Using a Phillips 000 screwdriver, remove the 14 1.5 mm screws that attach the plastic protection cover to the phone.
-
Removing the screws will cause a silver metal bracket by the top left corner of the battery to fall off. Keep track of it for later.
-
-
-
-
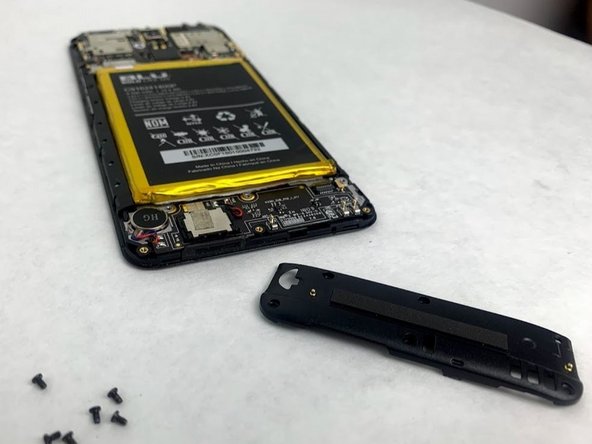
After removing the screws, the bottom plastic cover will need to be removed to expose the rest of the phone’s interior.
-
The plastic cover should come off easily using your fingers, but you may need the spudger or an opening pick to remove it.
-
Remove the cover by its sides to ensure the removal is as easy as possible.
-
-
-
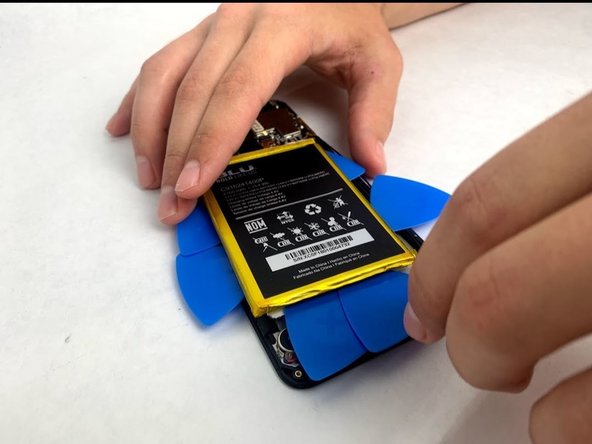
Remove the two blue strips of tape on the lower portion of the battery.
-
After removing the blue strips of tape gently begin wedging the plastic picks underneath the battery and locating the adhesive tape strips.
-
Utilize the picks in a fashion that both pries the battery upward and scrapes the adhesive either loose from the battery or phone body. Be careful not to bend or damage the battery and it should eventually come free from the housing.
-
-
-
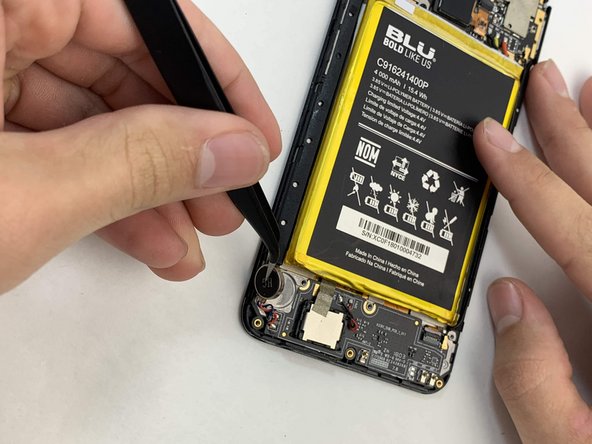
Desolder the three wires (red, yellow, black) that connect the battery to the motherboard in the top right-hand corner. Use the link listed to safely desolder your battery. Video link to desolder.
-
-
-
Using either an opening pick or a pair of needle nosed tweezers, gently pry and lift the microphone away from the sub frame.
-


To reassemble your device, follow these instructions in reverse order.
To reassemble your device, follow these instructions in reverse order.
チーム

Embry-Riddle Aeronautical University, Team S23-G1, McClure Fall 2019 Embry-Riddle Aeronautical University, Team S23-G1, McClure Fall 2019人のメンバー
ERAU-MCCLURE-F19S23G1
4 メンバー
5のガイドは作成済み