はじめに
If your Asus ZenFone 5 has lost its ability to hold a charge, you most likely have a dead battery, which requires replacement.
A functional battery provides power to your cellphone. Eventually, cellphone batteries will rapidly drain after going through a repeated amount of charge cycles. If you notice that your charged battery is draining more quickly than usual, consider calibrating your battery to determine an accurate charging capacity. If you continue to notice significant drops in battery percentage, you should replace your battery.
Make sure to power down your device before you begin. Use ESD safe tools when accessing the battery. ESD safe tools greatly reduce the risk puncturing the battery. A punctured battery can cause a dangerous fire. If your battery is swollen, take appropriate precautions.
必要な工具と部品
-
-
Place the iOpener on the side of the phone until the iOpener gets cool (approximately 10-15 minutes).
-
Reheat the iOpener and reapply it to the other side of the phone.
-
-
-
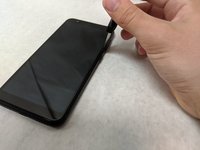
Gently slide the jimmy along the edges of the phone to break the adhesive.
-
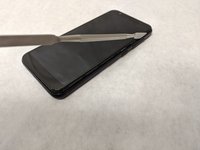
Use opening picks and the opening tool to pry the back cover off.
-
Repeat the heating and prying process until the back cover can be fully removed.
-
-
-
-
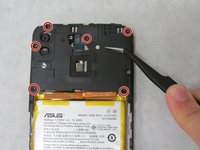
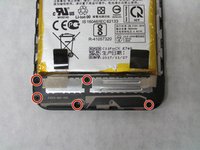
Use the #00 phillips head to take out the six phillips #00 3.175mm screws on the top cover plate.
-
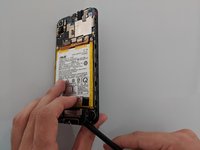
Use the spudger to release the clasps along the edge of the top plate.
-
-
-
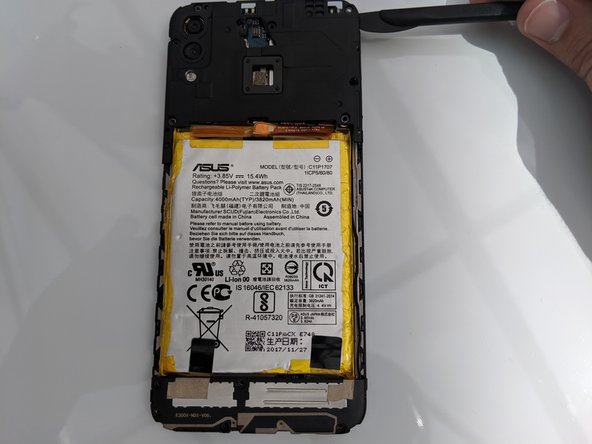
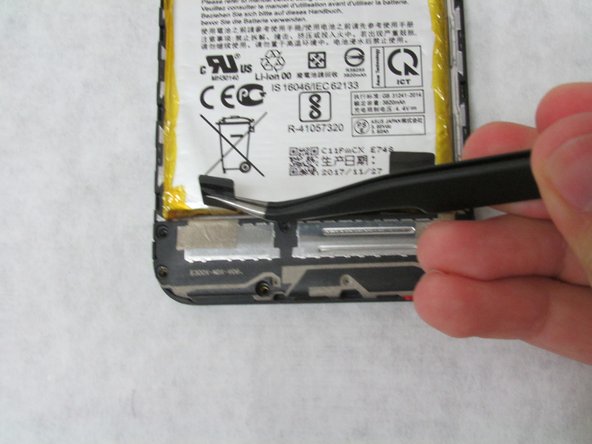
Disconnect the press fit connector located near the upper right corner of the battery to disengage the battery from the motherboard.
-
-
-
Use the same screwdriver to remove the five phillips #00 3.96mm screws along the bottom plate.
-
Use the spudger to pry the bottom plate off.
-
-
-
Pull on the two black tabs on the bottom of the battery until the battery is released.
-
Gently pull the battery out of its socket.
-


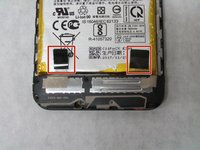

To put the battery back in, replace the orange tab on the top of the battery on its socket.
チーム

Embry-Riddle Aeronautical University, Team S3-G27, Watkins Summer 2019 Embry-Riddle Aeronautical University, Team S3-G27, Watkins Summer 2019人のメンバー
ERAU-WATKINS-SU19S3G27
4 メンバー
16のガイドは作成済み