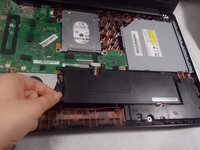
メインコンテンツにスキップ

Asus X553MA-BPD07051 Optical Drive Replacement

必要な工具と部品

  1. Asus X553MA-BPD07051 Optical Drive Replacement, Battery: 手順 1、 2の画像 1 Asus X553MA-BPD07051 Optical Drive Replacement, Battery: 手順 1、 2の画像 2
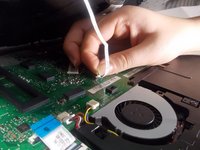
    • Use a Phillips #0 screwdriver (PH0 bit) to remove the four 5.0 mm screws that are securing the bottom of the laptop.

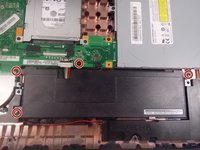
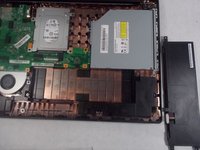
    • Use a Phillips #0 screwdriver (PH0 bit) to remove the six 11.0 mm screws that are securing the bottom of the laptop.

  2. Asus X553MA-BPD07051 Optical Drive Replacement: 手順 2、 1の画像 1
    • Lift the edges of the keyboard using the plastic iFixit opening tool and raise the keyboard slightly to see the inside of the laptop.

    • Do not lift the keyboard too high as the keyboard is connected to the motherboard by two ribbon connectors that must be detached.

  3. Asus X553MA-BPD07051 Optical Drive Replacement: 手順 3、 2の画像 1 Asus X553MA-BPD07051 Optical Drive Replacement: 手順 3、 2の画像 2
    • Lift back the clip on the ribbon tape, and pull the tape out in order to remove the keyboard from the laptop.

    • Remove both pieces of the ribbon tape connecting the keyboard to the motherboard.

  4. Asus X553MA-BPD07051 Optical Drive Replacement: 手順 4、 1の画像 1
    • Remove the bundled cable connector attaching the battery to the motherboard with the plastic iFixit opening tool.

    • Make sure that you do not remove the entire connector by applying too much force. Only the white plastic connector should be removed from the metal part on the motherboard.

  5. Asus X553MA-BPD07051 Optical Drive Replacement: 手順 5、 2の画像 1 Asus X553MA-BPD07051 Optical Drive Replacement: 手順 5、 2の画像 2
    • Use Phillips #0 screwdriver (PH0 bit) to remove the four 6.0 mm screws attaching the battery to the laptop.

  6. Asus X553MA-BPD07051 Optical Drive Replacement: 手順 6、 2の画像 1 Asus X553MA-BPD07051 Optical Drive Replacement: 手順 6、 2の画像 2
    • Lift the battery up and remove it completely from the laptop.

  7. Asus X553MA-BPD07051 Optical Drive Replacement, Optical Drive: 手順 7、 2の画像 1 Asus X553MA-BPD07051 Optical Drive Replacement, Optical Drive: 手順 7、 2の画像 2
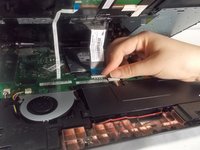
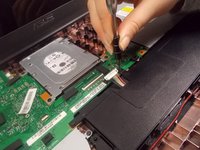
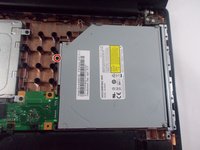
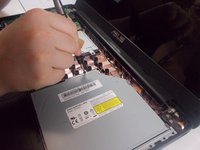
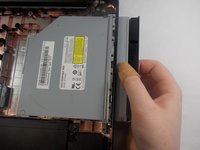
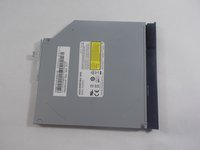
    • Use a Phillips #0 screwdriver (PH0 bit) to remove the one 6.0 mm screw holding in the optical drive.

  8. Asus X553MA-BPD07051 Optical Drive Replacement: 手順 8、 2の画像 1 Asus X553MA-BPD07051 Optical Drive Replacement: 手順 8、 2の画像 2
    • Gently slide the optical drive out from the motherboard.

終わりに

To reassemble your device, follow these instructions in reverse order.

作成者

2人の作成者と共同で作成されました。

Stephanie DeCarvalho

メンバー登録日: 10/21/19

898 ポイント

5のガイドは作成済み

チーム

UMass Dartmouth, Team S1-G4, Botvin Fall 2019 UMass Dartmouth, Team S1-G4, Botvin Fall 2019人のメンバー

UMASSD-BOTVIN-F19S1G4

3 メンバー

5のガイドは作成済み

0 件のコメント

コメントを追加

統計データ:

過去 24時間: 0

過去 7 日: 0

過去 30 日: 7

今までの合計 362