メインコンテンツにスキップ

Asus UL30VT-A1 Hard Drive Replacement

必要な工具と部品

  1. Asus UL30VT-A1 Hard Drive Replacement, Hard Drive: 手順 1、 1の画像 1
    • Flip your device so that the back of the device is facing you.

  2. Asus UL30VT-A1 Hard Drive Replacement: 手順 2、 2の画像 1 Asus UL30VT-A1 Hard Drive Replacement: 手順 2、 2の画像 2
    • Remove the four screws using your Phillips #0 screwdriver to attain access to your Hard Drive.

    • Remove the panel using a plastic opening tool.

  3. Asus UL30VT-A1 Hard Drive Replacement: 手順 3、 2の画像 1 Asus UL30VT-A1 Hard Drive Replacement: 手順 3、 2の画像 2
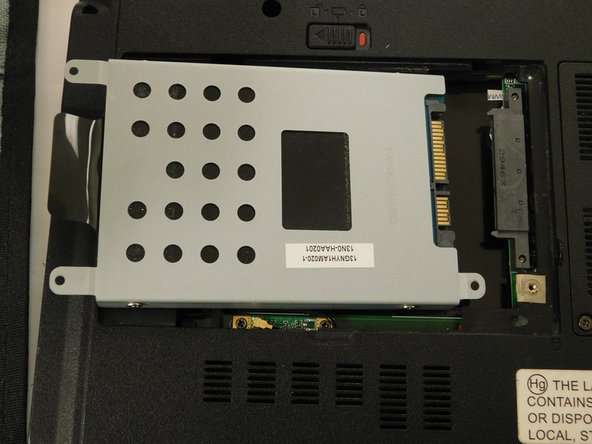
    • Gently pull the black strip and the Hard Drive should slide right off. Pull your hard drive to the side not up to avoid damage to the slot.

終わりに

To reassemble your device, follow these instructions in reverse order.

ある他の人がこのガイドを完成しました。

作成者

1人の作成者と共同作成されました。

Miguel Gonzalez

メンバー登録日: 02/04/19

97 ポイント

1ガイドが承認済み

チーム

Gateway, Team S1-G2, Saknee Spring 2019 Gateway, Team S1-G2, Saknee Spring 2019人のメンバー

GCC-SAKNEE-S19S1G2

5 メンバー

3のガイドは作成済み

0 件のコメント

コメントを追加

統計データ:

過去 24時間: 0

過去 7 日: 2

過去 30 日: 7

今までの合計 211