メインコンテンツにスキップ

Asus K53S -X156V Thermal Paste Replacement

必要な工具と部品

  1. Asus K53S -X156V Thermal Paste Replacement, removing battery: 手順 1、 3の画像 1 Asus K53S -X156V Thermal Paste Replacement, removing battery: 手順 1、 3の画像 2 Asus K53S -X156V Thermal Paste Replacement, removing battery: 手順 1、 3の画像 3
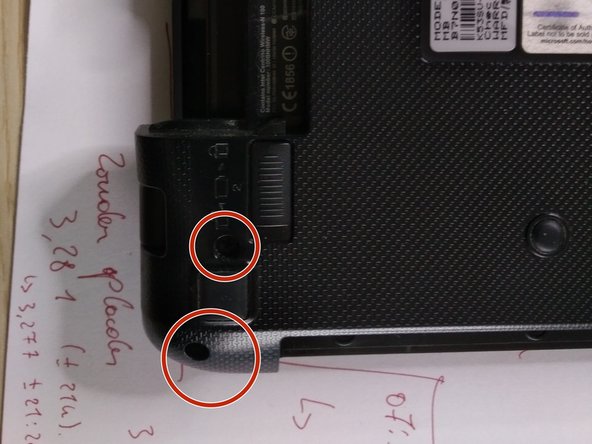
    • remove battery by sliding the two release buttons to the right position.

    • slide the battery away from the laptop

  2. Asus K53S -X156V Thermal Paste Replacement, removing plastic plate RAM/HDD: 手順 2、 2の画像 1 Asus K53S -X156V Thermal Paste Replacement, removing plastic plate RAM/HDD: 手順 2、 2の画像 2
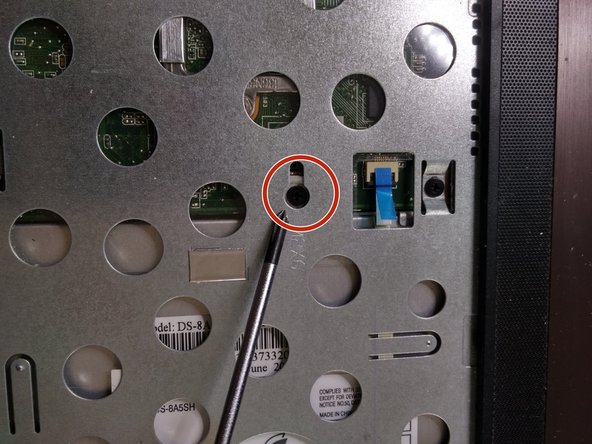
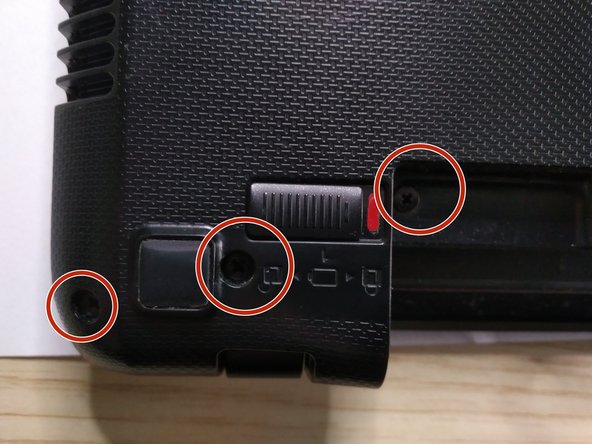
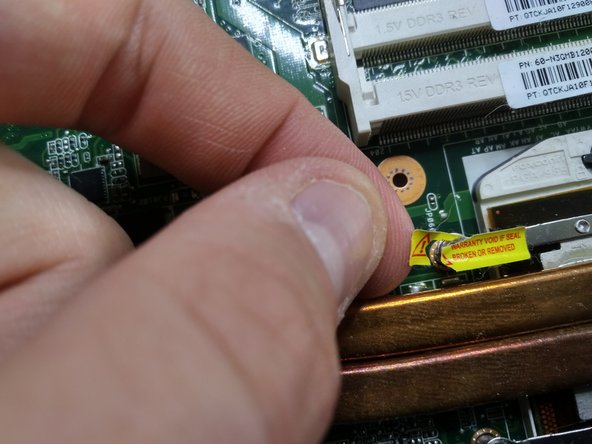
    • remove the 2 screws holding the plastic plate , underneath is the RAM/ WiFi and HDD

    • the 2 screws are marked in red. afterwarts slide it away from the laptop

    • keep track of all the screws and parts. make a map or a plan.

  3. Asus K53S -X156V Thermal Paste Replacement, removing RAM: 手順 3、 3の画像 1 Asus K53S -X156V Thermal Paste Replacement, removing RAM: 手順 3、 3の画像 2 Asus K53S -X156V Thermal Paste Replacement, removing RAM: 手順 3、 3の画像 3
    • click the ram module out of there sockets.

    • push the metal clips away from the module.

  4. Asus K53S -X156V Thermal Paste Replacement, Remove wifi module: 手順 4、 2の画像 1 Asus K53S -X156V Thermal Paste Replacement, Remove wifi module: 手順 4、 2の画像 2
    • remove the black and white wire.

    • remove the screw.

  5. Asus K53S -X156V Thermal Paste Replacement, removing hard disk: 手順 5、 3の画像 1 Asus K53S -X156V Thermal Paste Replacement, removing hard disk: 手順 5、 3の画像 2 Asus K53S -X156V Thermal Paste Replacement, removing hard disk: 手順 5、 3の画像 3
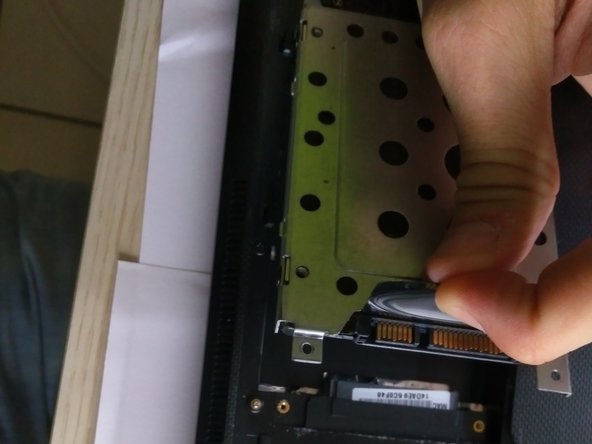
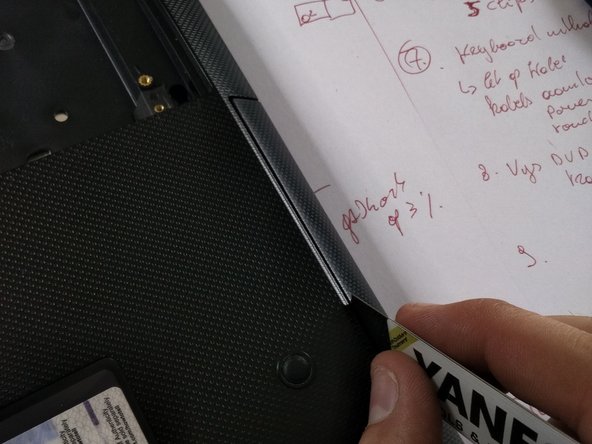
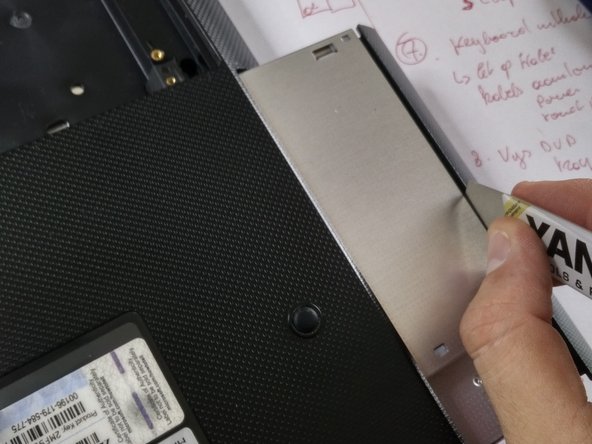
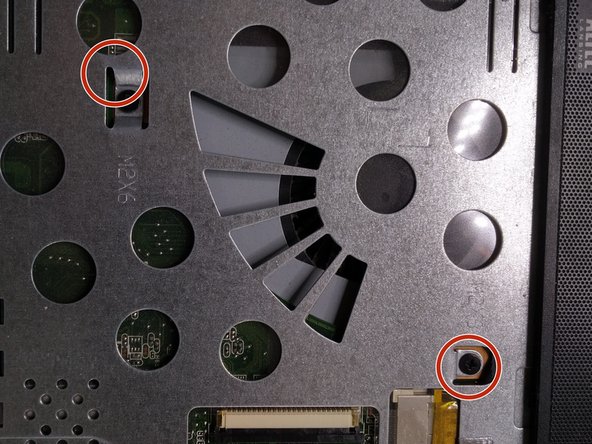
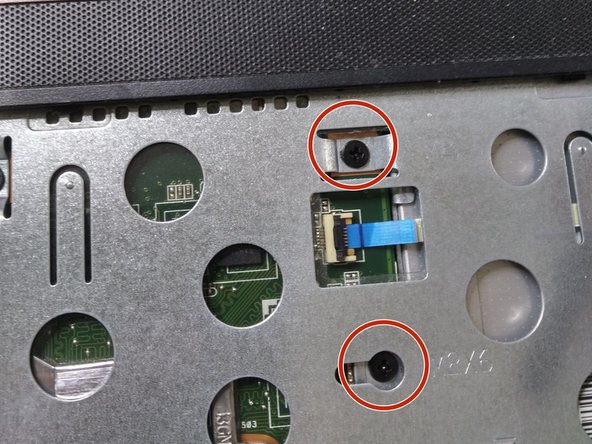
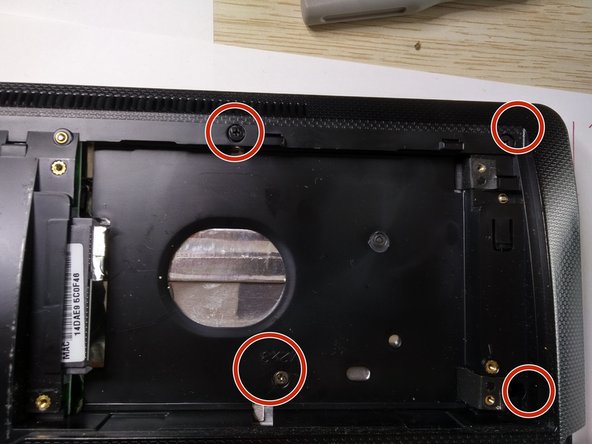
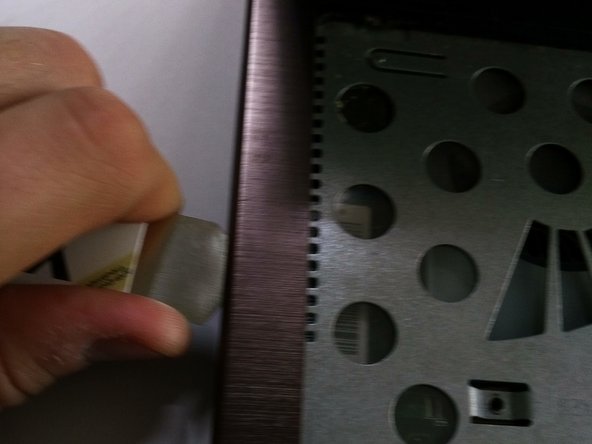
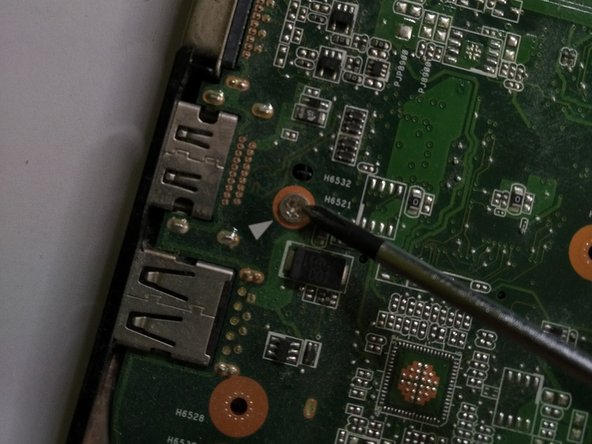
    • remove the 4 screws holding the metal frame , holding the hdd to it's place.

    • slide the frame and hard disk away from the case.

  6. Asus K53S -X156V Thermal Paste Replacement, removing keyboard: 手順 6、 2の画像 1 Asus K53S -X156V Thermal Paste Replacement, removing keyboard: 手順 6、 2の画像 2
    • click the keyboard loose . There are 5 clips to remove

  7. Asus K53S -X156V Thermal Paste Replacement, keyboard second part: 手順 7、 3の画像 1 Asus K53S -X156V Thermal Paste Replacement, keyboard second part: 手順 7、 3の画像 2 Asus K53S -X156V Thermal Paste Replacement, keyboard second part: 手順 7、 3の画像 3
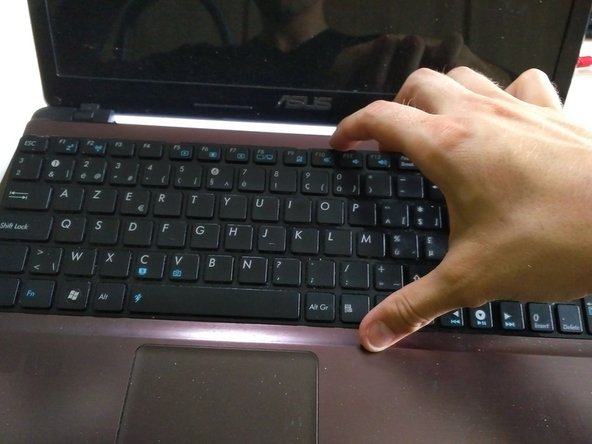
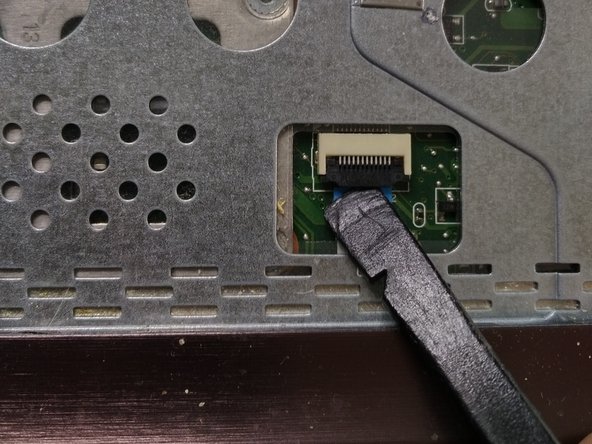
    • be carefull with the flat cable from the keyboard.

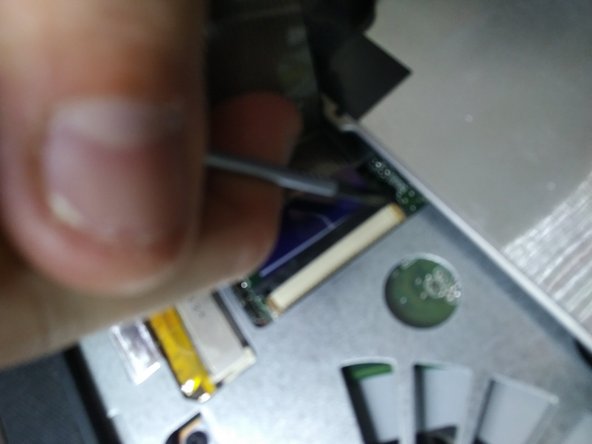
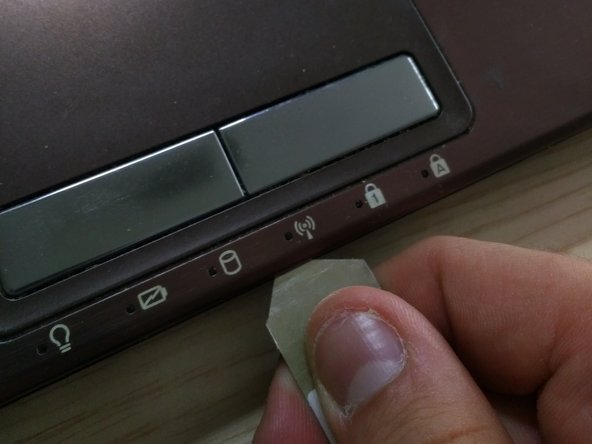
    • use a spudger to click the connector lid loose.

    • i used the tip of a screwdriver.. but i know what i am doing.. if you are use to work on laptops you can use a screwdriver, if not use a plastic spudger.

  8. Asus K53S -X156V Thermal Paste Replacement, remove DVD bay: 手順 8、 3の画像 1 Asus K53S -X156V Thermal Paste Replacement, remove DVD bay: 手順 8、 3の画像 2 Asus K53S -X156V Thermal Paste Replacement, remove DVD bay: 手順 8、 3の画像 3
    • remove the screw hidden under the keyboard.

    • slide the dvd bay out.

  9. Asus K53S -X156V Thermal Paste Replacement, removing flat cables: 手順 9、 3の画像 1 Asus K53S -X156V Thermal Paste Replacement, removing flat cables: 手順 9、 3の画像 2 Asus K53S -X156V Thermal Paste Replacement, removing flat cables: 手順 9、 3の画像 3
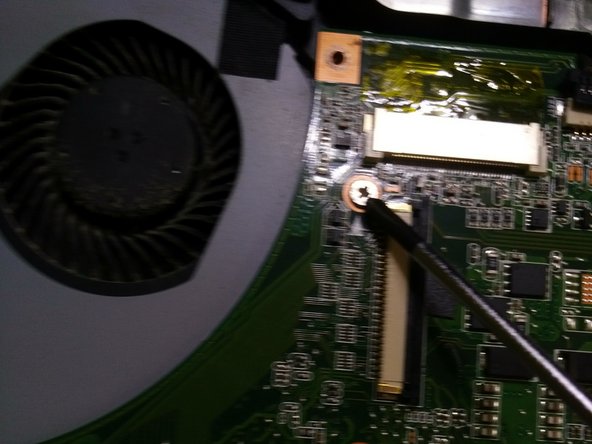
    • remove the flat thin cables from there sockets.

    • use a spudger , click the lid upwards and slide the flat cable out.

  10. Asus K53S -X156V Thermal Paste Replacement: 手順 10、 3の画像 1 Asus K53S -X156V Thermal Paste Replacement: 手順 10、 3の画像 2 Asus K53S -X156V Thermal Paste Replacement: 手順 10、 3の画像 3
    • remove the 6 screws ( m2x6) holding the metal plate to the case.

  11. Asus K53S -X156V Thermal Paste Replacement, remove screws on the bottom plate: 手順 11、 3の画像 1 Asus K53S -X156V Thermal Paste Replacement, remove screws on the bottom plate: 手順 11、 3の画像 2 Asus K53S -X156V Thermal Paste Replacement, remove screws on the bottom plate: 手順 11、 3の画像 3
    • remove screws as shown in pictures.

  12. Asus K53S -X156V Thermal Paste Replacement, remove screws bottom plate: 手順 12、 3の画像 1 Asus K53S -X156V Thermal Paste Replacement, remove screws bottom plate: 手順 12、 3の画像 2 Asus K53S -X156V Thermal Paste Replacement, remove screws bottom plate: 手順 12、 3の画像 3
    • remove screws as shown in pictures

  13. Asus K53S -X156V Thermal Paste Replacement, removing case: 手順 13、 3の画像 1 Asus K53S -X156V Thermal Paste Replacement, removing case: 手順 13、 3の画像 2 Asus K53S -X156V Thermal Paste Replacement, removing case: 手順 13、 3の画像 3
    • slide an isesamo opening tool between the two plates. you will here clicks

  14. Asus K53S -X156V Thermal Paste Replacement, reveal MAIN PCB: 手順 14、 3の画像 1 Asus K53S -X156V Thermal Paste Replacement, reveal MAIN PCB: 手順 14、 3の画像 2 Asus K53S -X156V Thermal Paste Replacement, reveal MAIN PCB: 手順 14、 3の画像 3
    • remove upper plate , revealing the main PCB.

  15. Asus K53S -X156V Thermal Paste Replacement, removing cable to usb module: 手順 15、 3の画像 1 Asus K53S -X156V Thermal Paste Replacement, removing cable to usb module: 手順 15、 3の画像 2 Asus K53S -X156V Thermal Paste Replacement, removing cable to usb module: 手順 15、 3の画像 3
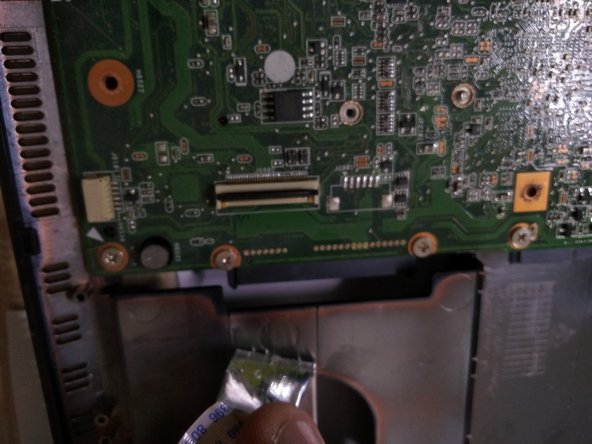
    • remove the flat cable of the USB module , use a spudger to lift up the lid of the connector.

    • gently slide out the flat cable

    • when removing the cable, be carefull they used a lot of adhessive to paste the cable to the plastic case.

  16. Asus K53S -X156V Thermal Paste Replacement, removing LCD cable: 手順 16、 3の画像 1 Asus K53S -X156V Thermal Paste Replacement, removing LCD cable: 手順 16、 3の画像 2 Asus K53S -X156V Thermal Paste Replacement, removing LCD cable: 手順 16、 3の画像 3
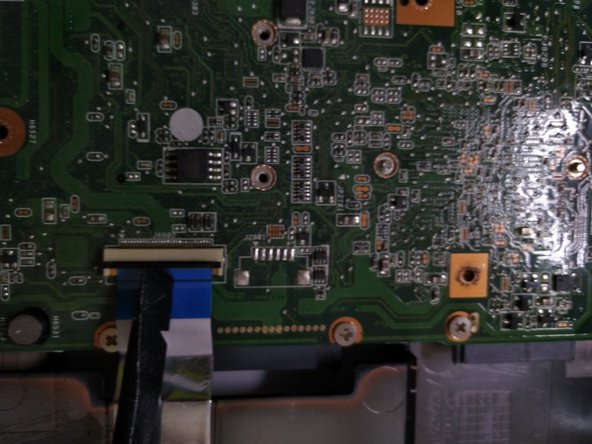
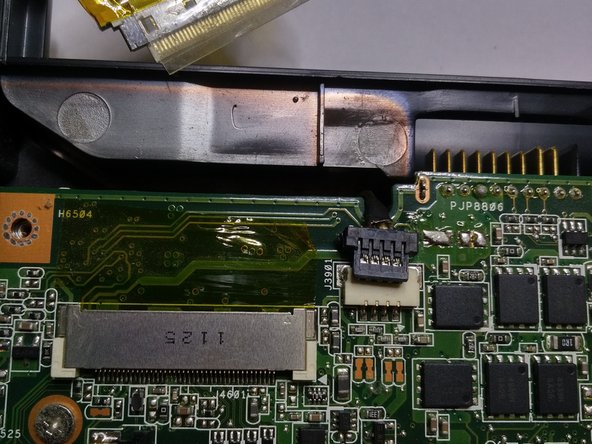
    • use the tip of a spudger or a tiny flathead screwdriver to push out the LCD cable from connector.

    • be very very very carefull , if you tear tis cable or damage it , you will have to buy a new one.

    • first lift the cable metal connector upwards ( push it out) , very gently, then the other side untill you can remove the cable.

  17. Asus K53S -X156V Thermal Paste Replacement, remove audio cable: 手順 17、 2の画像 1 Asus K53S -X156V Thermal Paste Replacement, remove audio cable: 手順 17、 2の画像 2
    • use IC extractor pliers to remove the cable away from is socket.

  18. Asus K53S -X156V Thermal Paste Replacement, remove screws main board: 手順 18、 3の画像 1 Asus K53S -X156V Thermal Paste Replacement, remove screws main board: 手順 18、 3の画像 2 Asus K53S -X156V Thermal Paste Replacement, remove screws main board: 手順 18、 3の画像 3
    • remove the 4 screws holding the main pcb ..

  19. Asus K53S -X156V Thermal Paste Replacement, removing last screw.: 手順 19、 1の画像 1
    • remove screw holding the fan tot the laptop.

  20. Asus K53S -X156V Thermal Paste Replacement, removing main board: 手順 20、 3の画像 1 Asus K53S -X156V Thermal Paste Replacement, removing main board: 手順 20、 3の画像 2 Asus K53S -X156V Thermal Paste Replacement, removing main board: 手順 20、 3の画像 3
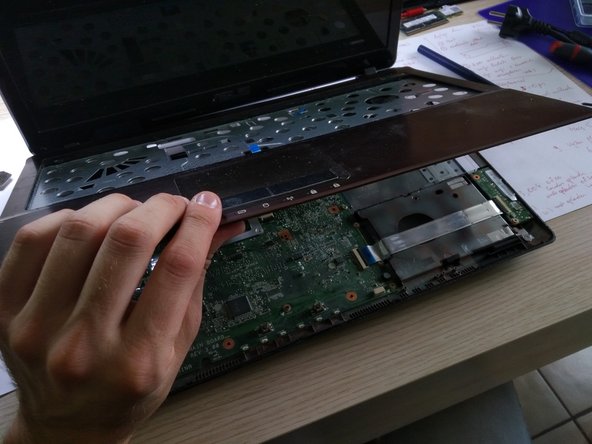
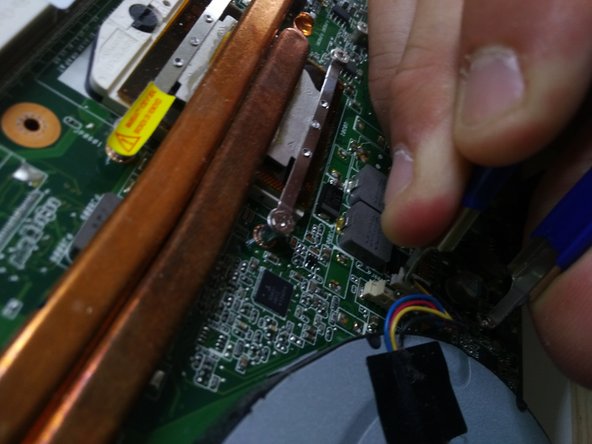
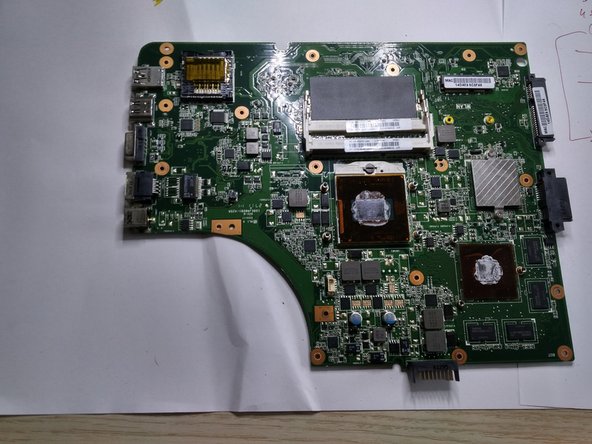
    • lift the main board or motherboard up on the right side and slide it out.

  21. Asus K53S -X156V Thermal Paste Replacement, FAN: 手順 21、 2の画像 1 Asus K53S -X156V Thermal Paste Replacement, FAN: 手順 21、 2の画像 2
    • release the fan from the main board by removing the connector with an IC extractor pliers.

  22. Asus K53S -X156V Thermal Paste Replacement: 手順 22、 3の画像 1 Asus K53S -X156V Thermal Paste Replacement: 手順 22、 3の画像 2 Asus K53S -X156V Thermal Paste Replacement: 手順 22、 3の画像 3
    • loosen up the screws from the cooling pads on the CPU and GPU.

    • You will have to tear the warranty sticker. it is a sticker in 3 parts.

  23. Asus K53S -X156V Thermal Paste Replacement, removing fan and cooling pads: 手順 23、 3の画像 1 Asus K53S -X156V Thermal Paste Replacement, removing fan and cooling pads: 手順 23、 3の画像 2 Asus K53S -X156V Thermal Paste Replacement, removing fan and cooling pads: 手順 23、 3の画像 3
    • remove the fan and cooling pads.

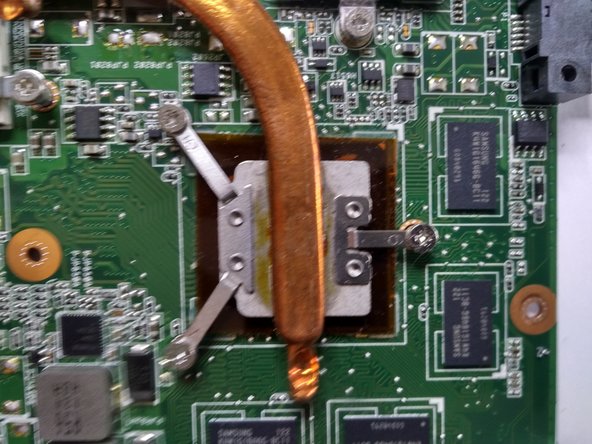
    • you will see the old thermal paste.

  24. Asus K53S -X156V Thermal Paste Replacement, removing thermal paste from pads.: 手順 24、 2の画像 1 Asus K53S -X156V Thermal Paste Replacement, removing thermal paste from pads.: 手順 24、 2の画像 2
    • clean the cooling pads with an very sharp knife. or spudger..

    • wear gloves, cause the thermal paste is very toxic.

    • also this is a good time to blow out the fan with compressed air.

  25. Asus K53S -X156V Thermal Paste Replacement, removing CPU and cleaning: 手順 25、 3の画像 1 Asus K53S -X156V Thermal Paste Replacement, removing CPU and cleaning: 手順 25、 3の画像 2 Asus K53S -X156V Thermal Paste Replacement, removing CPU and cleaning: 手順 25、 3の画像 3
    • remove the old thermal paste from the processors , be very carefull. and use some artic silver liquid to clean them. and easely remove the thermal paste.

    • you can remove the CPU by using a flathead screwdriver , the socket will move and you can pull the CPU out , maybe a good time to upgrade the CPU.

  26. Asus K53S -X156V Thermal Paste Replacement: 手順 26、 1の画像 1
    • unfortunately i don't have a picture when i added some new thermal paste. But if you do: one drop on each processor is enough.

    • Check out the thermal paste guide for more information on how to apply thermal paste.

終わりに

To reassemble your device, follow these instructions in reverse order.

8 の人々がこのガイドを完成させました。

作成者

4人の作成者と共同で作成されました。

Kevin D

メンバー登録日: 05/02/14

7,343 ポイント

21のガイドは作成済み

5 件のコメント

You dont have to disassembly whole computer, just remove back cover, 4 screws from cpu, 2 screws from gpu and 2 screws from fan..

Aleksi Kinnunen - 返信

Hi Aleksi,

Yes we know, but we took the hole laptop apart to show how to replace, renew other parts as well.

Kevin D - 返信

Ciao, io ho fatto tutto perfettamente in modo identico alla spiegazione (anche perché non è complicato). può essere la cpu?

Irene Montanari - 返信

Which themal paste good . Please give amazon purchase link

Vinayak Patil - 返信

Thank you. Pretty useful guide not to break connectors. went from 97ºC to 45ºC. I'm pretty happy.
The fan was blocked with dust and the thermal paste was like cement.

Marco Fidalgo - 返信

コメントを追加

統計データ:

過去 24時間: 1

過去 7 日: 10

過去 30 日: 50

今までの合計 5,328