メインコンテンツにスキップ

Aquaris M5 Display Replacement

必要な工具と部品

  1. Aquaris M5 Display Replacement, Back Cover: 手順 1、 2の画像 1 Aquaris M5 Display Replacement, Back Cover: 手順 1、 2の画像 2
    • Insert the tip of an iFixit opening tool between the back cover and the mid frame of the phone.

    • Between the 2 SIM card slots is a good place to start.

    • Slide the opening tool to the bottom of the phone, to snap out the plastic clips, connecting the back cover and mid frame.

  2. Aquaris M5 Display Replacement: 手順 2、 2の画像 1 Aquaris M5 Display Replacement: 手順 2、 2の画像 2
    • Slide the opening tool back to the top of the phone, to disconnect all the clips on the edge.

    • Slide around the corner and along the top edge, to also disconnect these clips.

  3. Aquaris M5 Display Replacement: 手順 3、 3の画像 1 Aquaris M5 Display Replacement: 手順 3、 3の画像 2 Aquaris M5 Display Replacement: 手順 3、 3の画像 3
    • Be careful not to bend the back cover too hard to prevent some of the clips breaking.

    • Grab the back cover by the loosened edge.

    • Gently bend and twist the flexible back cover a bit to disconnect the remaining clips.

    • Take off the back cover.

  4. Aquaris M5 Display Replacement, Battery: 手順 4、 1の画像 1
    • Damaging the liquid indicator sticker, on the middle most screw, will void the warranty of the phone.

    • Unscrew the ten black 4mm Phillips #00 Screws from the mainboard shield.

    • Unscrew the golden 3.4mm Phillips #00 screw on the middle-right side of the mainboard shield.

  5. Aquaris M5 Display Replacement: 手順 5、 3の画像 1 Aquaris M5 Display Replacement: 手順 5、 3の画像 2 Aquaris M5 Display Replacement: 手順 5、 3の画像 3
    • Insert the flat side of a spudger between the mainboard shield and the frame of the phone.

    • Twist the spudger to lift up the mainboard shield.

    • Remove the mainboard shield from the phone.

  6. Aquaris M5 Display Replacement: 手順 6、 2の画像 1 Aquaris M5 Display Replacement: 手順 6、 2の画像 2
    • Use a spudger to disconnect the battery's flex cable from the mainboard.

    • Pull of the sticker on the bottom side of the battery.

    • Grab the sticker and lift it up to take the battery out of the phone.

  7. Aquaris M5 Display Replacement, Loud Speaker: 手順 7、 1の画像 1
    • Take out the seven 4mm Phillips #00 screws, holding the loud speaker unit to the mid frame of the phone.

  8. Aquaris M5 Display Replacement: 手順 8、 2の画像 1 Aquaris M5 Display Replacement: 手順 8、 2の画像 2
    • Insert the flat side of a spudger into the gap on the right side of the loud speaker.

    • Lever the loud speaker up with the spudger.

    • Grab the loud speaker and take it out of the phone.

  9. Aquaris M5 Display Replacement, Display: 手順 9、 1の画像 1
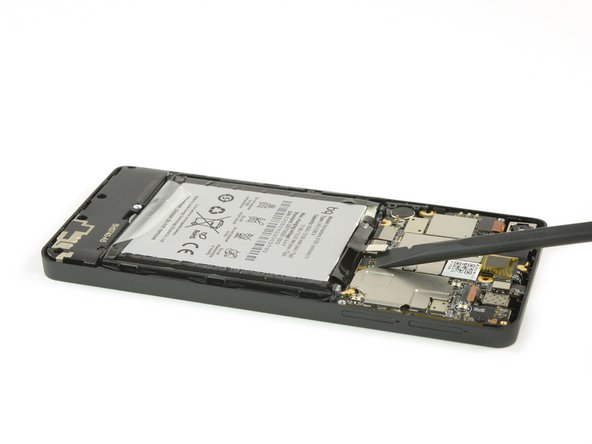
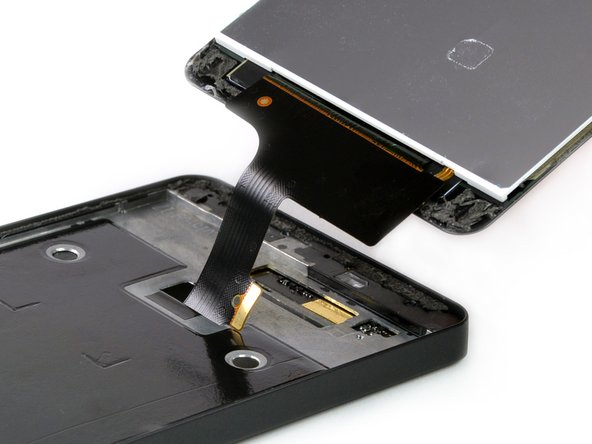
    • Use the flat end of a spudger to disconnect the displays flex cable from the mainboard.

  10. Aquaris M5 Display Replacement: 手順 10、 1の画像 1
    • Use an iOpener to loosen the displays adhesive.

    • If you have never used an iOpener before, visit our iOpener Instruction Guide.

  11. Aquaris M5 Display Replacement: 手順 11、 3の画像 1 Aquaris M5 Display Replacement: 手順 11、 3の画像 2 Aquaris M5 Display Replacement: 手順 11、 3の画像 3
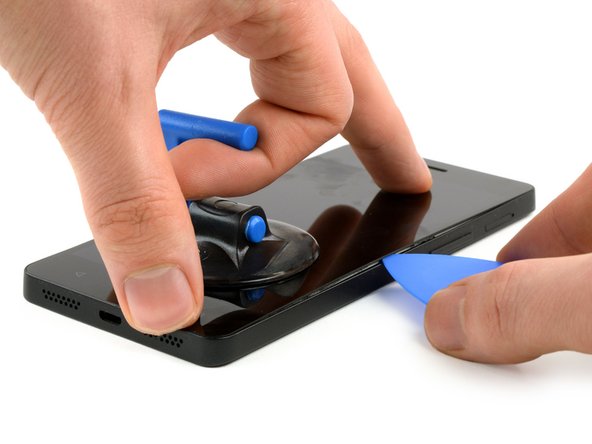
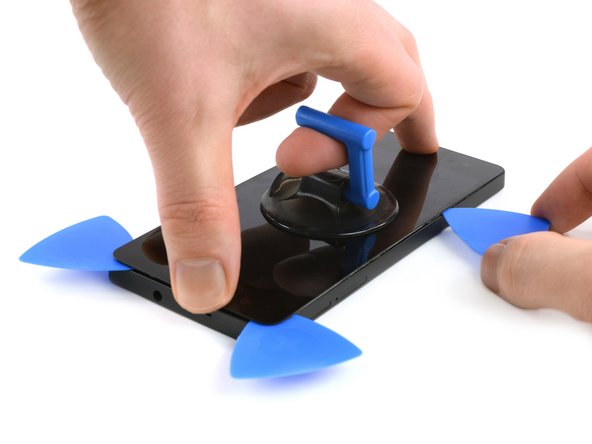
    • Place a suction cup on the bottom-middle part of the screen and lift it up.

    • Insert the tip of an opening pick in the gap between the display and the midframe.

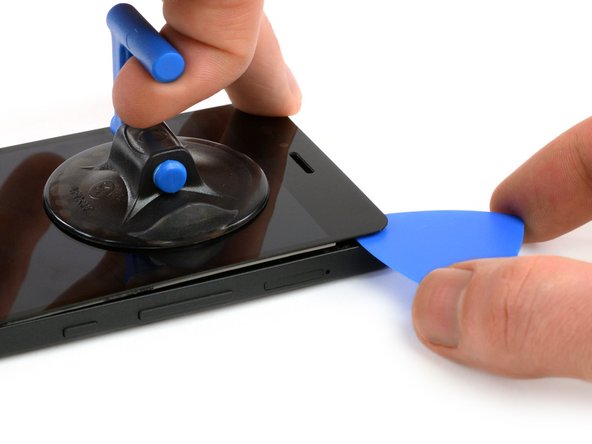
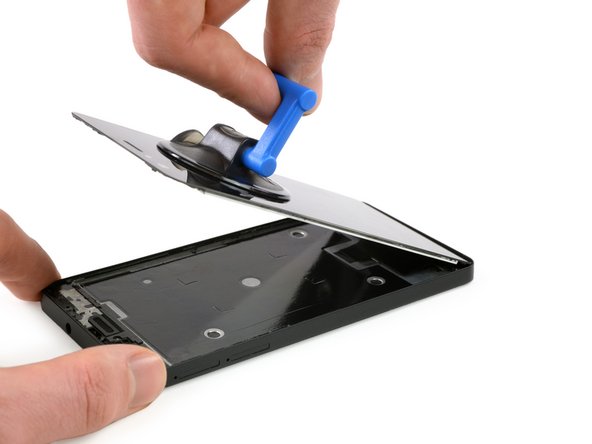
    • Slide the opening pick along the edge of the display to cut the adhesive.

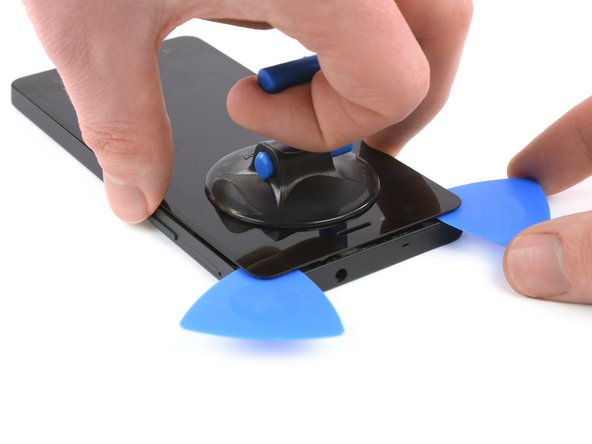
    • Move the opening pick around the top right corner and leave it there.

  12. Aquaris M5 Display Replacement: 手順 12、 2の画像 1 Aquaris M5 Display Replacement: 手順 12、 2の画像 2
    • Insert the tip of another opening pick next to the other one and slide it along the top side of your phone and around the top left corner, where you leave it.

    • If the glue is hard to loosen, reheat it with your iOpener.

  13. Aquaris M5 Display Replacement: 手順 13、 2の画像 1 Aquaris M5 Display Replacement: 手順 13、 2の画像 2
    • Take a third opening pick and insert the tip into the gap on the left side of the phone.

    • Slide the opening pick down to the bottom of the phone.

  14. Aquaris M5 Display Replacement: 手順 14、 3の画像 1 Aquaris M5 Display Replacement: 手順 14、 3の画像 2 Aquaris M5 Display Replacement: 手順 14、 3の画像 3
    • Grasp the midframe of the phone with one hand and gently but steadily pull up the display to separate the adhesive of the lower part.

    • Pull the display away from the midframe, while moving the flex cable through the opening in the mid frame.

終わりに

To reassemble your device, follow these instructions in reverse order.

作成者

2人の作成者と共同で作成されました。

Theo Mat

メンバー登録日: 11/12/17

12,782 ポイント

14のガイドは作成済み

0 件のコメント

コメントを追加

統計データ:

過去 24時間: 1

過去 7 日: 4

過去 30 日: 16

今までの合計 2,303