メインコンテンツにスキップ

Apple Time Capsule Model A1254 Fan Replacement

必要な工具と部品

  1. Apple Time Capsule Model A1254 Fan Replacement, Back Plate: 手順 1、 3の画像 1 Apple Time Capsule Model A1254 Fan Replacement, Back Plate: 手順 1、 3の画像 2 Apple Time Capsule Model A1254 Fan Replacement, Back Plate: 手順 1、 3の画像 3
    • Turn the device upside down to reveal the rubber section of the back plate. Using a metal spudger, carefully wedge the blunt tip into the space between the aluminum back plate and the rubber, separating the two pieces.

    • This may take a few minutes to pry the rubber off completely. Once your are able to get a grip on the rubber it is easier to peel it off using your hands.

    • Depending on air temperature and how set the adhesive is, you may need to spend some time warming the back plate with a hot plate (on low) or hair dryer.

    • Don't worry about re-applying adhesive to the rubber; the remaining adhesive has plenty of strength to affix itself to the aluminum.

  2. Apple Time Capsule Model A1254 Fan Replacement: 手順 2、 2の画像 1 Apple Time Capsule Model A1254 Fan Replacement: 手順 2、 2の画像 2
    • Remove the ten 3mm screws with a Phillips #00 screwdriver.

    • The screws with adhesive covering do not need to be removed.

  3. Apple Time Capsule Model A1254 Fan Replacement: 手順 3、 2の画像 1 Apple Time Capsule Model A1254 Fan Replacement: 手順 3、 2の画像 2
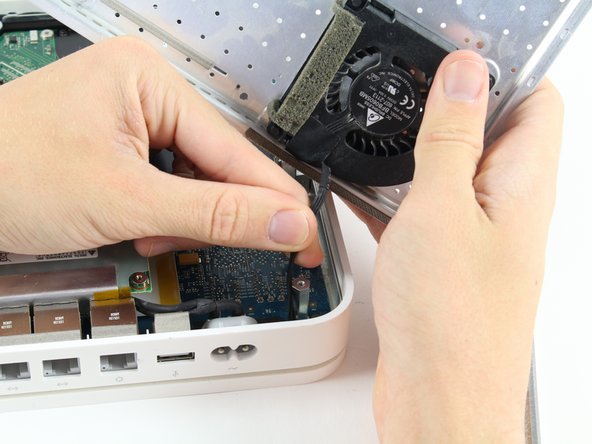
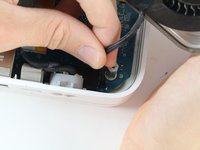
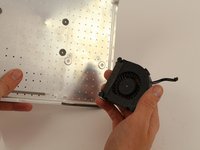
    • The fan affixed to the back plate is connected to the logic board. A small wire must be detached to fully remove the back plate.

    • Pull the base of the wire close to the logic board and the connector will pop off.

  4. Apple Time Capsule Model A1254 Fan Replacement, Fan: 手順 4、 2の画像 1 Apple Time Capsule Model A1254 Fan Replacement, Fan: 手順 4、 2の画像 2
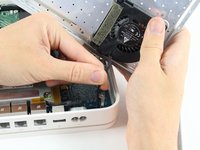
    • Orientate the back plate so that the fan is facing away from you.

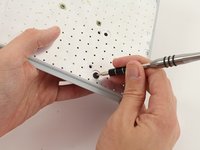
    • Use the #0 Phillips Screw Drive to push the rubber shock mounts through the back plate.

    • Make sure that the head of the screw driver is centered on the head of the rubber shock mount so that it doesn't slip off causing possible injury.

    • When attaching the new fan, push the new rubber shock mounts through the back plate first. Attach the fan once all mounts are inserted.

終わりに

To reassemble your device, follow these instructions in reverse order.

3 の人々がこのガイドを完成させました。

作成者

1人の作成者と共同作成されました。

JR Alfano

メンバー登録日: 10/06/16

525 ポイント

1ガイドが承認済み

チーム

Cal Poly, Team 4-2, Livingston Fall 2016 Cal Poly, Team 4-2, Livingston Fall 2016人のメンバー

CPSU-LIVINGSTON-F16S4G2

4 メンバー

17のガイドは作成済み

コメント 1 件

Hi where can I find the new rubber shock mount replacement for A-1254 fan replacement? thx.

V Q - 返信

コメントを追加

統計データ:

過去 24時間: 5

過去 7 日: 11

過去 30 日: 39

今までの合計 3,951