メインコンテンツにスキップ
リペアコミュニティに参加 - アカウントの作成
Alldaymall A88X LCD Screen and Touch Sensor Assembly Replacement

必要な工具と部品

  1. Alldaymall A88X LCD Screen and Touch Sensor Assembly  Replacement, Alldaymall A88X Back Cover: 手順 1、 3の画像 1 Alldaymall A88X LCD Screen and Touch Sensor Assembly  Replacement, Alldaymall A88X Back Cover: 手順 1、 3の画像 2 Alldaymall A88X LCD Screen and Touch Sensor Assembly  Replacement, Alldaymall A88X Back Cover: 手順 1、 3の画像 3
    • Using a plastic opening tool, carefully pry the device apart. Make your way around the entire perimeter of the device and carefully place the two panels next to each other.

    • After the panels are separated, watch out for the speaker on the rear panel as it's wire is rather short.

    • When separating the panels keep an eye out for the power button and volume rocker as they can be dislodged.

    FixBotに聞いてみる

    コメントを追加

  2. Alldaymall A88X LCD Screen and Touch Sensor Assembly  Replacement: 手順 2、 1の画像 1
    この手順で使用する道具:
    Tweezers
    $4.99
    • Grip the speaker from the sides with your fingers or a pair of tweezers and slowly begin to remove it from the rear panel.

    • When removing the speaker, make sure not to disconnect the wires in any way.

    • After the speaker has been removed, place the rear panel aside.

    FixBotに聞いてみる

    コメントを追加

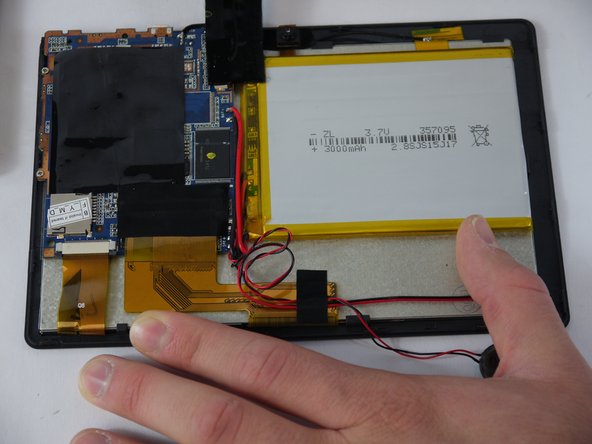
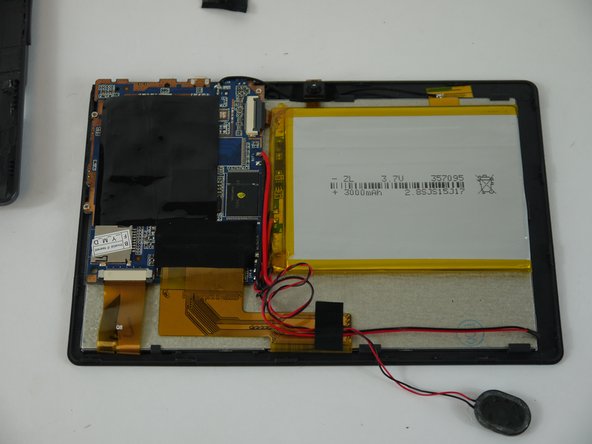
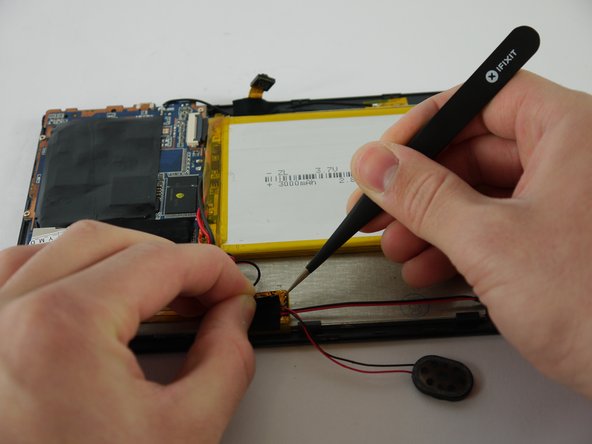
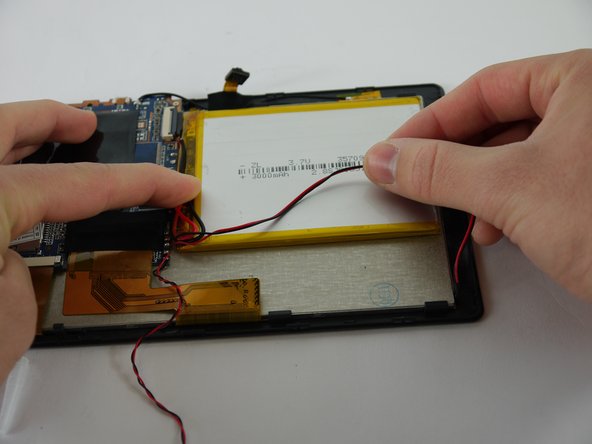
  3. Alldaymall A88X LCD Screen and Touch Sensor Assembly  Replacement, Speaker: 手順 3、 3の画像 1 Alldaymall A88X LCD Screen and Touch Sensor Assembly  Replacement, Speaker: 手順 3、 3の画像 2 Alldaymall A88X LCD Screen and Touch Sensor Assembly  Replacement, Speaker: 手順 3、 3の画像 3
    • Carefully separate the speaker wire from the tape and proceed to peel the tape off in an upwards direction.

    • The tape we are removing covers a number of connections on the motherboard. Be extra careful not to sever any of these.

    FixBotに聞いてみる

    コメントを追加

  4. Alldaymall A88X LCD Screen and Touch Sensor Assembly  Replacement: 手順 4、 3の画像 1 Alldaymall A88X LCD Screen and Touch Sensor Assembly  Replacement: 手順 4、 3の画像 2 Alldaymall A88X LCD Screen and Touch Sensor Assembly  Replacement: 手順 4、 3の画像 3
    この手順で使用する道具:
    Tweezers
    $4.99
    • Using a pair of tweezers, begin separating the tape downwards from the back panel.

    • Pull the tape away from the wire bundle beneath.

    • Isolate the wire running from the speaker to the motherboard.

    FixBotに聞いてみる

    コメントを追加

  5. Alldaymall A88X LCD Screen and Touch Sensor Assembly  Replacement: 手順 5、 3の画像 1 Alldaymall A88X LCD Screen and Touch Sensor Assembly  Replacement: 手順 5、 3の画像 2 Alldaymall A88X LCD Screen and Touch Sensor Assembly  Replacement: 手順 5、 3の画像 3
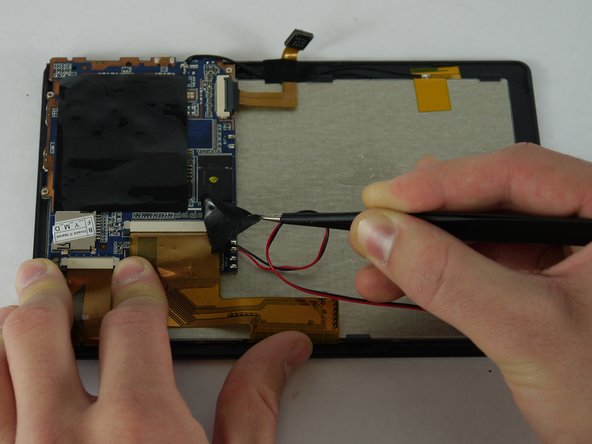
    • Desolder the speaker wires from the motherboard.

    FixBotに聞いてみる

    コメントを追加

  6. Alldaymall A88X LCD Screen and Touch Sensor Assembly  Replacement, Camera: 手順 6、 3の画像 1 Alldaymall A88X LCD Screen and Touch Sensor Assembly  Replacement, Camera: 手順 6、 3の画像 2 Alldaymall A88X LCD Screen and Touch Sensor Assembly  Replacement, Camera: 手順 6、 3の画像 3
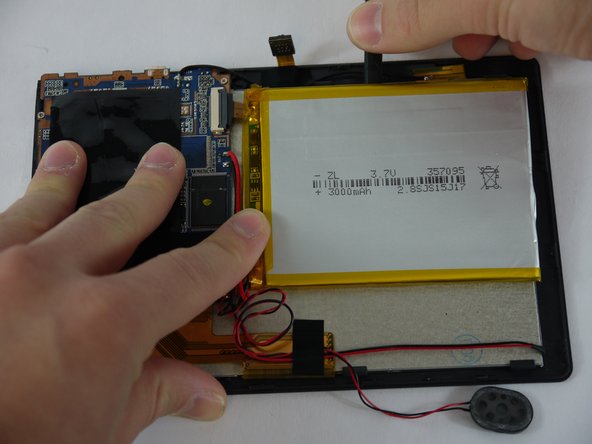
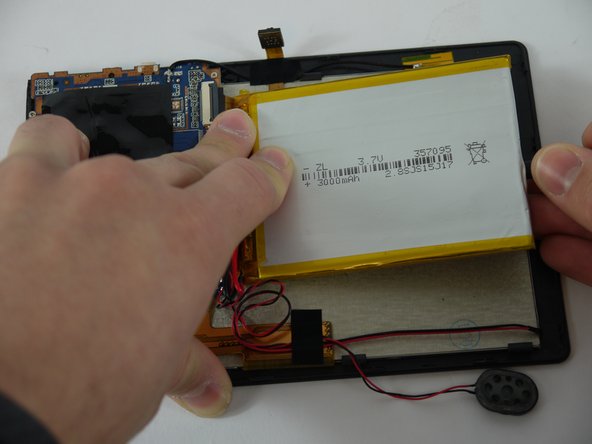
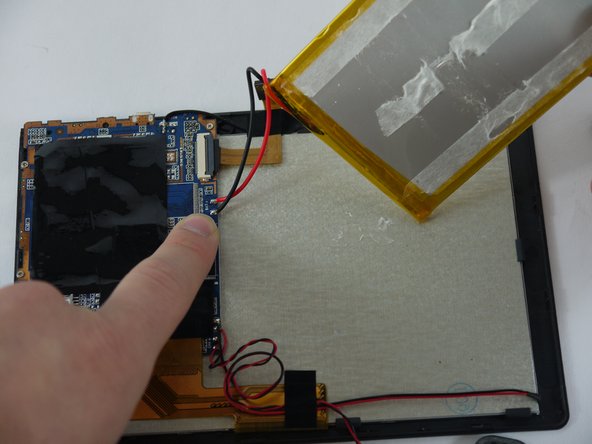
    • Using a nylon spudger, slowly work your way underneath the battery separating it from the panel beneath.

    • After the battery is separated from the panel make sure to place it face down above the tablet itself.

    • Throughout the removal process keep an eye on the battery's wires and make sure they do not break.

    FixBotに聞いてみる

    コメントを追加

  7. Alldaymall A88X LCD Screen and Touch Sensor Assembly  Replacement: 手順 7、 2の画像 1 Alldaymall A88X LCD Screen and Touch Sensor Assembly  Replacement: 手順 7、 2の画像 2
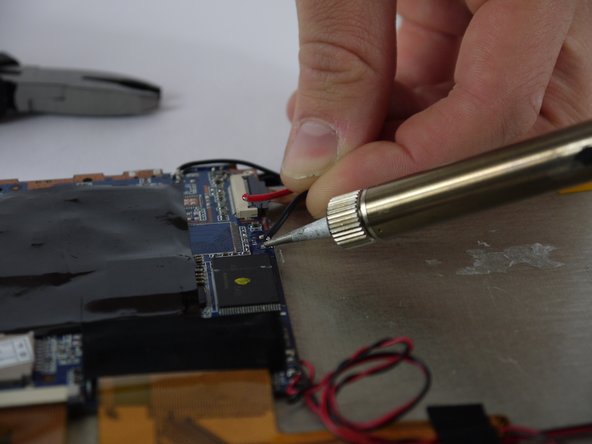
    • Desolder the wires that connect the battery to the motherboard.

    FixBotに聞いてみる

    コメントを追加

  8. Alldaymall A88X LCD Screen and Touch Sensor Assembly  Replacement: 手順 8、 2の画像 1 Alldaymall A88X LCD Screen and Touch Sensor Assembly  Replacement: 手順 8、 2の画像 2
    この手順で使用する道具:
    Tweezers
    $4.99
    • Using a pair of tweezers begin to peel the tape covering the ribbon cable on the motherboard.

    FixBotに聞いてみる

    コメントを追加

  9. Alldaymall A88X LCD Screen and Touch Sensor Assembly  Replacement: 手順 9、 3の画像 1 Alldaymall A88X LCD Screen and Touch Sensor Assembly  Replacement: 手順 9、 3の画像 2 Alldaymall A88X LCD Screen and Touch Sensor Assembly  Replacement: 手順 9、 3の画像 3
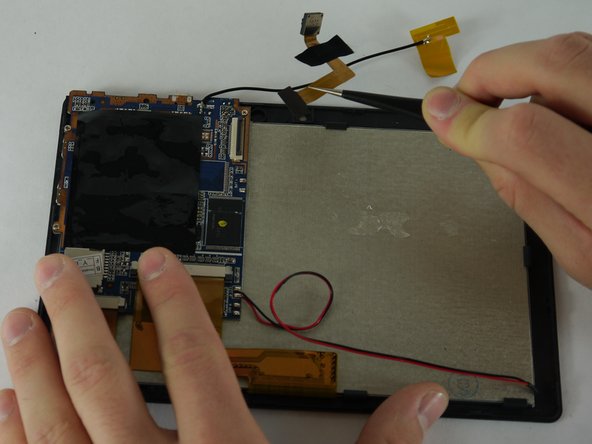
    • Using a pair of tweezers begin to peel the antenna from the metal panel.

    • Work your way down until the antenna is completely removed.

    • Be careful not deform the antenna or sever its connection.

    FixBotに聞いてみる

    コメントを追加

  10. Alldaymall A88X LCD Screen and Touch Sensor Assembly  Replacement: 手順 10、 1の画像 1
    • Using a pair of tweezers remove the tape securing the cameras to the back panel.

    FixBotに聞いてみる

    コメントを追加

  11. Alldaymall A88X LCD Screen and Touch Sensor Assembly  Replacement: 手順 11、 1の画像 1
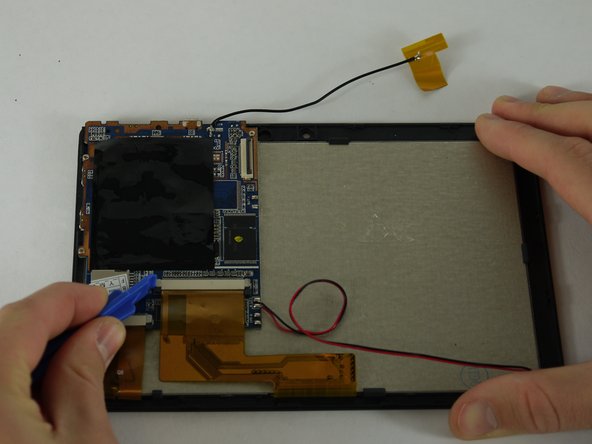
    • Using a plastic opening tool lift up the flap on the ribbon cable receptacle.

    FixBotに聞いてみる

    コメントを追加

  12. Alldaymall A88X LCD Screen and Touch Sensor Assembly  Replacement: 手順 12、 2の画像 1 Alldaymall A88X LCD Screen and Touch Sensor Assembly  Replacement: 手順 12、 2の画像 2
    • Using a pair of tweezers remove the camera assembly from its housing and its receptacles.

    FixBotに聞いてみる

    コメントを追加

  13. Alldaymall A88X LCD Screen and Touch Sensor Assembly  Replacement, Motherboard: 手順 13、 3の画像 1 Alldaymall A88X LCD Screen and Touch Sensor Assembly  Replacement, Motherboard: 手順 13、 3の画像 2 Alldaymall A88X LCD Screen and Touch Sensor Assembly  Replacement, Motherboard: 手順 13、 3の画像 3
    この手順で使用する道具:
    Tweezers
    $4.99
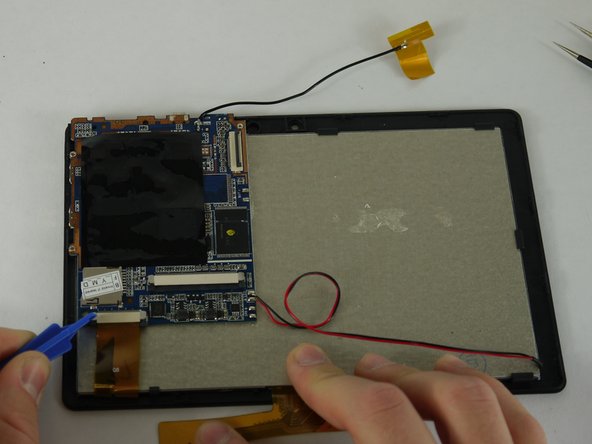
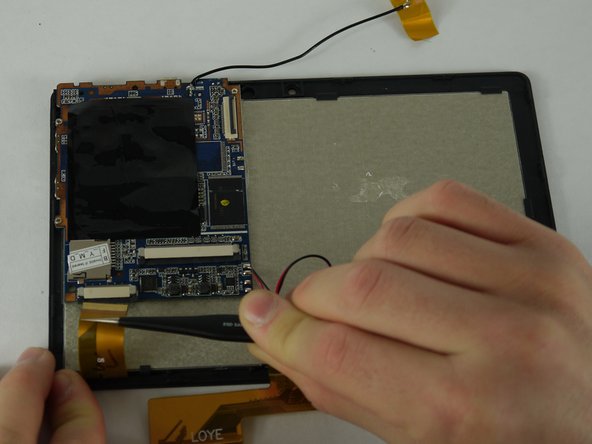
    • Use a plastic opening tool to pull out the black knobs on both sides of the ribbon cable receptacle.

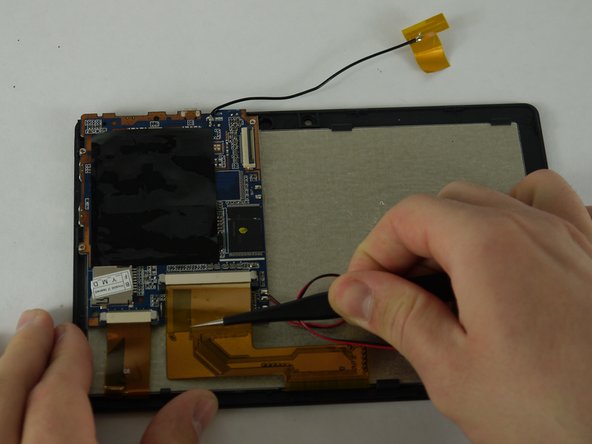
    • Using a pair of tweezers remove the ribbon cable from its receptacle.

    FixBotに聞いてみる

    コメントを追加

  14. Alldaymall A88X LCD Screen and Touch Sensor Assembly  Replacement: 手順 14、 3の画像 1 Alldaymall A88X LCD Screen and Touch Sensor Assembly  Replacement: 手順 14、 3の画像 2 Alldaymall A88X LCD Screen and Touch Sensor Assembly  Replacement: 手順 14、 3の画像 3
    • Now on the left ribbon cable use a plastic opening tool to pull out the black knobs on both sides of the ribbon cable receptacle.

    • Using a pair of tweezers remove the ribbon cable from its receptacle.

    FixBotに聞いてみる

    コメントを追加

  15. Alldaymall A88X LCD Screen and Touch Sensor Assembly  Replacement: 手順 15、 2の画像 1 Alldaymall A88X LCD Screen and Touch Sensor Assembly  Replacement: 手順 15、 2の画像 2
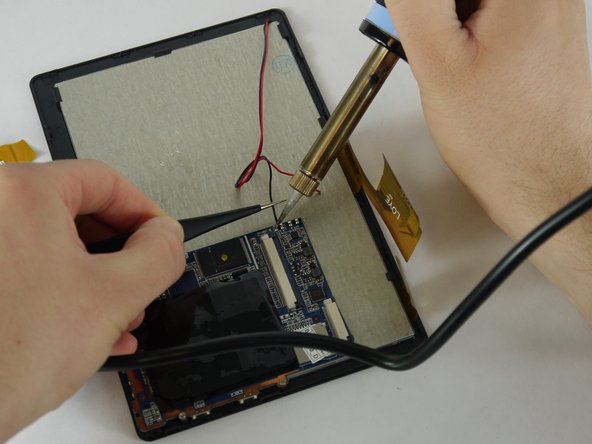
    • Desolder the wires that connect the backlight to the motherboard.

    FixBotに聞いてみる

    コメントを追加

  16. Alldaymall A88X LCD Screen and Touch Sensor Assembly  Replacement: 手順 16、 3の画像 1 Alldaymall A88X LCD Screen and Touch Sensor Assembly  Replacement: 手順 16、 3の画像 2 Alldaymall A88X LCD Screen and Touch Sensor Assembly  Replacement: 手順 16、 3の画像 3
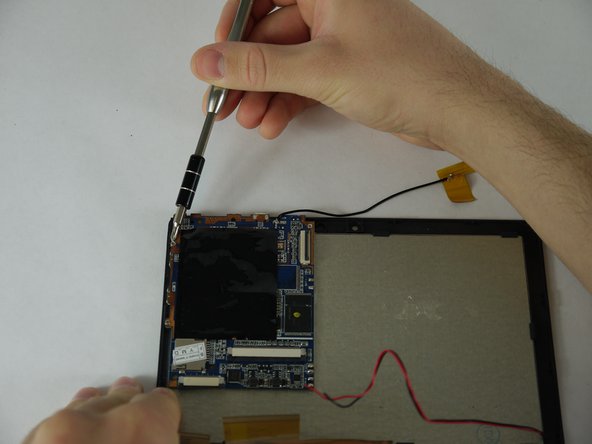
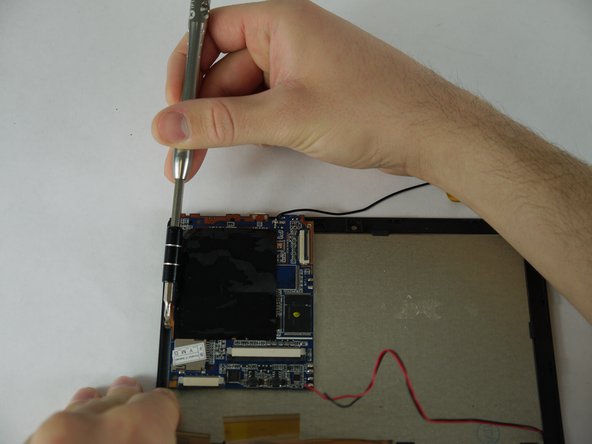
    • Using a PH0 screw bit unscrew the three 3mm screws securing the motherboard to the back panel.

    FixBotに聞いてみる

    コメントを追加

  17. Alldaymall A88X LCD Screen and Touch Sensor Assembly  Replacement: 手順 17、 1の画像 1
    • Carefully lift up on the motherboard from its housing.

    FixBotに聞いてみる

    コメントを追加

  18. Alldaymall A88X LCD Screen and Touch Sensor Assembly  Replacement, LCD Screen and Touch Sensor Assembly: 手順 18、 3の画像 1 Alldaymall A88X LCD Screen and Touch Sensor Assembly  Replacement, LCD Screen and Touch Sensor Assembly: 手順 18、 3の画像 2 Alldaymall A88X LCD Screen and Touch Sensor Assembly  Replacement, LCD Screen and Touch Sensor Assembly: 手順 18、 3の画像 3
    • Gently pry the brackets holding the touch sensor to the LCD Screen

    • Do not bend the touch sensor to much as it may shatter.

    FixBotに聞いてみる

    コメントを追加

終わりに

To reassemble your device, follow these instructions in reverse order.

キャンセル: このガイドを終了できませんでした。

ある他の人がこのガイドを完成しました。

作成者

1人の作成者と共同作成されました。

Drhaber

メンバー登録日: 02/10/16

985 ポイント

7のガイドは作成済み

チーム

USF Tampa, Team 4-1, Lacy Spring 2016 USF Tampa, Team 4-1, Lacy Spring 2016人のメンバー

USFT-LACY-S16S4G1

4 メンバー

16のガイドは作成済み

0件のガイドコメント

コメントを追加

統計データ:

過去 24時間: 0

過去 7 日: 7

過去 30 日: 27

今までの合計 881