メインコンテンツにスキップ

Acer Chromebook 14 CB3-431-C3WS Motherboard Replacement

必要な工具と部品

  1. Acer Chromebook 14 CB3-431-C3WS Motherboard Replacement, Back Cover: 手順 1、 3の画像 1 Acer Chromebook 14 CB3-431-C3WS Motherboard Replacement, Back Cover: 手順 1、 3の画像 2 Acer Chromebook 14 CB3-431-C3WS Motherboard Replacement, Back Cover: 手順 1、 3の画像 3
    • Remove the two 6mm JIS #0 screws from either side of the hinges.

  2. Acer Chromebook 14 CB3-431-C3WS Motherboard Replacement: 手順 2、 1の画像 1
    • Remove the eight 4mm JIS #0 screws from the back cover.

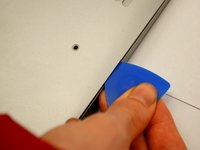
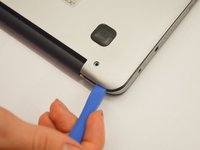
  3. Acer Chromebook 14 CB3-431-C3WS Motherboard Replacement: 手順 3、 2の画像 1 Acer Chromebook 14 CB3-431-C3WS Motherboard Replacement: 手順 3、 2の画像 2
    • Insert an opening pick between the back panel and the sides of the computer to begin lifting the back off.

    • There are several clips holding the cover in place.

    • After the sides have been lifted, use the opening tool to finish opening the back cover.

  4. Acer Chromebook 14 CB3-431-C3WS Motherboard Replacement: 手順 4、 1の画像 1
    • Lift off the back cover.

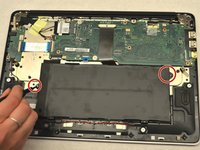
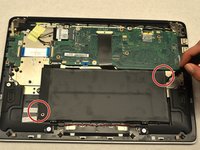
  5. Acer Chromebook 14 CB3-431-C3WS Motherboard Replacement, Battery: 手順 5、 3の画像 1 Acer Chromebook 14 CB3-431-C3WS Motherboard Replacement, Battery: 手順 5、 3の画像 2 Acer Chromebook 14 CB3-431-C3WS Motherboard Replacement, Battery: 手順 5、 3の画像 3
    • Remove the two JIS #0 screws that connect the battery to the rest of the laptop.

  6. Acer Chromebook 14 CB3-431-C3WS Motherboard Replacement: 手順 6、 2の画像 1 Acer Chromebook 14 CB3-431-C3WS Motherboard Replacement: 手順 6、 2の画像 2
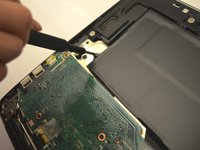
    • Pull the white tab connected to the battery out of the black tab that connects to the motherboard.

    • It is extremely important that this is done carefully and slowly to avoid causing damage to the motherboard.

  7. Acer Chromebook 14 CB3-431-C3WS Motherboard Replacement: 手順 7、 1の画像 1
    • Lift the battery out gently.

  8. Acer Chromebook 14 CB3-431-C3WS Motherboard Replacement, Motherboard: 手順 8、 1の画像 1
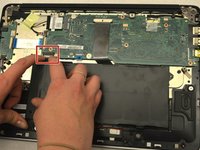
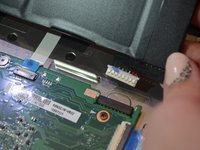
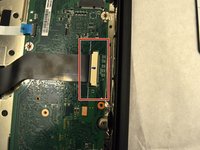
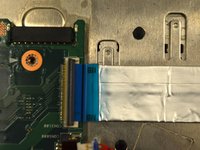
    • Disconnect the LCD cable from the motherboard by removing the tape on the LCD connector, then gently pulling out the ribbon cable.

  9. Acer Chromebook 14 CB3-431-C3WS Motherboard Replacement: 手順 9、 3の画像 1 Acer Chromebook 14 CB3-431-C3WS Motherboard Replacement: 手順 9、 3の画像 2 Acer Chromebook 14 CB3-431-C3WS Motherboard Replacement: 手順 9、 3の画像 3
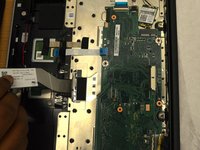
    • Disconnect the LCD cable from the motherboard by gently pulling on the cable.

  10. Acer Chromebook 14 CB3-431-C3WS Motherboard Replacement: 手順 10、 1の画像 1
    • Disconnect the trackpad by pulling on the trackpad connector cable.

  11. Acer Chromebook 14 CB3-431-C3WS Motherboard Replacement: 手順 11、 2の画像 1 Acer Chromebook 14 CB3-431-C3WS Motherboard Replacement: 手順 11、 2の画像 2
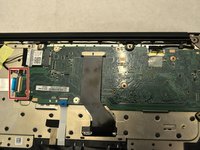
    • Disconnect the daughterboard from the motherboard by gently removing the daughterboard cable from the motherboard connector.

  12. Acer Chromebook 14 CB3-431-C3WS Motherboard Replacement: 手順 12、 2の画像 1 Acer Chromebook 14 CB3-431-C3WS Motherboard Replacement: 手順 12、 2の画像 2
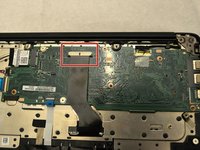
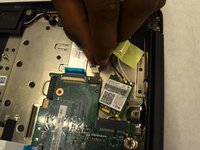
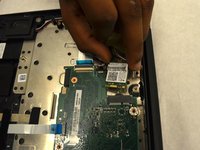
    • Remove the electrical tape covering the screw that holds the Wi-Fi card in place.

    • Remove the single 4mm JIS #0 screw that holds the Wi-Fi card in place.

  13. Acer Chromebook 14 CB3-431-C3WS Motherboard Replacement: 手順 13、 1の画像 1
    • Remove the seven 4mm JIS #0 screws that hold the motherboard in place.

  14. Acer Chromebook 14 CB3-431-C3WS Motherboard Replacement: 手順 14、 1の画像 1
    • Gently remove the motherboard.

終わりに

To reassemble your device, follow these instructions in reverse order.

3 の人々がこのガイドを完成させました。

作成者

2人の作成者と共同で作成されました。

Samantha Postma

メンバー登録日: 10/15/19

1,238 ポイント

6のガイドは作成済み

チーム

Grand Valley State University, Team S1-G3, DeVasto Fall 2019 Grand Valley State University, Team S1-G3, DeVasto Fall 2019人のメンバー

GVSU-DEVASTO-F19S1G3

5 メンバー

6のガイドは作成済み

0 件のコメント

コメントを追加

統計データ:

過去 24時間: 0

過去 7 日: 3

過去 30 日: 20

今までの合計 1,571