メインコンテンツにスキップ

Acer Aspire Switch 10 SW5-012-18MY USB Port Replacement

必要な工具と部品

  1. Acer Aspire Switch 10 SW5-012-18MY USB Port Replacement, USB Port: 手順 1、 3の画像 1 Acer Aspire Switch 10 SW5-012-18MY USB Port Replacement, USB Port: 手順 1、 3の画像 2 Acer Aspire Switch 10 SW5-012-18MY USB Port Replacement, USB Port: 手順 1、 3の画像 3
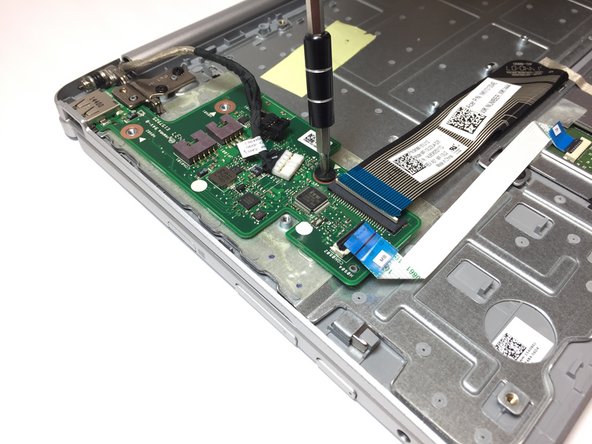
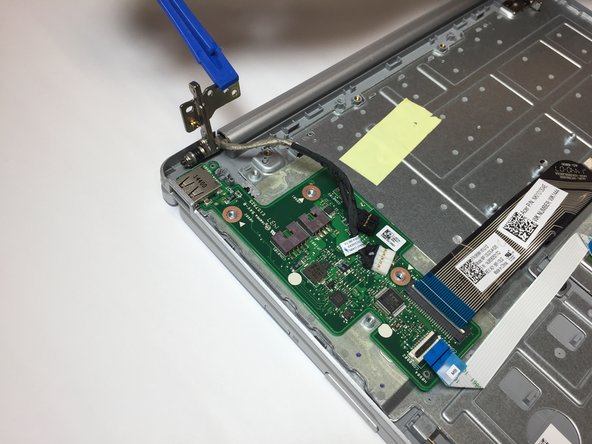
    • Remove the 8, 5.25 mm screws on the back cover using the screwdriver.

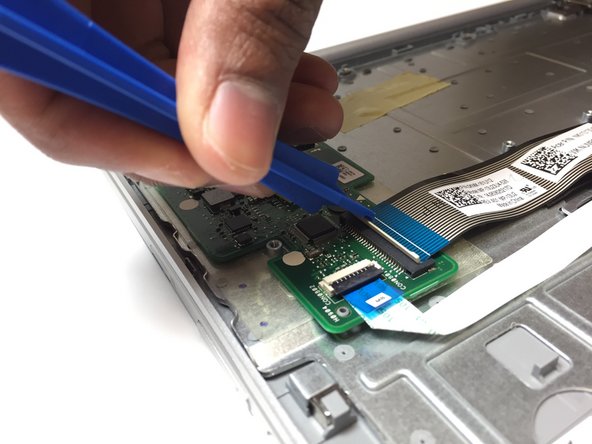
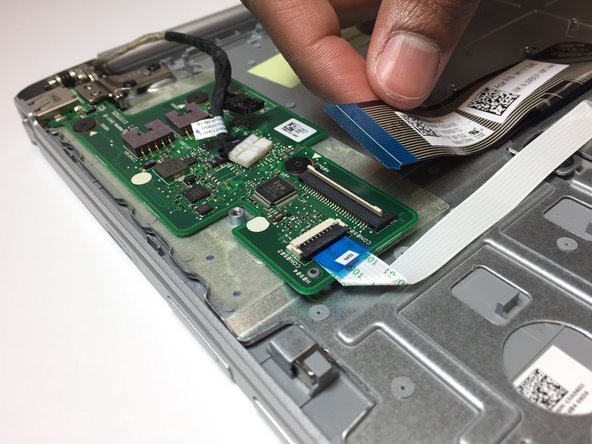
    • Carefully remove the back cover using the opening tool.

  2. Acer Aspire Switch 10 SW5-012-18MY USB Port Replacement: 手順 2、 3の画像 1 Acer Aspire Switch 10 SW5-012-18MY USB Port Replacement: 手順 2、 3の画像 2 Acer Aspire Switch 10 SW5-012-18MY USB Port Replacement: 手順 2、 3の画像 3
    • Remove the yellow tape from the circuit board that is connected to the USB port.

    • Carefully unplug the two bundled cable connectors by pulling on them.

  3. Acer Aspire Switch 10 SW5-012-18MY USB Port Replacement: 手順 3、 3の画像 1 Acer Aspire Switch 10 SW5-012-18MY USB Port Replacement: 手順 3、 3の画像 2 Acer Aspire Switch 10 SW5-012-18MY USB Port Replacement: 手順 3、 3の画像 3
    • Flip up the ZIF connector that holds the larger ribbon cable in place with the opening tool.

    • Carefully unplug the larger ribbon cable by pulling on its blue tab.

  4. Acer Aspire Switch 10 SW5-012-18MY USB Port Replacement: 手順 4、 3の画像 1 Acer Aspire Switch 10 SW5-012-18MY USB Port Replacement: 手順 4、 3の画像 2 Acer Aspire Switch 10 SW5-012-18MY USB Port Replacement: 手順 4、 3の画像 3
    • Flip up the small ZIF connector that holds the smaller ribbon cable in place with the opening tool.

    • Carefully unplug the smaller ribbon cable by pulling on its blue tab.

  5. Acer Aspire Switch 10 SW5-012-18MY USB Port Replacement: 手順 5、 3の画像 1 Acer Aspire Switch 10 SW5-012-18MY USB Port Replacement: 手順 5、 3の画像 2 Acer Aspire Switch 10 SW5-012-18MY USB Port Replacement: 手順 5、 3の画像 3
    • Remove the 3, 2.5 mm screws on the circuit board.

  6. Acer Aspire Switch 10 SW5-012-18MY USB Port Replacement: 手順 6、 2の画像 1 Acer Aspire Switch 10 SW5-012-18MY USB Port Replacement: 手順 6、 2の画像 2
    • Remove the 2, 4.25 mm screws on the security tab.

  7. Acer Aspire Switch 10 SW5-012-18MY USB Port Replacement: 手順 7、 3の画像 1 Acer Aspire Switch 10 SW5-012-18MY USB Port Replacement: 手順 7、 3の画像 2 Acer Aspire Switch 10 SW5-012-18MY USB Port Replacement: 手順 7、 3の画像 3
    • Lift the security tab so that it will be out of the way when you remove the circuit board.

    • Using your fingers may be easier than using the opening tool for this particular step, although both can be used.

  8. Acer Aspire Switch 10 SW5-012-18MY USB Port Replacement: 手順 8、 3の画像 1 Acer Aspire Switch 10 SW5-012-18MY USB Port Replacement: 手順 8、 3の画像 2 Acer Aspire Switch 10 SW5-012-18MY USB Port Replacement: 手順 8、 3の画像 3
    • Remove the circuit board by lifting it up with the opening tool.

    • The USB port is attached to this circuit board you have just removed. To replace the USB port on this piece, please go to the page How To Solder and Desolder Connections.

終わりに

To reassemble your device, follow these instructions in reverse order.

作成者

3人の作成者と共同で作成されました。

Grecia Corrada

メンバー登録日: 03/19/18

1,134 ポイント

6のガイドは作成済み

チーム

Baylor, Team S3-G3, Williams Spring 2018 Baylor, Team S3-G3, Williams Spring 2018人のメンバー

BU-WILLIAMS-S18S3G3

3 メンバー

6のガイドは作成済み

0 件のコメント

コメントを追加

統計データ:

過去 24時間: 0

過去 7 日: 3

過去 30 日: 20

今までの合計 1,583