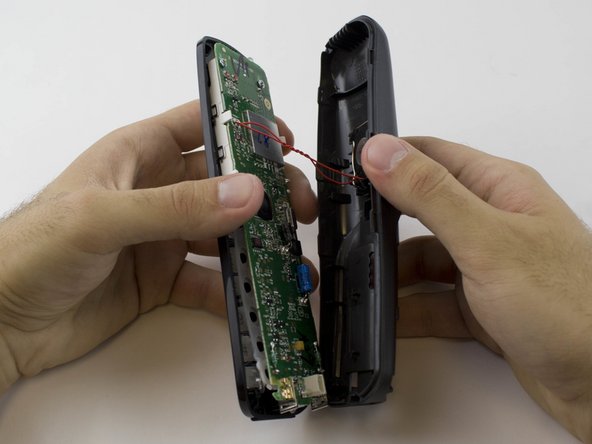
メインコンテンツにスキップ

ATT EL52300 Speaker Replacement

必要な工具と部品

  1. ATT EL52300 Speaker Replacement, Battery: 手順 1、 2の画像 1 ATT EL52300 Speaker Replacement, Battery: 手順 1、 2の画像 2
    • Find the bump where the battery cover meets the phone. Put your thumb here, and push and slide the cover down.

  2. ATT EL52300 Speaker Replacement: 手順 2、 1の画像 1
    • Unplug the battery by squeezing your hands on the small white plug and lifting it up.

    • Do not pull on the wire itself because you might damage the wire!

    • The battery is now detached and ready to be removed by lifting it out.

  3. ATT EL52300 Speaker Replacement, Motherboard: 手順 3、 2の画像 1 ATT EL52300 Speaker Replacement, Motherboard: 手順 3、 2の画像 2
    • Remove the two 3.75 mm screws with a PH1 screwdriver.

  4. ATT EL52300 Speaker Replacement: 手順 4、 2の画像 1 ATT EL52300 Speaker Replacement: 手順 4、 2の画像 2
    • Use a plastic opening tool to remove the handset case.

    • Be careful to not lift the case too far as the ringer cable is attached to the case.

  5. ATT EL52300 Speaker Replacement: 手順 5、 2の画像 1 ATT EL52300 Speaker Replacement: 手順 5、 2の画像 2
    この手順で使用する道具:
    Anti-Static Wrist Strap
    $7.95
    購入する
    • Remove the two 3.65 mm screws on the motherboard with a PH1 screwdriver.

    • Use an anti-static wrist strap to prevent damage to the motherboard.

  6. ATT EL52300 Speaker Replacement, Speaker: 手順 6、 1の画像 1
終わりに

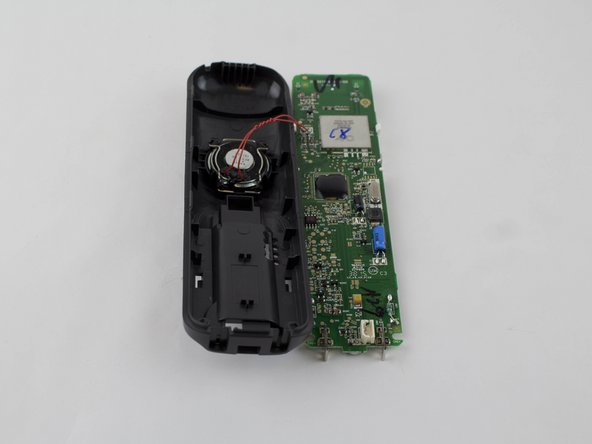
To reassemble your device, follow these instructions in reverse order.

作成者

4人の作成者と共同で作成されました。

Eddie Barnes

メンバー登録日: 02/10/16

323 ポイント

1ガイドが承認済み

チーム

USF Tampa, Team 1-1, Sullivan Spring 2016 USF Tampa, Team 1-1, Sullivan Spring 2016人のメンバー

USFT-SULLIVAN-S16S1G1

4 メンバー

10のガイドは作成済み

0 件のコメント

コメントを追加

統計データ:

過去 24時間: 0

過去 7 日: 0

過去 30 日: 0

今までの合計 368