メインコンテンツにスキップ

4Sight 9 Digitizer Replacement

必要な工具と部品

  1. 4Sight 9 Digitizer Replacement, Cover: 手順 1、 2の画像 1 4Sight 9 Digitizer Replacement, Cover: 手順 1、 2の画像 2
    • Place the tablet on its side so that the two screws are facing upward.

    • Remove two 1 mm screws from the left side of the tablet using a Phillips #00 screwdriver.

  2. 4Sight 9 Digitizer Replacement: 手順 2、 1の画像 1
    • Pry the case away from the device slowly by sliding a plastic opening tool along the device.

    • Once loosened, use your hands to separate the case from the device.

  3. 4Sight 9 Digitizer Replacement: 手順 3、 2の画像 1 4Sight 9 Digitizer Replacement: 手順 3、 2の画像 2
    • Hold the positive and negative wires as close as possible to the speaker.

    • Use an opening tool and fingers to simultaneously lift the speaker from the cover.

  4. 4Sight 9 Digitizer Replacement, Motherboard: 手順 4、 1の画像 1
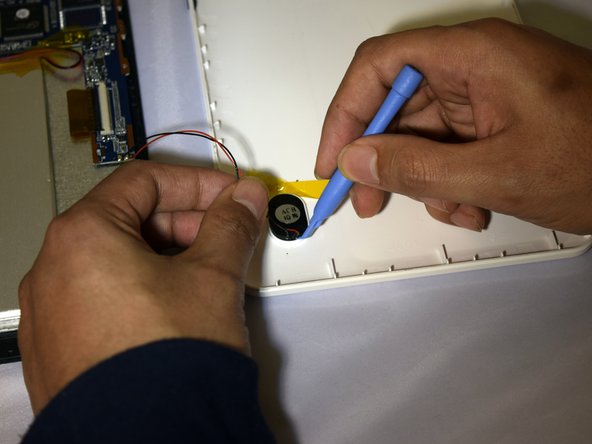
    • Use soldering gun to remove the positive and negative wires connecting the battery to the circuit board.

    • For a complete guide on how to solder, click here.

  5. 4Sight 9 Digitizer Replacement: 手順 5、 2の画像 1 4Sight 9 Digitizer Replacement: 手順 5、 2の画像 2
    • Grip the ribbon located at the far end of the circuit board with a plastic spudger tool.

    • Put pressure on the connector until the clasp comes undone.

    • Gently pull up on electrical ribbon until it disconnects from circuit board.

  6. 4Sight 9 Digitizer Replacement: 手順 6、 2の画像 1 4Sight 9 Digitizer Replacement: 手順 6、 2の画像 2
    • Remove the second electrical ribbon from the motherboard.

    • Use the technique for the previous ribbon.

  7. 4Sight 9 Digitizer Replacement: 手順 7、 1の画像 1
    • Using #00 Phillips Screwdriver, remove the four 1mm screws holding the circuit board to the device.

  8. 4Sight 9 Digitizer Replacement: 手順 8、 2の画像 1 4Sight 9 Digitizer Replacement: 手順 8、 2の画像 2
    • With fingers, grip the green Wi-Fi connector.

    • Gently pull up on connector to remove tape holding the connector in place.

  9. 4Sight 9 Digitizer Replacement: 手順 9、 1の画像 1
    • Using your fingers, gently lift the motherboard.

  10. 4Sight 9 Digitizer Replacement, Digitizer: 手順 10、 3の画像 1 4Sight 9 Digitizer Replacement, Digitizer: 手順 10、 3の画像 2 4Sight 9 Digitizer Replacement, Digitizer: 手順 10、 3の画像 3
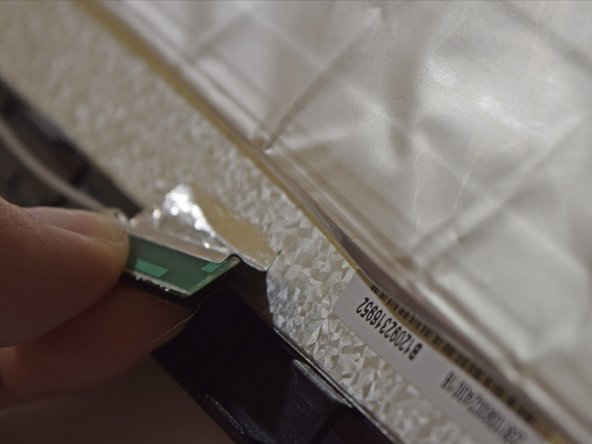
    • Insert plastic prying tool under screen and exert pressure, pulling upward.

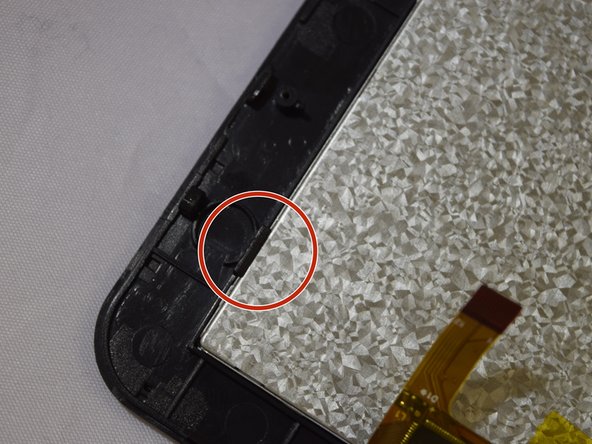
    • Repeat this strep around each corner of screen until it pops off.

  11. 4Sight 9 Digitizer Replacement: 手順 11、 1の画像 1
    • Place heating pad on glass frame in order to loosen adhesive for 3 to 5 minutes.

  12. 4Sight 9 Digitizer Replacement: 手順 12、 1の画像 1
    • Use fingers to gently pull digitizer off of device.

終わりに

To reassemble your device, follow these instructions in reverse order.

4 の人々がこのガイドを完成させました。

作成者

3人の作成者と共同で作成されました。

Hali Ramirez

メンバー登録日: 04/07/15

628 ポイント

4のガイドは作成済み

チーム

Eastern Washington University, Team 1-2, Plummer Spring 2015 Eastern Washington University, Team 1-2, Plummer Spring 2015人のメンバー

EWU-PLUMMER-S15S1G2

4 メンバー

10のガイドは作成済み

0 件のコメント

コメントを追加

統計データ:

過去 24時間: 1

過去 7 日: 1

過去 30 日: 15

今までの合計 1,131