はじめに
If you have a legacy HP LaserJet HP no longer supports (or doesn’t provide a “modern” driver, and the “legacy” driver no longer works, like the LaserJet 1012), or want a single driver that works for multiple printers, this guide will show you how to install and use the HP UPD on your Windows system.
Note: Some printers have problems with their respective model-specific utilities with the HP UPD. This usually affects older models like the P2015, P2035, P2055, and M401 series. This may be fixed on the newer JetIntelligence (DS) models, but I have not tested it and cannot guarantee the driver will coexist.
CAUTION: IF YOU INTEND TO USE THE ORIGINAL HP PRINTER UTILITIES, YOU USUALLY HAVE TO USE THE ORIGINAL DRIVER (at least on pre-2016 models such as the M401/M425 series). This is generally a customized version of the HP UPD driver. As this is complex to test, I will not test it; assume this is the case. If it works with the UPD, it's a bonus.
OUT OF PRINCIPLE, l AM NOT TESTING THE NEWER DS MODELS FOR USE OF THE DRIVER UTILITIES WITH THE HP UPD. HP's newer printers have even more dreadful DRM that's worse than the HP DS "feature" by adding a 3rd party toner block requiring genuine virgin HP toner (HP+, denoted with an "e" in the model).
Even if I got the unit used and verified it isn't a dreaded HP+ ("e") model from an upgrade and only took it to keep it out of a landfill due to a very agreeable page count, I will not include the results in this guide. HP no longer sells them but refuses to unlock the firmware as a goodwill gesture.
The issue is once this additional "feature" is enabled, it cannot be disabled and locks you out of the HP smart app if you dare not use genuine virgin toner.
-
-
Find out what print languages your printer supports. The LaserJet Pro M401 series supports PCL6 and PostScript. However, PCL6 is recommended when possible.
-
Get your printer ready for setup. If you use USB, connect the printer now. If networked, make sure to get your printers IP address now as it will be needed later on.
-
-
-
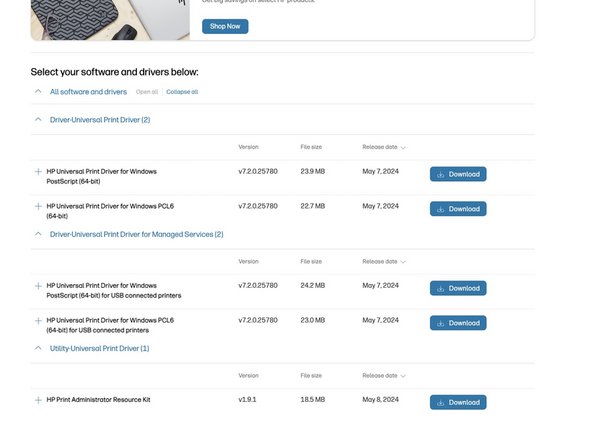
Once you know what print language(s) your printer supports, download the best one for your printer. The driver can be found on the HP website.
-
-
-
At the installation screen, select USB mode- Plug and Play.
-
Once you select the mode, pick the options you wish to use. While these settings can be changed, leave it as-is unless you understand what this does to the Windows driver store.
-
Click Next and the files will be copied to your computer.
-
-
-
-
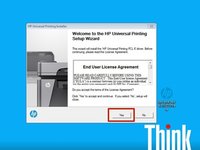
After the driver loads, agree to the license.
-
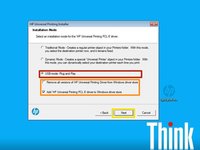
Once you agree to the license, you will be asked which installation mode you want to use. Select Dynamic Mode and click Next.
-
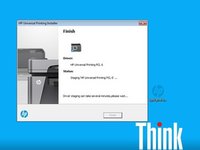
After selecting Dynamic Mode, click Next. The printer driver will be installed alongside a "universal printer".
-
Once the driver is installed, manual configuration and a static IP address on the printer are REQUIRED. The printer is configured via IP address with this method.
-
-
-
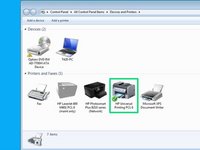
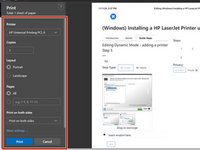
Select a file to print and select the HP Universal Printing PCL6 "printer". A box to select a printer will immediately pop on your screen.
-
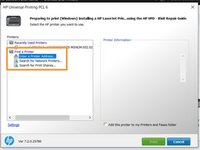
Once the HP printer queue comes up, select Add a printer address or Search for printer addresses and enter the IP address setup on your printer, if you enter the IP address manually.
-
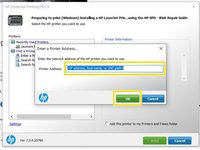
Manual IP entry only Enter the IP address and click Ok. The printer will now be added.
-
-
-
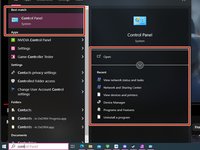
In the search bar, search for Control panel. This will open the legacy control panel on Windows 10 and 11.
-
Select Devices and Printers (Icon View) or View Devices and Printers (Category View), and then you will see the option in the top bar that says Add a Printer. Select this option, and pick the appropriate option for your specific printer.
-
-
-
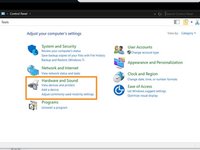
Find Devices and Printers. The location will vary based on what version of Windows is installed. Search for Control panel and find Devices and Printers.
-
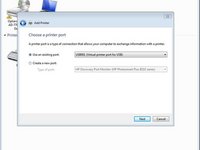
Click Add a Printer. If your printer uses USB, select Add a Local printer. For networked printers, select Add a Network, Wireless, or Bluetooth printer.
-
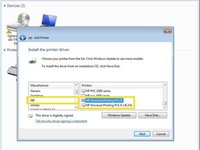
Allow your computer to populate the driver list. Find HP and then locate the driver that says HP Universal Printing (PCL6/PostScript). Select the driver and click Next.
-
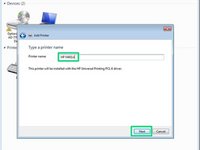
Name your printer, then click Next.
-
-
-
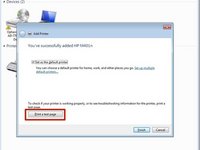
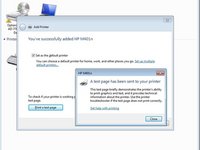
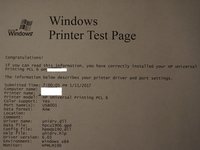
After the printer is installed, print a test page to make sure it works. Click Print a test page and make sure it works.
-


To reassemble your device, follow these instructions in reverse order.
To reassemble your device, follow these instructions in reverse order.
2 の人々がこのガイドを完成させました。

チーム

コメント 1 件
I bought an HP printer specified by laserjet. I have followed a few steps to install this printer via HP UPD. at first search for the correct driver, then install it first in a USB mode after that in dynamic mode. then set the configuration pf printer and after completing all the steps just print once for a test.
www.facebook.com