はじめに
このガイドはNintendo Switch.の左側Joy-Con用ボタンを交換するための手順です。このガイドには右側Joy-Con用の交換方法は含んでいませんのでご注意ください。右側用のJoy-Conボタンの交換手順は若干異なります。左側Joy-Conのボタンの交換手順は、本体を開口してバッテリーやマザーボードを含むJoy-Con内部のパーツを取り出します。それから、故障しているボタンを取り出して、交換します。
必要な工具と部品
-
-
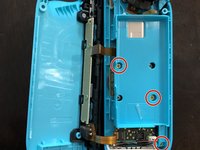
Y00ドライバーを使って、バックケース上の4本のネジを外してください。
-
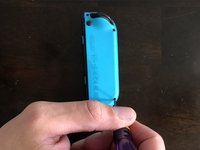
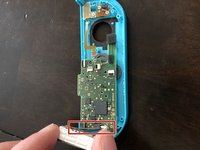
プラスチックの開口ツールもしくは、開口ピックをレールの付いていない側のJoy-Con側面に差し込み、ゆっくりと下向きにこじ開けて、バックプレートを外します。
-
-


デバイスを再組み立てするには、これらのインストラクションを逆の順番に従って作業を進めてください。作業終了後、マザーボードのボタンを締め直す時には、きつく締めすぎないでください。マザーボードにきつくボタンが締められると、ボタンを正しく押せなくなります。
39 の人々がこのガイドを完成させました。
以下の翻訳者の皆さんにお礼を申し上げます:
100%

Midori Doiさんは世界中で修理する私たちを助けてくれています! あなたも貢献してみませんか?
翻訳を始める ›
チーム

Eastern Washington University, Team S3-G2, Crane Fall 2018 Eastern Washington University, Team S3-G2, Crane Fall 2018人のメンバー
EWU-CRANE-F18S3G2
3 メンバー
9のガイドは作成済み
10件のガイドコメント
My left directional button is nonresponsive. Can I fix this by dropping in a replacement left directional button? Would the rubber cover need to be replaced as well?
just incase you havent done so already, it might not be the button. it might be the motherboard, connectors, and a whole slew of other problems.
What type of switch is the minus button? It’s on the same ribbon as the L micro switch. My L switch is bad and I’m replacing it I just would like to know the name of the type of switch used on the minus button.
Thank you for the helpful guide! Is there a guide for the right Joy Con available anywhere?
ericsajedi - 返信
Eric, no one has made a guide for the right Joy-Con yet! I’ve taken them both apart and the buttons are pretty similar. I think you can use Joshua’s button guide here and this joystick guide to guide you to the buttons in the other Joy-Con! If you do end up attempting it, consider taking some photos and making a guide for future right Joy-Con fixers. :)