メインコンテンツにスキップ

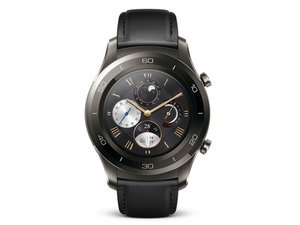
The 2nd Gen Huawei Watch is an Android smartwatch released in 2017, also known as Huawei Watch 2 Classic LEO-BX9. Model number: Leo-B19.

6回答 すべてを表示

How can I take off the sensor from the back plate when opened?

I have to change the backside of my Huawei Watch 2 because of burned out connections for charging.

I opened my Watch 2 and there is a cable going from the mainboard to the sensors of the backplate. I have to take off the sensors from the backplate and have to put it to the new backplate.

But I have no idea how to do it. Mybe with heat? It is very hard do take it off without damage
この質問に回答する 同じ問題があります

この質問は役に立ちましたか?

スコア 2
コメントを追加

5件の回答

最も参考になった回答

I managed to loosen the magnet (the block at the botton) by prying at the edges between the plastic which is part of the back cover (the one that is already on the new one) and the piece.

The black plastic dots holding the pulse sensor plate in the center seem to be molded, so I wedged a tool under the metal place and “broke” it off. It then fits on the unmolded plastic pins on the new back cover. HOWEVER, my watch is showing "Tighten band and keep wrist still and level. Try again” when I try to measure my pulse. So apparently even after multiple tries I failed to properly fix it to the new back cover …

このアンサーは役に立ちましたか?

スコア 1

1件のコメント:

For the sensor, I also initially had the error message, that the wrist band has to be tightened: I forgot to transfer the ring from the old back that is around the three "windows" with two golden contacts to the new back. After this, it works like charm!

さんによる

コメントを追加

I had the same Problem.

You will need to break the four black points, take it off (there is a square ring of adhesive for the middle sensor, that you will scratch off). The new backplate had a new adhesive ring, and there are four black pins, where the new sensor is mounted on. And with heat (I used a solder iron), you can melt the pins and they will then hold the sensor in place, the same way the old plate did.

このアンサーは役に立ちましたか?

スコア 1
コメントを追加

See the battery replacement guide - Huawei Watch 2 Battery Assembly Replacement

Step 7. Looks like the ribbon cable pops off at the connector.

このアンサーは役に立ちましたか?

スコア 0
コメントを追加

I have the same problem. The battery tutorial doesn't help. The question is not how to loosen the ribbon cable, that's easy.

Block Image

The question is how to remove the sensor and other parts from the old back cover (right on the photo) to the new back cover (left on the photo).

Anyone know how to do this?

このアンサーは役に立ちましたか?

スコア 0
コメントを追加

The soldering iron was excellent advice! I just performed this delicate surgery myself and used an Exacto knife to slice the top of the old plastic posts off that hold the sensor disk in place. Then it was just a matter of prying the sensor disk off (although that middle square was stuck on there pretty good). I smashed the sensor disk down on the new backplate after aligning the posts and melted down the posts slightly with a soldering iron and the sensor disk is staying in place great. The magnet or vibrator motor or whatever that is at the bottom took quite a bit of effort to remove and transfer (I'm guessing it's the vibration motor as there are two tiny electrical connection arms at the sides, and after I removed it the old backplate would still stick to the charger). Eventually I cut enough of the old glue and pried back enough of the surrounding plastic rectangle that I was able to finally pry it up. I then used a little hot glue to secure it to the new backplate. I am extremely happy to report that the watch charges on the first try now, every time. No more fighting, wiggling, clamping, or reseating required which is the battle I had been fighting for quite a few months.

このアンサーは役に立ちましたか?

スコア 0
コメントを追加

回答を追加する

Trebor さん、ありがとうございました!
統計データ:

過去 24時間: 0

過去 7 日: 7

過去 30 日: 13

今までの合計 525