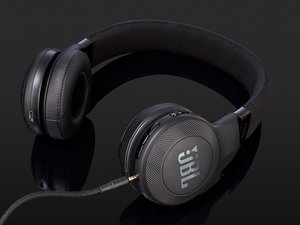
I'm going to try repairing by purchasing this wire Aipinchun 5 Meters/Lot DIY Replacement Earphone Cable Wire Cord Repair for Bluetooth-Compatible Headphone 9 Cores from AliExpress as well as some replacement ear pads. You need to peel off the ear pads (extremely sticky tape between the leather pad and the plastic cup, use a thin pry tool), remove the three screws inside the ear cup, take off the textured ring on the outside of each side of the headphone (I used my fingernail, sources online say it's glued but I just encountered 3 plastic clips), unscrew underneath that, take a photo and then desolder of all the wires, unscrew the two 2mm triangle screws at the top of each earphone (I used the iFixIt Y1 driver since I only had a 3mm triangle), poke the hinge out, pry one plastic end covering the fabric headband, use a razor to loosen just the very end of the fabric (lightly glued/melted down), peel the fabric back to the halfway point of the band, gently peel back the foam from the plastic at the midway point, and loosen the wire from its anchor.
This is the spot I'm at, we'll see if the rest goes well:
At that point you should be able to unthread the old and rethread the new wire (you could try cutting and supergluing the ends together to help pull the new wire through, or use some other sacrificial solid core wire as a fish tape if it's hard). Remember that you need enough wire to extend both headphones at the same time, plus enough to reach all the way to the speakers. Maybe thread the wire first before cutting. The extra is stored in the headband above each ear in a sort of zigzag pattern, consider adding a drop of super glue to the center so there's no migration. Refer to the old photos to resolder, you'll need to strip the sheathing, gently burn or sand off the enamel from the tip of each wire strip, tin the wire, and resolder. I suggest using the extra wire cores to double up on the thicker cables used for power, though this is theoretically optional and you could possibly get away with the 6 core wire sold by the same people above.


 1
1  1
1 
 1
1 


