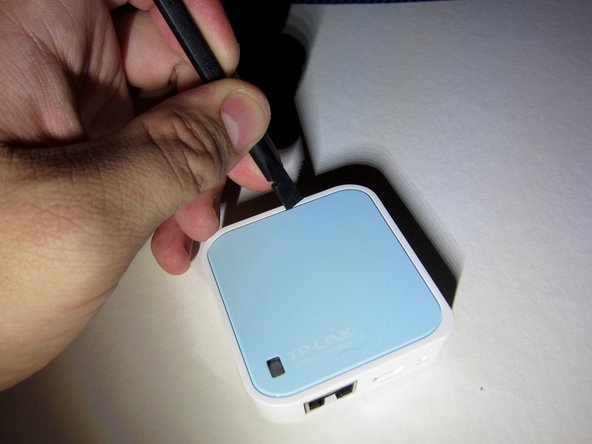
メインコンテンツにスキップ

必要な工具と部品

この分解は修理ガイドでは ありません。 お持ちのTP-Link TL-WR802N N300 Nano Routerを修理する際は、iFixitの修理ガイドをご利用ください。

  1. TP-Link TL-WR802N N300 Nano Router Teardown, TP-Link TL-WR802N N300 Nano Router Teardown: 手順 1、 3の画像 1 TP-Link TL-WR802N N300 Nano Router Teardown, TP-Link TL-WR802N N300 Nano Router Teardown: 手順 1、 3の画像 2 TP-Link TL-WR802N N300 Nano Router Teardown, TP-Link TL-WR802N N300 Nano Router Teardown: 手順 1、 3の画像 3
    • Inside the device contains:

    • Speeds up to 300 Mbps; 2x2 MIMO antenna setup; 5 modes which can turn it into a WiFi extender, or a Wi-Fi client to connect wired only devices to Wi-Fi.

    • On the outside:

    • Green LED indicator

    • 10/100 Ethernet port; can be used as a WAN or LAN

    • Micro USB for power

    • Recessed Reset Button

  2. TP-Link TL-WR802N N300 Nano Router Teardown: 手順 2、 3の画像 1 TP-Link TL-WR802N N300 Nano Router Teardown: 手順 2、 3の画像 2 TP-Link TL-WR802N N300 Nano Router Teardown: 手順 2、 3の画像 3
    • On the top of the router, there is a blue panel that is the case. It is held on by clips, holding it in place.

    • The top panel can be removed by using a small flat bladed screwdriver and inserting it into the gap between the case and the panel itself.

    • You have to use a little force, but not too much force as you'll break those clips!

  3. TP-Link TL-WR802N N300 Nano Router Teardown: 手順 3、 2の画像 1 TP-Link TL-WR802N N300 Nano Router Teardown: 手順 3、 2の画像 2
    • Once the cover is loose, the cover can be removed, revealing the router's main circut board.

  4. TP-Link TL-WR802N N300 Nano Router Teardown: 手順 4、 2の画像 1 TP-Link TL-WR802N N300 Nano Router Teardown: 手順 4、 2の画像 2
    • With the top panel removed, we can now see the internal components.

    • A spudger was used to lift the circuit board out of the case.

    • There was no room to wedge the board out of the case, so one of the antennas was used with the top of the spudger to lift the board out of the case.

  5. TP-Link TL-WR802N N300 Nano Router Teardown: 手順 5、 1の画像 1
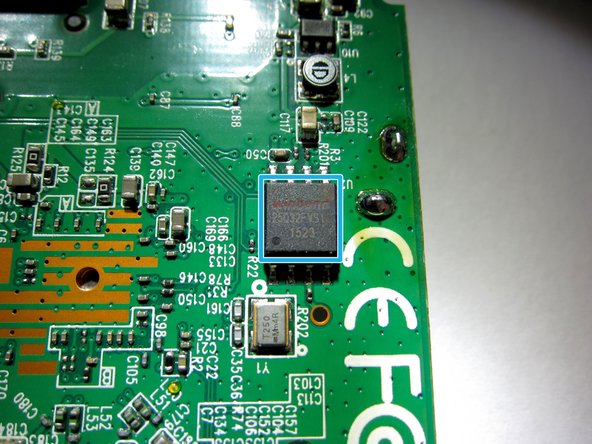
    • On the front of the board:

    • Qualcomm Atheros QCA9533-AL3A SoC

    • Running at a speed of 560 MHz

    • Uses the MIPS 24Kc architecture

    • Contains an integrated Ethernet switch and wireless radio built in.

    • 2 soldered antennas that allows a MIMO configuration of 2x2:2.

    • Most of the information that I can obtain are from Wikidevi at: https://wikidevi.com/wiki/Qualcomm_Ather...

  6. TP-Link TL-WR802N N300 Nano Router Teardown: 手順 6、 3の画像 1 TP-Link TL-WR802N N300 Nano Router Teardown: 手順 6、 3の画像 2 TP-Link TL-WR802N N300 Nano Router Teardown: 手順 6、 3の画像 3
    • Back of the board:

    • Zentel A3S56D40GTP-50L RAM chip with 32 MB

    • Windond 25Q32FVS1 SOIC Flash chip with 8 MB

  7. TP-Link TL-WR802N N300 Nano Router Teardown: 手順 7、 1の画像 1
    • And that's It!

    • The router in this teardown is v1.0. There is another version of the same router, called V2.0, which is virtually identical, however it will only accept firmware that was sold in that country.

    • For a very small device it can do alot! But it can do more if the OpenWrt/LEDE firmware was ported over.

    • Unfortunately, due to the limited amount of memory and RAM, OpenWrt and LEDE may not work as expected, as it expects more memory and RAM, therefore you can't turn it into say a OpenVPN client.

作成者

2人の作成者と共同で作成されました。

Peter Low

メンバー登録日: 03/26/11

281 ポイント

2のガイドは作成済み

8 件のコメント

Is it possible to remove the 2 antennas and ad external antennas instead… and how Should it be done…

Best regards

Anders Bech - 返信

Hi

Is it possible to remove the 2 antennas and replace them with external antennas instead… and how should this be done…

Best regards

Anders Bech - 返信

i’m sure you can just how you do it i’m not sure

Luke -

This TP Link Router is awesome. I like it. i think we can add external antennas in it.

Hashley - 返信

コメントを追加

統計データ:

過去 24時間: 3

過去 7 日: 19

過去 30 日: 86

今までの合計 10,881