メインコンテンツにスキップ

必要な工具と部品

この分解は修理ガイドでは ありません。 お持ちのSony VAIO PCG-61411Lを修理する際は、iFixitの修理ガイドをご利用ください。

  1. Sony VAIO PCG-61411L Teardown, Sony VAIO PCG-61411L Teardown: 手順 1、 3の画像 1 Sony VAIO PCG-61411L Teardown, Sony VAIO PCG-61411L Teardown: 手順 1、 3の画像 2 Sony VAIO PCG-61411L Teardown, Sony VAIO PCG-61411L Teardown: 手順 1、 3の画像 3
    • In this guide I'll be doing a full disassembly of a Sony VAIO PCG-61411L laptop. My hope is that you will find some helpful information here and possibly save some money! lets get started!

  2. Sony VAIO PCG-61411L Teardown: 手順 2、 1の画像 1
    • First unlock the battery with the sliding locks (marked with orange indicators), and lift battery up and out.

    • When working with laptops always remove batteries or charging cords first, if possible, as powering the unit while touching the components can be fatal to you or the device!

  3. Sony VAIO PCG-61411L Teardown: 手順 3、 3の画像 1 Sony VAIO PCG-61411L Teardown: 手順 3、 3の画像 2 Sony VAIO PCG-61411L Teardown: 手順 3、 3の画像 3
    • Next loosen the hard drive cover screws as shown (marked with red indicators picture 1) And remove the hard drive bay cover.

    • Remove screws from indicated areas (picture 2).

    • place screws in a safe location or container (I use powerade bottle caps to separate screws from different parts of a project)

    • Use the tab (indicated in picture 3) to pull the hard drive to the side and lift it free.

  4. Sony VAIO PCG-61411L Teardown: 手順 4、 3の画像 1 Sony VAIO PCG-61411L Teardown: 手順 4、 3の画像 2 Sony VAIO PCG-61411L Teardown: 手順 4、 3の画像 3
    • Loosen the screw marked (indicated in the red circle) and pull the RAM bay cover free. (the cover has plastic tabs on the sides and may take a few tries to free it.)

    • push the metal tabs on either side of the RAM chips, making them lean up slightly, and pull both chips free

  5. Sony VAIO PCG-61411L Teardown: 手順 5、 2の画像 1 Sony VAIO PCG-61411L Teardown: 手順 5、 2の画像 2
    • Remove 2 screws (indicated in first picture).

    • Pull CD drive from the laptop.

  6. Sony VAIO PCG-61411L Teardown: 手順 6、 3の画像 1 Sony VAIO PCG-61411L Teardown: 手順 6、 3の画像 2 Sony VAIO PCG-61411L Teardown: 手順 6、 3の画像 3
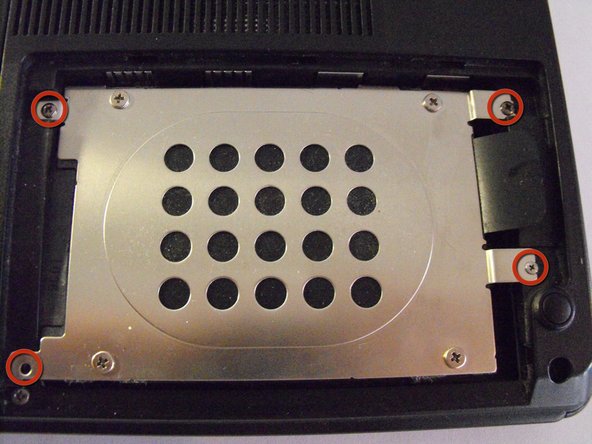
    • Remove the 15 screws indicated by red circles setting them aside in their own container

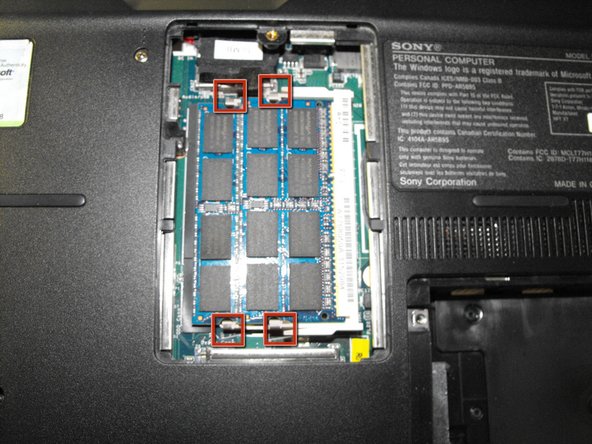
    • Remove the 3 screws indicated by yellow circles setting them aside in their own container as well

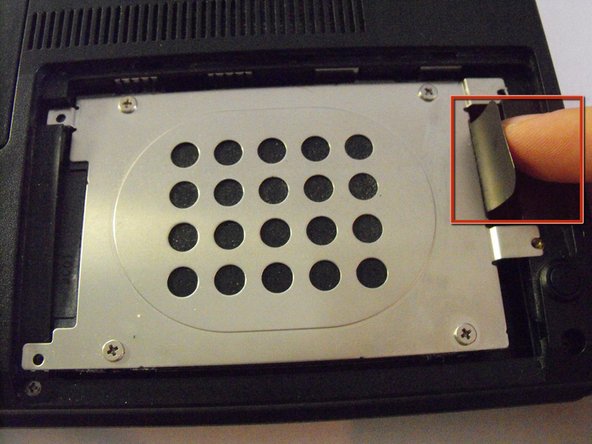
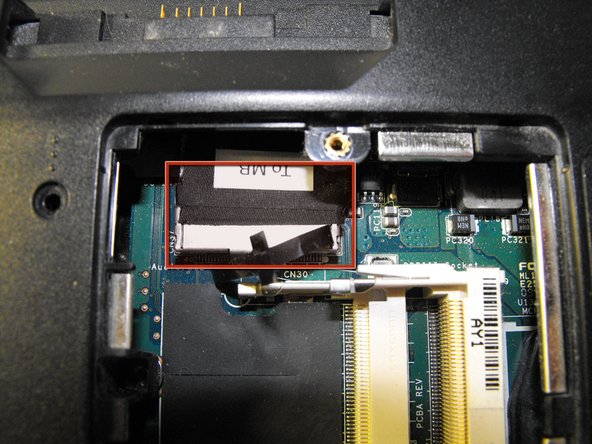
    • Pull up on tab in the RAM bay as indicated. (the black pull tab may detach, don't worry it will not affect performance)

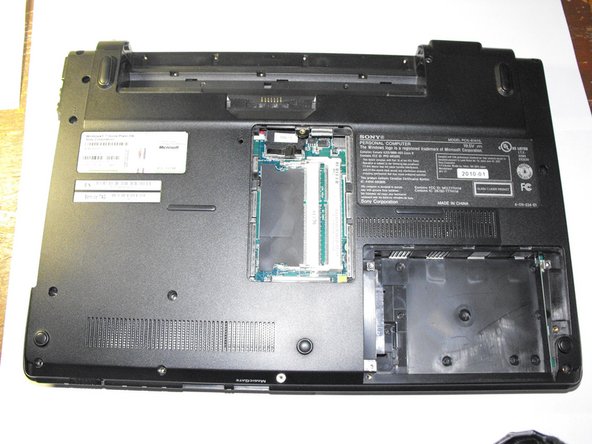
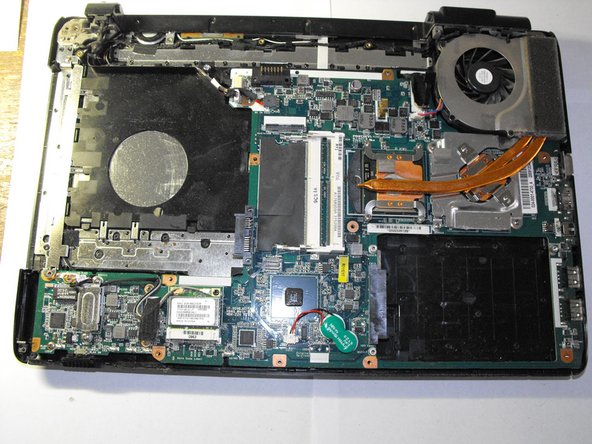
    • Gently begin to pull the bottom casing free

  7. Sony VAIO PCG-61411L Teardown: 手順 7、 2の画像 1 Sony VAIO PCG-61411L Teardown: 手順 7、 2の画像 2
    • Begin unplugging cords from the motherboard in designated locations

作成者

2人の作成者と共同で作成されました。

geekinthebasement

メンバー登録日: 10/21/12

181 ポイント

1ガイドが承認済み

チーム

Geek in the basement Geek in the basement人のメンバー

Business

1 メンバー

1のガイドは作成済み

2 件のコメント

I would have to say a partial disassembly, unless I'm missing pages somewhere?

Colm - 返信

As a matter of fact there are 20 (not 15) small black screws (in addition to the 3 silver ones) that hold down the bottom casing. Also, I could not pull the tab in the RAM bay, but was able to rotate the bottom casing around that cable to access the fan, which needed cleaning.

xjekeli - 返信

コメントを追加

統計データ:

過去 24時間: 2

過去 7 日: 11

過去 30 日: 35

今までの合計 20,554