メインコンテンツにスキップ

ビデオの概要

この分解は修理ガイドでは ありません。 お持ちのPlayStation VR2を修理する際は、iFixitの修理ガイドをご利用ください。

    • Spec wise the PS VR2 improves on some aspects of the original PS VR headset that set it apart from other competitor headsets.

    • Single OLED display with 2000 x 2040 per eye

    • Approximately 110º field of view

    • Refresh rate up to 120 Hz

    • Six-axis movement detection system (three-axis gyroscope, three-axle accelerometer)

    • Headset weight: 560 g (Around 50 g lighter than the previous model)

  1. Sony's PlayStation VR2 Teardown: 手順 2、 1の画像 1
    • Specs aside Sony has improved the headset significantly in terms of external design and setup.

    • The new PlayStation VR features 4 built-in cameras for inside-out tracking, removing the need for a camera.

    • This same system can also be used for viewing the viewer and the controllers.

    • Sony also simplified the setup process by removing the processor unit, which means that setup is as simple as plug and play.

    • Out of the box, you will get the headset, newly designed move controllers, earbuds, an extra USB-C-to-A cable, and the user manual.

  2. Sony's PlayStation VR2 Teardown: 手順 3、 3の画像 1 Sony's PlayStation VR2 Teardown: 手順 3、 3の画像 2 Sony's PlayStation VR2 Teardown: 手順 3、 3の画像 3
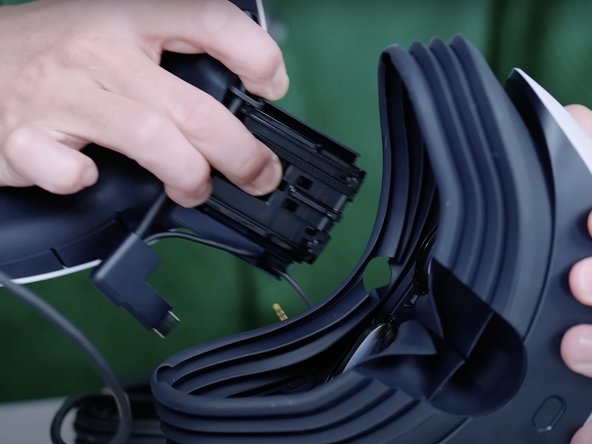
    • The headset features a similar headband and visor combination as the previous model, with the most significant change being that the headband can be detached without any tools.

    • Removing the headband is as easy as unplugging the audio and video cables and pressing a button between the light shield and the headband.

    • This small change makes swapping out cables, or headband replacements much easier, as you don't really need to disassemble the headset itself to remove the headband.

  3. Sony's PlayStation VR2 Teardown: 手順 4、 3の画像 1 Sony's PlayStation VR2 Teardown: 手順 4、 3の画像 2 Sony's PlayStation VR2 Teardown: 手順 4、 3の画像 3
    • The PS VR2 still relies on a rubber light shield block light, which means that we get the same washable surface.

    • The design of the light shield has changed significantly to accommodate for different shaped heads, and larger noses.

    • The holder for the light shield is held in with 4 screws. Once all the screws are removed we can simply remove the holder without any issue.

    • The exterior fastener is held in with only one screw. Removing the screw allows us to separate the fastener from the front of the headset.

  4. Sony's PlayStation VR2 Teardown: 手順 5、 3の画像 1 Sony's PlayStation VR2 Teardown: 手順 5、 3の画像 2 Sony's PlayStation VR2 Teardown: 手順 5、 3の画像 3
    • With the fastener removed, we can begin working on the front cover.

    • in total there are eight screws holding the front cover in place. four on the top and four on the bottom.

    • Once the screws have been removed we can finally get a look at what's inside

  5. Sony's PlayStation VR2 Teardown: 手順 6、 2の画像 1 Sony's PlayStation VR2 Teardown: 手順 6、 2の画像 2
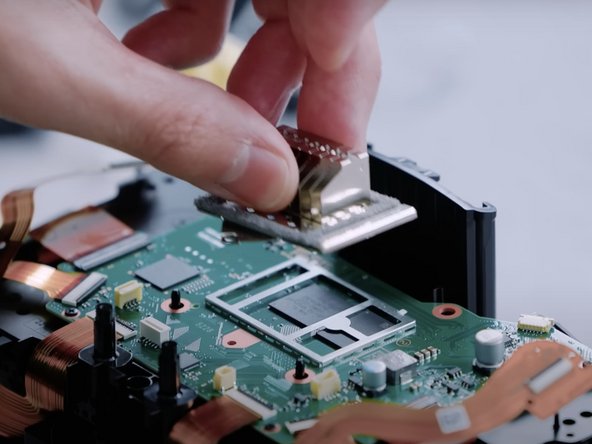
    • With the front cover removed, we can notice two significant changes.

    • The sea of flex cables that were in abundance in the previous headset has been reduced quite significantly. This makes potential repairs way less intimidating for anyone who would attempt to do so.

    • It is also worth pointing out that Sony designed the inside of the headset to be as symmetrical as possible. In theory, this should mean that repairs to one side should be as easy to do on one side as it is on the other.

    • We can also see that Sony has added a cooling fan. Presumably, this is meant for cooling the electronics inside, but also means that the same cooling system will prevent the lenses from fogging over.

    • It is also interesting that Sony decided to print their logo on the inside of their head set, where it would be normally covered. Perhaps they have every intention of having us repair their headsets.

  6. Sony's PlayStation VR2 Teardown: 手順 7、 3の画像 1 Sony's PlayStation VR2 Teardown: 手順 7、 3の画像 2 Sony's PlayStation VR2 Teardown: 手順 7、 3の画像 3
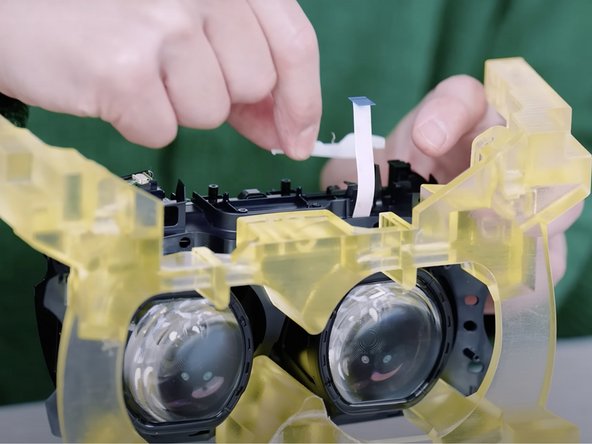
    • The bottom camera assembly can be removed. The only thing holding this assembly in place is two screws, and a few flex cables. With minimal fuss the assembly is free.

    • The previous headset used four LEDs for the front-facing tracking, all attached through one cable assembly. Having the upper and lower cameras in separate assemblies makes replacing these cameras much easier.

    • The bottom camera assembly also has two shock-absorbing rubber grommets. These are easily removed through the bottom of the assembly.

  7. Sony's PlayStation VR2 Teardown: 手順 8、 3の画像 1 Sony's PlayStation VR2 Teardown: 手順 8、 3の画像 2 Sony's PlayStation VR2 Teardown: 手順 8、 3の画像 3
    • The upper cameras each have their own assembly. Each is held down by one flex cable, and one screw.

  8. Sony's PlayStation VR2 Teardown: 手順 9、 2の画像 1 Sony's PlayStation VR2 Teardown: 手順 9、 2の画像 2
    • The button/microphone assembly can be removed. Other than the cables, the only thing holding the assembly in place, making it removable without any tools.

    • This assembly also allows for the microphone to easily slide out the side of the plastic housing. This means that replacing the microphone without scrapping the whole housing is completely possible.

  9. Sony's PlayStation VR2 Teardown: 手順 10、 3の画像 1 Sony's PlayStation VR2 Teardown: 手順 10、 3の画像 2 Sony's PlayStation VR2 Teardown: 手順 10、 3の画像 3
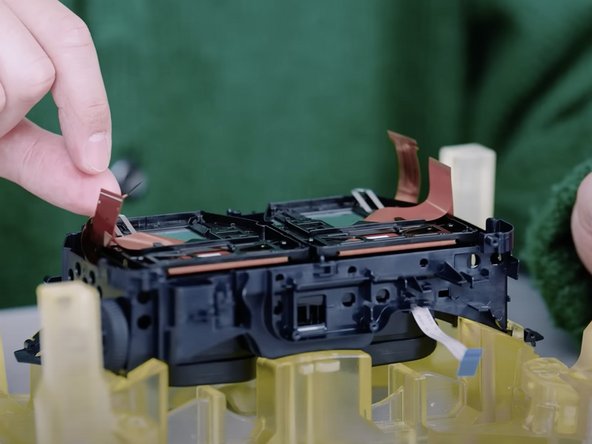
    • The button assembly itself holds the power button and the headsets microphone. One of the nicest things that is not mentioned is that both the microphone and the power button can actually be replaced independently of one another. This means that if one breaks, then the whole assembly is not trashed.

  10. Sony's PlayStation VR2 Teardown: 手順 11、 3の画像 1 Sony's PlayStation VR2 Teardown: 手順 11、 3の画像 2 Sony's PlayStation VR2 Teardown: 手順 11、 3の画像 3
    • The cooling system can now be removed. The fan is held to the duct by two screws, while the duct is secured to the headset by just one screw hidden under the fan.

  11. Sony's PlayStation VR2 Teardown: 手順 12、 3の画像 1 Sony's PlayStation VR2 Teardown: 手順 12、 3の画像 2 Sony's PlayStation VR2 Teardown: 手順 12、 3の画像 3
    • Heatsink can now be removed. This reveals the IC Chip for the headset.

    • Sony refers to the thermal conduction material as TIM, however the name is a shortening of Thermal Interface Material, which is actually a category of material that's inserted between the two components, and not the material itself. Best guess is that the material itself is a type of non-adhesive thermal glue.

  12. Sony's PlayStation VR2 Teardown: 手順 13、 2の画像 1 Sony's PlayStation VR2 Teardown: 手順 13、 2の画像 2
    • The flex cables for the cameras can be removed from the motherboard. No adhesive holds the ribbon cable down, and each sides cable can be detached independently.

  13. Sony's PlayStation VR2 Teardown: 手順 14、 2の画像 1 Sony's PlayStation VR2 Teardown: 手順 14、 2の画像 2
    • Slider base can be removed. Four screws hold the base in place.

  14. Sony's PlayStation VR2 Teardown: 手順 15、 3の画像 1 Sony's PlayStation VR2 Teardown: 手順 15、 3の画像 2 Sony's PlayStation VR2 Teardown: 手順 15、 3の画像 3
    • There is a small lever system for the headband adjustment system. We just need to remove the small ribbon cable attached to the logic board.

    • With the ribbon cable removed, we can finally remove the two levers that make up the locking system for the headband adjustment.

  15. Sony's PlayStation VR2 Teardown: 手順 16、 3の画像 1 Sony's PlayStation VR2 Teardown: 手順 16、 3の画像 2 Sony's PlayStation VR2 Teardown: 手順 16、 3の画像 3
    • Looking at the motherboard we can see that there are four flex cables (Top two for video, and the bottom two are for eye tracking), along with the audio cable in the top right corner.

  16. Sony's PlayStation VR2 Teardown: 手順 17、 2の画像 1 Sony's PlayStation VR2 Teardown: 手順 17、 2の画像 2
    • With the motherboard out of its housing, we can get a better look at some of the chips that are on the unit.

    • Overall the design itself is just a bit bigger then the MetaQuest Pro's motherboard

    • An in-depth chip identification guide can be found here.

  17. Sony's PlayStation VR2 Teardown: 手順 18、 3の画像 1 Sony's PlayStation VR2 Teardown: 手順 18、 3の画像 2 Sony's PlayStation VR2 Teardown: 手順 18、 3の画像 3
    • The plastic bench for the motherboard can be removed. Only four screws hold it in place. Once removed we can see the two lenses that make up the headset's optical assembly.

  18. Sony's PlayStation VR2 Teardown: 手順 19、 2の画像 1 Sony's PlayStation VR2 Teardown: 手順 19、 2の画像 2
    • With the bench removed, we can remove the audio jack's connector (This is different from the actual audio jack on the headband.

    • The connector sits in a small housing molded into the headset and can be removed without any tools.

  19. Sony's PlayStation VR2 Teardown: 手順 20、 3の画像 1 Sony's PlayStation VR2 Teardown: 手順 20、 3の画像 2 Sony's PlayStation VR2 Teardown: 手順 20、 3の画像 3
    • Work can begin for removing the Optical Unit. We can start by removing the springs for the depth of the lenses.

    • We can also remove the dial for the horizontal lens movement. This is easy removed with a Philips head screwdriver. Once taken off we can simply slide the metal rod out.

  20. Sony's PlayStation VR2 Teardown: 手順 21、 3の画像 1 Sony's PlayStation VR2 Teardown: 手順 21、 3の画像 2 Sony's PlayStation VR2 Teardown: 手順 21、 3の画像 3
    • Finally, we can remove the assembly for the lenses from the rest of the headset's housing.

    • Both lenses can be pulled right out and can be separated without any issue.

  21. Sony's PlayStation VR2 Teardown: 手順 22、 1の画像 1
    • Each individual lens assembly contains the following components.

    • Infrared Light LED emitters

    • Infrared Camera

    • The glass lense

  22. Sony's PlayStation VR2 Teardown: 手順 23、 3の画像 1 Sony's PlayStation VR2 Teardown: 手順 23、 3の画像 2 Sony's PlayStation VR2 Teardown: 手順 23、 3の画像 3
    • The IR Lights are connected to the rest of the lease assembly that via a ZIF connector.

    • IR Lights are hidden within a cap on the lenses. This can be popped off with the flat end of a Spudger.

    • And the lights can be pulled out without any issues.

  23. Sony's PlayStation VR2 Teardown: 手順 24、 3の画像 1 Sony's PlayStation VR2 Teardown: 手順 24、 3の画像 2 Sony's PlayStation VR2 Teardown: 手順 24、 3の画像 3
    • The IR Cameras are located on the side of the lenses. A simple screwdriver can remove the camera.

    • Believe it or not, this is the first time during the teardown that any adhesive can be found. The adhesive is really only to keep dust out from the inside of the lenses.

  24. Sony's PlayStation VR2 Teardown: 手順 25、 3の画像 1 Sony's PlayStation VR2 Teardown: 手順 25、 3の画像 2 Sony's PlayStation VR2 Teardown: 手順 25、 3の画像 3
    • The last part that can be removed from the lenses is the micro OLED display.

    • Much like the IR Camera, this is held in place with a few screws and a bit of adhesive.

  25. Sony's PlayStation VR2 Teardown: 手順 26、 1の画像 1
    • The Fresnel lenses are firmly attached to the plastic housing.

    • Now, this isn't a massive issue if the lenses need to be replaced, but it is an interesting choice of design.

  26. Sony's PlayStation VR2 Teardown: 手順 27、 3の画像 1 Sony's PlayStation VR2 Teardown: 手順 27、 3の画像 2 Sony's PlayStation VR2 Teardown: 手順 27、 3の画像 3
    • The last few things that can be removed from the housing are the gears for the horizontal movement and the proximity sensor.

    • The sensor behaves similarly to the first headset where the headset can tell if it's on your face or not.

  27. Sony's PlayStation VR2 Teardown: 手順 28、 3の画像 1 Sony's PlayStation VR2 Teardown: 手順 28、 3の画像 2 Sony's PlayStation VR2 Teardown: 手順 28、 3の画像 3
    • We can move right along to the headband.

    • The front padding can be unclipped, just like the light shield.

  28. Sony's PlayStation VR2 Teardown: 手順 29、 2の画像 1 Sony's PlayStation VR2 Teardown: 手順 29、 2の画像 2
    • The rear padding pops off the same way as the front padding.

  29. Sony's PlayStation VR2 Teardown: 手順 30、 3の画像 1 Sony's PlayStation VR2 Teardown: 手順 30、 3の画像 2 Sony's PlayStation VR2 Teardown: 手順 30、 3の画像 3
    • We can remove the rear covering. Only three screws hold the cover in place.

    • The rear cover hides the cabling for both the power and audio. We can also see the jack for the headphones.

  30. Sony's PlayStation VR2 Teardown: 手順 31、 3の画像 1 Sony's PlayStation VR2 Teardown: 手順 31、 3の画像 2 Sony's PlayStation VR2 Teardown: 手順 31、 3の画像 3
    • We can also remove the external rear panel. We just need to remove the six screws holding it into place and pop the cover off.

  31. Sony's PlayStation VR2 Teardown: 手順 32、 3の画像 1 Sony's PlayStation VR2 Teardown: 手順 32、 3の画像 2 Sony's PlayStation VR2 Teardown: 手順 32、 3の画像 3
    • We can remove the button for the headband adjustment gear by popping the button off using a Spudger.

  32. Sony's PlayStation VR2 Teardown: 手順 33、 3の画像 1 Sony's PlayStation VR2 Teardown: 手順 33、 3の画像 2 Sony's PlayStation VR2 Teardown: 手順 33、 3の画像 3
    • One screw holds the adjustment wheel in place. Once removed we can take the wheel off without any issue.

  33. Sony's PlayStation VR2 Teardown: 手順 34、 3の画像 1 Sony's PlayStation VR2 Teardown: 手順 34、 3の画像 2 Sony's PlayStation VR2 Teardown: 手順 34、 3の画像 3
    • The rest of the adjustment assembly is held down with four screws. Once removed the assembly can be removed.

  34. Sony's PlayStation VR2 Teardown: 手順 35、 3の画像 1 Sony's PlayStation VR2 Teardown: 手順 35、 3の画像 2 Sony's PlayStation VR2 Teardown: 手順 35、 3の画像 3
    • The rear cable housing can be removed easily enough.

    • The cabling can be navigated out of the channeling without any issues.

    • The rest of the housing can be removed by navigating it away from the rest of the headband.

  35. Sony's PlayStation VR2 Teardown: 手順 36、 3の画像 1 Sony's PlayStation VR2 Teardown: 手順 36、 3の画像 2 Sony's PlayStation VR2 Teardown: 手順 36、 3の画像 3
    • The front paneling can be removed too. This holds the rest of the cabling and the rumble motor.

  36. Sony's PlayStation VR2 Teardown, Final Thoughts: 手順 37、 1の画像 1
    • Repairability Score: 10 out of 10 (10 is easiest to repair)

    • Overall, the new design of the PS VR2 is a definite improvement over the original, and Sony has improved many of the aspects that made the first PS VR headset so difficult to repair.

    • Thoughtfully constructed and fairly straightforward to disassemble.

    • Many of the pieces, such as the cushions and light shield, still snap in place with no fussy fasteners or adhesive.

    • Sony took the time to reduce the amount of trim that made their first headset so complicated to disassemble.

    • The adhesive is still used minimally throughout and what adhesive there is can be removed easily. The lenses are easy to remove.

作成者

1人の作成者と共同作成されました。

Jacob Mehnert

メンバー登録日: 10/18/21

27,297 ポイント

43のガイドは作成済み

チーム

iFanatics iFanatics人のメンバー

Community

54 メンバー

156のガイドは作成済み

10 件のコメント

Can you please further tear down the cable connector to see which company's chip is enabling the Active Cable single-cable design?

Tom J - 返信

Hello, this guide is still in progress and will be updated in the near future

Jacob Mehnert -

Thank you. I am anticipating seeing a Spectra7 chip inside the active cable connector. I appreciate your work on this project.

Tom J - 返信

Interesting that they made the headband so easy to separate from the visor....I wonder if this is to facilitate a future wireless headband accessory with in-built battery and transmitter?🤔

Deepak Subramanian - 返信

It is interesting how Sony changed their design to allow for the headband to be taken off, and it will be interesting to see what direction Sony takes the headset as time goes on. Even if Sony doesn't make something like that, just having the headband detachable does help with repairing the headset.

Jacob Mehnert -

コメントを追加

統計データ:

過去 24時間: 8

過去 7 日: 69

過去 30 日: 244

今までの合計 7,746