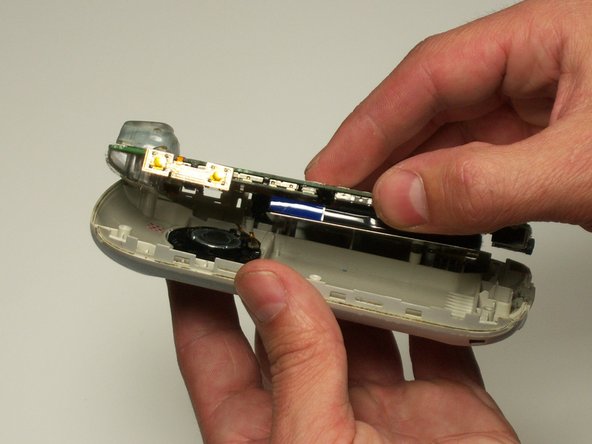
メインコンテンツにスキップ

必要な工具と部品

この分解は修理ガイドでは ありません。 お持ちのSidekick IIを修理する際は、iFixitの修理ガイドをご利用ください。

  1. Sidekick II Teardown, Outer Casing: 手順 1、 1の画像 1
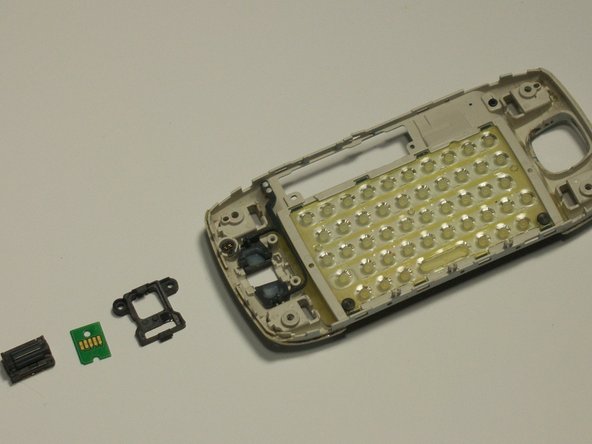
    • Use the plastic opening tool to remove the 4 buttons on each corner of the Sidekick.

    • Gently pry open button and remove button.

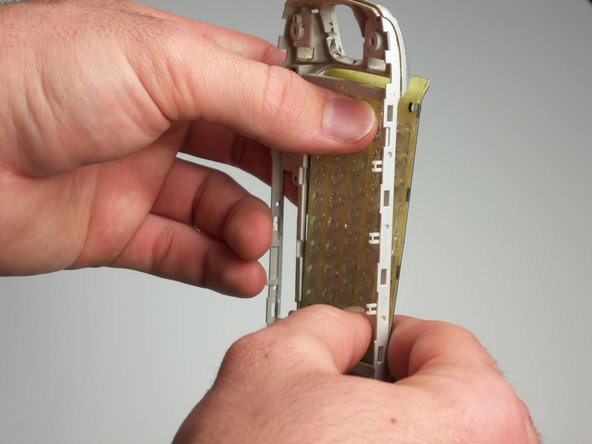
    • Do this for each of the 3 buttons remaining.

  2. Sidekick II Teardown: 手順 2、 2の画像 1 Sidekick II Teardown: 手順 2、 2の画像 2
    • The bumpers on the top and bottom of the phone can be removed by simply "peeling" them off.

  3. Sidekick II Teardown: 手順 3、 1の画像 1
    • Use the T6 Torx Screwdriver to remove the 4 screws that are underneath the 4 buttons you removed in step one.

    Those aren’t Phillips head screws.

    Nae Nae’s Retro Arcade - 返信

  4. Sidekick II Teardown: 手順 4、 1の画像 1
    • Flip the screen up halfway (90 degrees), to reveal the 2 screws above the right side of the keyboard.

    • Use the Torx 6 screwdriver to remove these 2 screws.

    • Be careful in handling the phone after removing the screws, because the two main bodies of the phone are no longer attached.

  5. Sidekick II Teardown: 手順 5、 1の画像 1
    • After removing the 6 screws and both bumpers, the phone will be easy to separate into the two main bodies.

    • You can use your hands to simply pull apart the top casing from the bottom casing.

  6. Sidekick II Teardown, Sidekick II Teardown: 手順 6、 2の画像 1 Sidekick II Teardown, Sidekick II Teardown: 手順 6、 2の画像 2
    • Remove screen from casing.

  7. Sidekick II Teardown: 手順 7、 2の画像 1 Sidekick II Teardown: 手順 7、 2の画像 2
    • Remove 4 screws from back of screen using Torx 6 Screwdriver.

    • Pry screen out of casing using fingers.

  8. Sidekick II Teardown: 手順 8、 3の画像 1 Sidekick II Teardown: 手順 8、 3の画像 2 Sidekick II Teardown: 手順 8、 3の画像 3
    • Remove 4 screws from front of screen with Phillip screwdrivers.

    • Peel off the metal covering on the back of the screen.

    • Be careful when taking off the metal covering. The orange ribbon will not come out all the way, and it is fragile.

  9. Sidekick II Teardown: 手順 9、 1の画像 1
    • Remove the protective cover in front of the screen.

    • Do not use metal tools, you may damage the protective cover or the screen. Use your fingers only.

  10. Sidekick II Teardown: 手順 10、 2の画像 1 Sidekick II Teardown: 手順 10、 2の画像 2
    • Take the screws out using the Torx 6 screwdriver.

    • Then lift the thumb wheel and housing off of the front panel.

  11. Sidekick II Teardown: 手順 11、 2の画像 1 Sidekick II Teardown: 手順 11、 2の画像 2
    • Remove 2 black "rivets" from back of casing with the plastic opening tool.

    • Press keyboard out of front of casing using thumbs. Don't press too hard as you may break the board.

  12. Sidekick II Teardown: 手順 12、 2の画像 1 Sidekick II Teardown: 手順 12、 2の画像 2
    • Remove the 5 black screws with a Phillips head screwdriver.

    • Lift the bottom of the control board from housing, and separate the two.

  13. Sidekick II Teardown: 手順 13、 1の画像 1
    • Carefully remove battery and back plate.

    • Do not use metal tools, you may damage the control board. Use only your fingers.

  14. Sidekick II Teardown: 手順 14、 1の画像 1
    • Here are all of the pieces that you have disassembled

作成者

7人の作成者と共同で作成されました。

michael albaum

メンバー登録日: 01/20/10

87 ポイント

6のガイドは作成済み

チーム

Cal Poly, Team 3-19, Maness Winter 2010 Cal Poly, Team 3-19, Maness Winter 2010人のメンバー

CPSU-MANESS-W10S3G19

4 メンバー

11のガイドは作成済み

コメント 1 件

nice job from a former geek

Jared Boies - 返信

コメントを追加

統計データ:

過去 24時間: 0

過去 7 日: 5

過去 30 日: 21

今までの合計 7,248