はじめに
In this guide, I will show you how to disassemble the Seagate Backup Plus Hub to the point where you are able to remove the hard drive inside. It should be noted that this external hard drive enclosure is unable to be taken apart to that point without breaking a large number of snaps on the casing, that is why this is a teardown and not a repair guide.
必要な工具と部品
-
-
Above you will find a picture of the fully disassembled casing on the outside of the bay, (the board inside is not shown). The entire case is held togeter with snaps. These ones are particularly nasty and I found I could only prevent a few from breaking when opening the case even when using the gutar picks from the ifixit pro tech toolkit
-
-
-
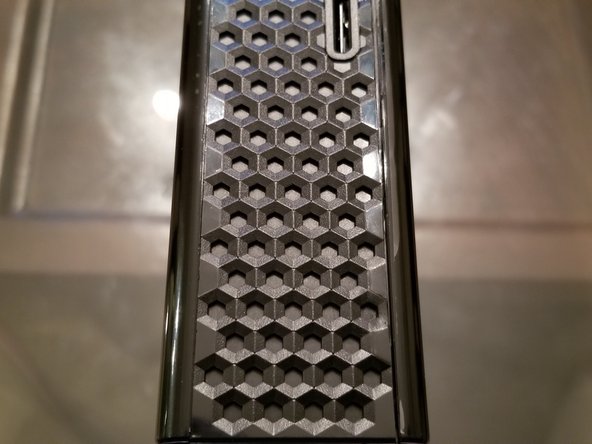
The rear casing plate is the only neccessary one to remove, above is a picture of the case when only the rear plate is removed.
-
-
-
First, press your pick between the casing at the area right of the bottom of the label (see picture). Then press the metal spudger into the widened crack next to the pick. You can remove the pick, but if the spudger slips out of the crack, you will need to use it to get the spudger back in.
-
-
-
Move the spudger so it pushes the casing off (see picture 1), you should hear loud snap noises as the snaps are broken. Slide the spudger along the crack and repeat this until you are sure there are no more snaps. There should be a small gap when you are done, (see picture two).
-
-
-
Now press the metal spudger into the crack next to the power plug (see picture 1), if the previous step was done right, it should already be separated enough to not need the pick to get it in. Do the same snapping method as before along this crack, when done there should be a small gap like the one shown in the second picure
-
-
-
-
now move to the top of the case starting the spudger at the corner similar to before. Make sure it is past the small curve before prying outward (see picture 1).
-
Break the snaps on this side in the same way as before.
-
-
-
With the help of the pick, get the spudger into the crack next to the seagate logo (picture 1).
-
Then break the snaps in the same way a before. if done right, the gap should be fairly big, and you should be able to begin to pull apart the two sides of the case (see next step)
-
-
-
The drive is not held to either side, so be careful when separating the case.
-
At this point, all the snaps have been broken or separated. So grab the two sides near the front of the drive and begin to separate them. As you do so, make sure the snaps on either side stayed separated, if not, take the metal spudger and use it to re-separate either side.
-
Once the sides are separate the board containing the drive will be free. There are no screws holding the drive and its board in place, instead opting for some vibration dampening rubber feet on either side of the drive.
-
Pull the board and drive free from whichever side then ended up in. (see picture 1)
-
No more snaps after this point :)
-
-
-
In the picture, the drive and board are on their side. on the bottom is a screw covered with a rubber vibration dampener. the top shows the other of the two on this side without the rubber.
-
The rubber is not glued on, so it is very easy to remove. There are two on each side of the drive for a total of four. Remove them all.
-
-
-
Peel the aluminum tape off of each side of the drive, it is easy to tear but with the new drive I am working on, the glue isn't very strong, so you should be able to remove it fairly easily.
-
This tape is used to protect from noise by shielding it, it is not strictly necessary if you wanted to use this board with a different drive but its there, so I decided to leave mine on the board.
-
The picture is of what it should look like after you remove the tape from the drive.
-
-
-
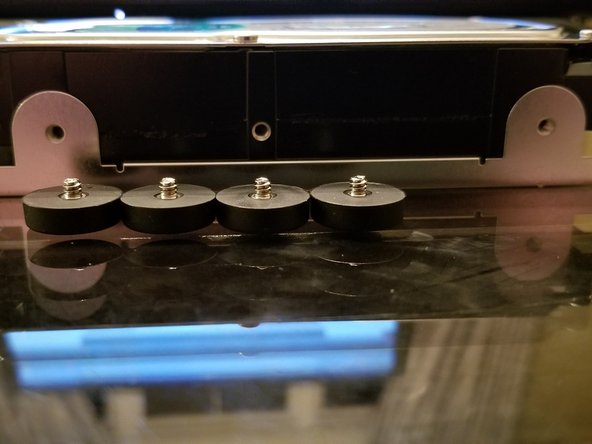
The rubber pieces that were removed before, covered up four screws total (2 on each side). (See Picture 1) Remove those screws using your #1 Philips head screwdriver.
-
After this, the drive is free from its mounting screws. I put the mounting screws into the rubber feet to avoid losing them. (picture 2)
-
-
-
The final step is to slide the drive away from where the board plugs the sata and sata power into the drive (See Picture 1).
-
You can do this by grabbing the metal plate on the back in one hand and the drive in the other hand. then slide the board up (in relation to the drive sticker) and the drive down. then the drive is separated and ready to plug in to something else
-
-
-
If you want to store the bay once the drive is out, you can set the rubber feet with the screws inside inside of where they would be if the drive was there, then slide it into the wider part of the case such that the case matches up with the board. then press the other part of the plastic case together with it to snap it back together.
-
If this is confusing, go back a few steps and try to reverse how it was disassembled.
-
This was my first iFixit guide so be sure to tell me how I did!
-
With that, I hope you all are happy with how this guide turned out!
-


12 件のコメント
Nice work. I would recommend saying “popping” or “break free” about the tabs. I’ve done enough repairs to know that… a) they are too easy to break and … b) you don’t really mean “breaking” but breaking loose. Otherwise it sounds like this is an irreversible process.
Thank you for doing this. Keep it up
OMG, yes. I haven't disassembled this drive yet. I came here looking for what was used to reassemble it, or comments on it, because of the "broken" tabs.
thank you!!!!!!!!!!!!!!!!!!!!!!!!! perfect guide!
So, mine snapped back together fine. If you were to look carefully, you would see that it had been opened but for functional purposes it is as new.
Nice guide. Any idea if you can put a different drive into the case and have it work?