This guide will give you a quick look inside the Samsung GT-E2120 (a.k.a E2120). It shows how the phone comes apart and will give you a quick look inside. This teardown should not be used as a dissasembaly guide.
この分解は修理ガイドでは ありません 。 お持ちのSamsung GT-E2120を修理する際は、iFixitの修理ガイド をご利用ください。
Using your thumb, press down on the back of the device in a downward motion to open the back cover.
Remove the battery along with the sim card and Micro-SD card.
This phone can take up to a 2GB Micro-SD card and is great for storing music. It even has a FM radio!
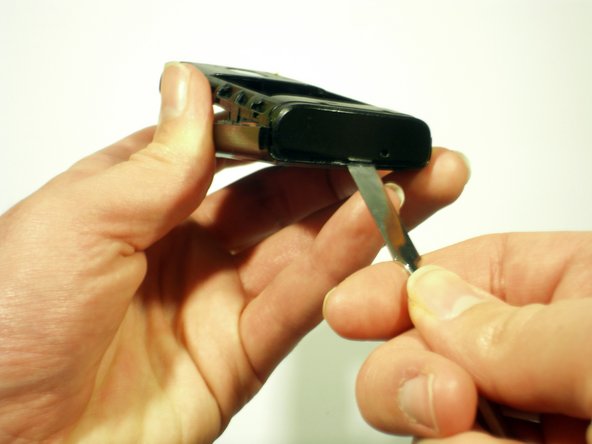
For this step a matal spudger is used to release the clips along the bottom, top, and sides of the phone.
These clips can be found at the points marked in red.
Working from the top down, gently prying at the case the clips are easily dislodged.
When the bottom of the phone is reached it is a bit harder to pull the bottom clips off.
This can be made a tad easier by using the pointed end of the spudger to get in and under the case.
Once the case is lifted up slightly, you can get enough purchase under the clip and lift it off.
Be careful so you dont damage the motherboard!
このガイドを埋め込む
サイズを選択し、以下のコードをコピーして、このガイドを小さなウィジェットとしてサイト/フォーラムに埋め込みます。
1つの手順
全ガイド
小サイズ - 600px
中サイズ - 800px
大サイズ - 1200px
プレビュー