メインコンテンツにスキップ

必要な工具と部品

この分解は修理ガイドでは ありません。 お持ちのToyを修理する際は、iFixitの修理ガイドをご利用ください。

  1. Robie the Banker Teardown, Robie the Banker Teardown: 手順 1、 2の画像 1 Robie the Banker Teardown, Robie the Banker Teardown: 手順 1、 2の画像 2
    • It may look slightly creepy, but Robie taught me about money at a very young age, and incentivized me to save my spare change.

    • Sold in the US by Radio Shack in the 80s and 90s, this gift from my Grandma was a huge hit at our family's Christmas gathering.

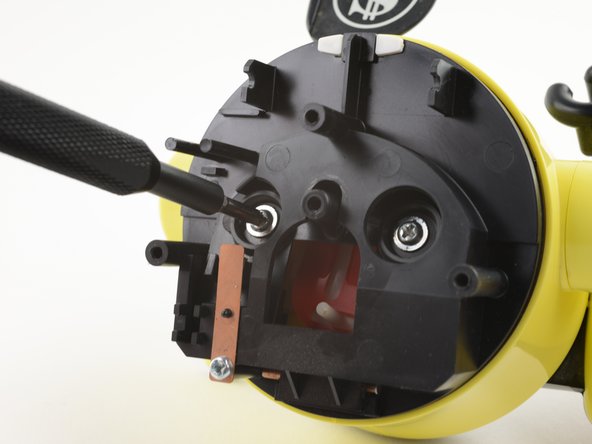
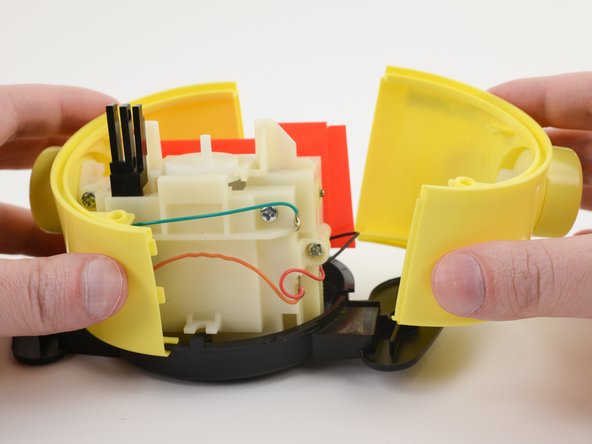
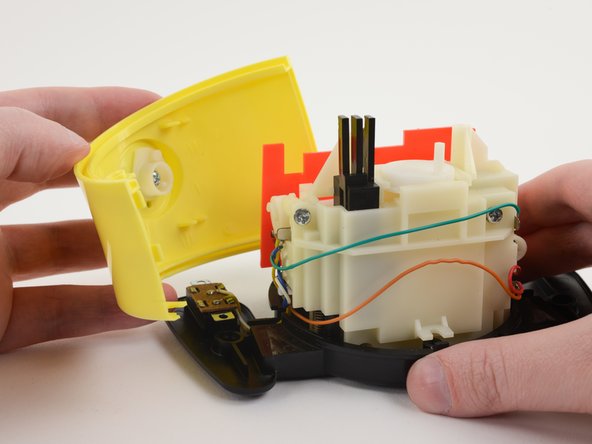
    • But enough reminiscing! Let's tear this thing down to see what makes Robie tick.

  2. Robie the Banker Teardown: 手順 2、 3の画像 1 Robie the Banker Teardown: 手順 2、 3の画像 2 Robie the Banker Teardown: 手順 2、 3の画像 3
    この手順で使用する道具:
    Spudger
    $2.99
    購入する
    • Using our handy-dandy Spudger, we perform a craniotomy on Robie by carefully prying off the top plastic cover in order to get at the screws underneath.

  3. Robie the Banker Teardown: 手順 3、 3の画像 1 Robie the Banker Teardown: 手順 3、 3の画像 2 Robie the Banker Teardown: 手順 3、 3の画像 3
    • Lucky for us, Robie is held together with standard Phillips #2 screws throughout, and there are three of them holding his head cover in place.

  4. Robie the Banker Teardown: 手順 4、 1の画像 1
    • Well, this is terrifying. Quick! Let's move on to the next step before we get nightmares!

  5. Robie the Banker Teardown: 手順 5、 3の画像 1 Robie the Banker Teardown: 手順 5、 3の画像 2 Robie the Banker Teardown: 手順 5、 3の画像 3
    • Robie's eyes are loosely held in place, so let's remove them before they fall out accidentally and roll under the desk.

  6. Robie the Banker Teardown: 手順 6、 3の画像 1 Robie the Banker Teardown: 手順 6、 3の画像 2 Robie the Banker Teardown: 手順 6、 3の画像 3
    • Just two screws hold Robie's head to its body. After removing those, we can carefully lift the head up and set it off to the side.

    • These two screws are still accessible without removing Robie's head cover and eyes. So you can detach the entire head assembly in one piece if you need to get inside more quickly.

  7. Robie the Banker Teardown: 手順 7、 2の画像 1 Robie the Banker Teardown: 手順 7、 2の画像 2
    • Before we can go any further, we need to remove Robie's feet covers so we have more room when removing his body.

    • The power switch is located in his left foot—nothing in his right.

  8. Robie the Banker Teardown: 手順 8、 2の画像 1 Robie the Banker Teardown: 手順 8、 2の画像 2
    この手順で使用する道具:
    Tweezers
    $3.99
    購入する
    • Robie's body is split into two halves, which are held in place by clips and tape.

    • Using some tweezers, removing the tape is a piece of cake.

  9. Robie the Banker Teardown: 手順 9、 3の画像 1 Robie the Banker Teardown: 手順 9、 3の画像 2 Robie the Banker Teardown: 手順 9、 3の画像 3
    • The clips are fairly weak (hence the tape, most likely), so separating the body enclosure is also a piece of cake.

  10. Robie the Banker Teardown: 手順 10、 1の画像 1
    • The motor assembly is attached to the base with three screws—two in the front and one in the back.

  11. Robie the Banker Teardown: 手順 11、 3の画像 1 Robie the Banker Teardown: 手順 11、 3の画像 2 Robie the Banker Teardown: 手順 11、 3の画像 3
    この手順で使用する道具:
    Soldering Station Hakko FX888D-23BY
    $122.99
    購入する
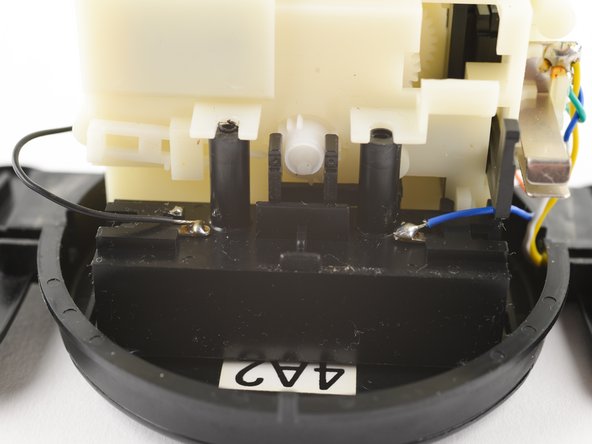
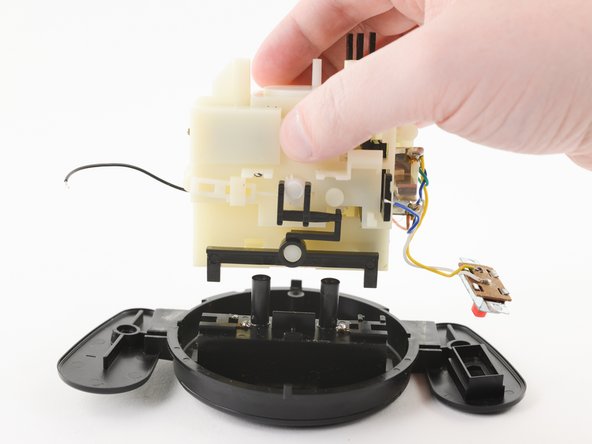
    • Unfortunately, the battery contacts are soldered to the motor assembly, so any repairs or replacement of the motor will require a soldering iron and some basic soldering skills to remove it entirely.

    • But once those two wires are removed, separating the motor assembly from the base is a cinch.

  12. Robie the Banker Teardown: 手順 12、 2の画像 1 Robie the Banker Teardown: 手順 12、 2の画像 2
    • The motor assembly is filled with all sorts of gears and servo motors that make Robie move.

    • If needed, you can open up the enclosure to gain access to these components by removing four screws, but we feel like this is a good stopping point for this teardown.

  13. Robie the Banker Teardown: 手順 13、 1の画像 1
    • Robie handled his teardown with aplomb! He'll be put back together so he can continue to eat coins in peace.

Craig Lloyd

メンバー登録日: 02/10/16

35,368 ポイント

82のガイドは作成済み

3 件のコメント

I love to take things apart too. Sometimes I even fix things that are not broken…

Brett E. Chmura - 返信

Fun to see a relatively low-tech teardown. But I didn’t learn anything about how the innards actually make Robie move. Should I expect that from a teardown?

John Wackman - 返信

Thank you! Our Robie is broken and I would not have noticed the access in the back of the head. Hopefully we can fix it now that we have it open.

Marianne - 返信

コメントを追加

統計データ:

過去 24時間: 4

過去 7 日: 33

過去 30 日: 104

今までの合計 6,247