メインコンテンツにスキップ

必要な工具と部品

この分解は修理ガイドでは ありません。 お持ちのredragon m686を修理する際は、iFixitの修理ガイドをご利用ください。

  1. Redragon m686 Teardown, Redragon m686 Teardown: 手順 1、 3の画像 1 Redragon m686 Teardown, Redragon m686 Teardown: 手順 1、 3の画像 2 Redragon m686 Teardown, Redragon m686 Teardown: 手順 1、 3の画像 3
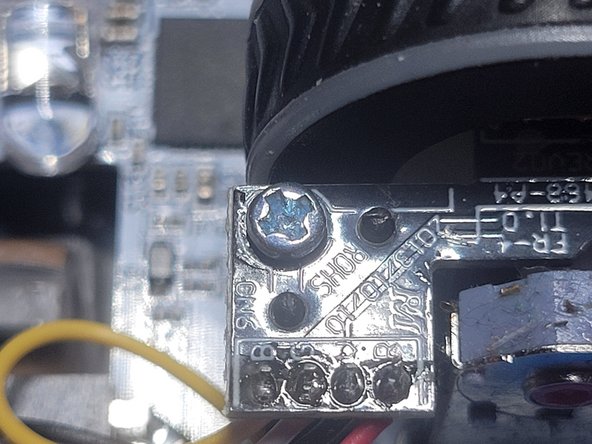
    • You need to remove the pads and unscrew the five hidden screws. after that, there is a pesky clip (shown in the blue circle)

  2. Redragon m686 Teardown: 手順 2、 2の画像 1 Redragon m686 Teardown: 手順 2、 2の画像 2
    • After you survive that clip, open the shell like a book and carefully unplug the cable connecting the halves.

  3. Redragon m686 Teardown: 手順 3、 1の画像 1
    • If you managed not to break them, take out the screws in the top.

    • I used the J1 bit and used a lot of force because that was the bit I had that fit the best and that wouldn't strip it. You can use whatever you like but be cautions of it stripping!

  4. Redragon m686 Teardown: 手順 4、 3の画像 1 Redragon m686 Teardown: 手順 4、 3の画像 2 Redragon m686 Teardown: 手順 4、 3の画像 3
    • On the bottom part, you just have to take out the screw by the mouse wheel to take the rest out.

作成者

1人の作成者と共同作成されました。

Eclipse Nox

メンバー登録日: 01/28/25

469 ポイント

2のガイドは作成済み

0件のガイドコメント

コメントを追加

統計データ:

過去 24時間: 0

過去 7 日: 5

過去 30 日: 27

今までの合計 459