メインコンテンツにスキップ

必要な工具と部品

この分解は修理ガイドでは ありません。 お持ちのPlayStation Cameraを修理する際は、iFixitの修理ガイドをご利用ください。

  1. PlayStation 4 Camera Teardown, PlayStation 4 Camera Teardown: 手順 1、 3の画像 1 PlayStation 4 Camera Teardown, PlayStation 4 Camera Teardown: 手順 1、 3の画像 2 PlayStation 4 Camera Teardown, PlayStation 4 Camera Teardown: 手順 1、 3の画像 3
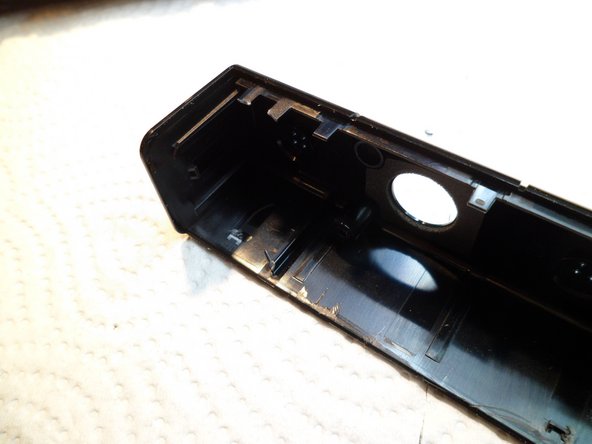
    • There are two PH0 Screws in the socket which hold the cable.

    • Unscrew two PH0 Screws and pull off the cable holder.

  2. PlayStation 4 Camera Teardown: 手順 2、 3の画像 1 PlayStation 4 Camera Teardown: 手順 2、 3の画像 2 PlayStation 4 Camera Teardown: 手順 2、 3の画像 3
    • The next two PH0 Screws are located BEHIND the two polycarbonate-plates of the two camera-lenses. Take a sharp tweezer and stab under that plate. The plates are glued with a sticky tape to the housing. These plates are very fragile and will break if handled incautious.

  3. PlayStation 4 Camera Teardown: 手順 3、 1の画像 1
    • There is one more PH0 screw to remove. This one is behind the other lens.

    • This was the easy part.

  4. PlayStation 4 Camera Teardown: 手順 4、 3の画像 1 PlayStation 4 Camera Teardown: 手順 4、 3の画像 2 PlayStation 4 Camera Teardown: 手順 4、 3の画像 3
    • There are many clips in there.

  5. PlayStation 4 Camera Teardown: 手順 5、 2の画像 1 PlayStation 4 Camera Teardown: 手順 5、 2の画像 2
    • Encore two photos where to locate these nasty clips

  6. PlayStation 4 Camera Teardown: 手順 6、 3の画像 1 PlayStation 4 Camera Teardown: 手順 6、 3の画像 2 PlayStation 4 Camera Teardown: 手順 6、 3の画像 3
    • The other half of the housing is attached to a solid U-Frame with the electronics.

    • There are four silver screws, PH0.

    • Four microphones, two with black/yellow cables and two with black/red wiring.

  7. PlayStation 4 Camera Teardown: 手順 7、 2の画像 1 PlayStation 4 Camera Teardown: 手順 7、 2の画像 2
    • The backside of the U-frame. The cable is not soldered, there is a plug.

    • Detail of the plug.

  8. PlayStation 4 Camera Teardown: 手順 8、 2の画像 1 PlayStation 4 Camera Teardown: 手順 8、 2の画像 2
    • 6 PH1 screws. Take a small magnet to hold them.

  9. PlayStation 4 Camera Teardown: 手順 9、 2の画像 1 PlayStation 4 Camera Teardown: 手順 9、 2の画像 2
    • The connector of the mikrophone-array

  10. PlayStation 4 Camera Teardown: 手順 10、 3の画像 1 PlayStation 4 Camera Teardown: 手順 10、 3の画像 2 PlayStation 4 Camera Teardown: 手順 10、 3の画像 3
    • The lenses, plastic, glued tight.

    • NOT ADJUSTABLE.

  11. PlayStation 4 Camera Teardown: 手順 11、 2の画像 1 PlayStation 4 Camera Teardown: 手順 11、 2の画像 2
    • Backside, two small PH0 at each CCD. But the Cameramodules are clued to the board,too - without destruction, you can not open it.

    • I want to save it as spare-part, so i don't want to open it. So here is finito capito. :) Thanks for watching...

  12. PlayStation 4 Camera Teardown: 手順 12、 1の画像 1
    • Extra: The wiring.

    • It's an USB3 cable without green/white Pimf. There are three SEPARATE ISOLATED metalfoil shields with wire, red-black-power and two Pimf yellow/blue and orange/green. So ja, thats it. Paulaner.

作成者

5人の作成者と共同で作成されました。

Schwarzstein

メンバー登録日: 07/15/13

2,813 ポイント

13のガイドは作成済み

7 件のコメント

Only 7 steps? Where is the rest of the teardown? I wanted to see detailed images of the optics.

Alexandru Voda - 返信

Ja, okay, i made some pictures for you. The optics are in Step 10.

Enjoy.

Freundliche Grüsse. :)

Schwarzstein - 返信

Does anyone think it would be possible to cut the wires from two cameras and splice the wires together and put the power on a A/B rocker switch to switch between two cameras?

Dan Schultz - 返信

Great job, congrats. Do you have also for the other version of ps4 camera same as this one? BR.

Cosmin - 返信

I'm wondering if it can even be spliced or soldered back together and actually work

bhee81 - 返信

コメントを追加

統計データ:

過去 24時間: 0

過去 7 日: 5

過去 30 日: 64

今までの合計 12,328