メインコンテンツにスキップ

この分解は修理ガイドでは ありません。 お持ちのDualSenseを修理する際は、iFixitの修理ガイドをご利用ください。

  1. PS5 Controller Trigger Teardown, PS5 Controller Trigger Teardown: 手順 1、 1の画像 1
    • Once you have opened your controller to this point remove those 4 screws to separate the middle frame from the outer frame.

  2. PS5 Controller Trigger Teardown: 手順 2、 1の画像 1
    • Once you have separated the middle frame from the outer remove the 2 screws securing the trigger assembly to the middle frame. Remove the opposite 2 if you are changing parts on the other side.

  3. PS5 Controller Trigger Teardown: 手順 3、 1の画像 1
    • The trigger assembly comes out easy now.

  4. PS5 Controller Trigger Teardown: 手順 4、 2の画像 1 PS5 Controller Trigger Teardown: 手順 4、 2の画像 2
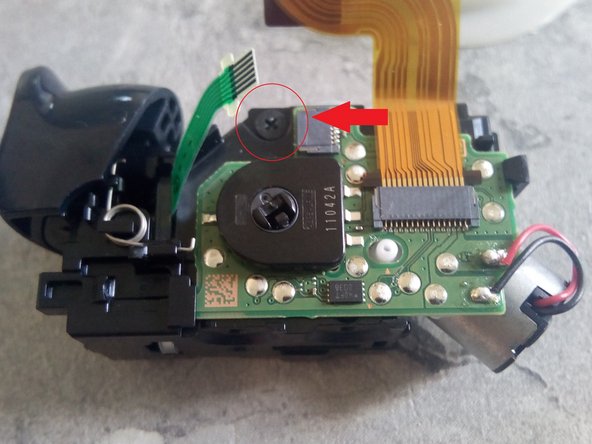
    • Remove these 3 screws on this side of the trigger assembly and one more hidden behind the ribbon cable on the other side.

  5. PS5 Controller Trigger Teardown: 手順 5、 2の画像 1 PS5 Controller Trigger Teardown: 手順 5、 2の画像 2
    • Your trigger assembly is now open. Gently remove the plastic piece to reveal more of the metal pin. Refer to second pic. Pull the metal pin holding the trigger out using a pliers and this will free up the assembly for the button film replacement.

  6. PS5 Controller Trigger Teardown: 手順 6、 1の画像 1
    • The metal pin is now out and the trigger is free.

  7. PS5 Controller Trigger Teardown: 手順 7、 1の画像 1
    • Remove the button conductive rubber and now replace the button film.

  8. PS5 Controller Trigger Teardown: 手順 8、 1の画像 1
    • For reassembly reverse the order. Congratulations. You have successfully replaced your R1, R2 or L1, L2 button film.

作成者

2人の作成者と共同で作成されました。

vickyjean1007

メンバー登録日: 03/28/22

169 ポイント

1ガイドが承認済み

0 件のコメント

コメントを追加

統計データ:

過去 24時間: 13

過去 7 日: 141

過去 30 日: 680

今までの合計 2,902