はじめに
This guide will show the teardown of the PAL Super Nintendo. You can also use this guide to learn how to replace the main PCB.
必要な工具と部品
-
-
Consoles for the European, Asian and Australian market all had the same form factor, unlike the North American version. This guide should work for all versions except for American and pre-1995 japanese models.
-
-
-
Remove the six screws located on the underside of the system with a 4.5mm Gamebit screwdriver.
-
Turn the unit back up and lift the top cover.
-
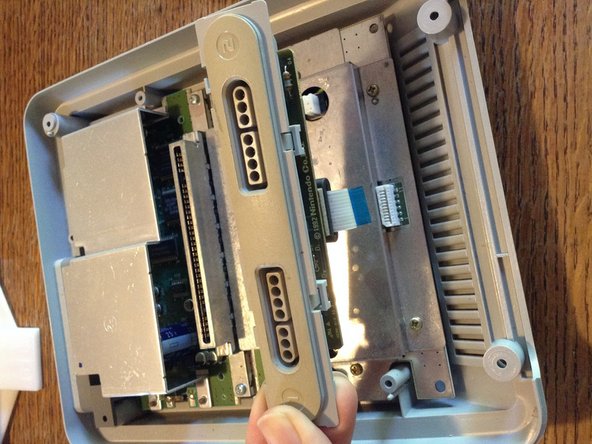
This is the front panel, requires a ribbon cable to be unplugged.
-
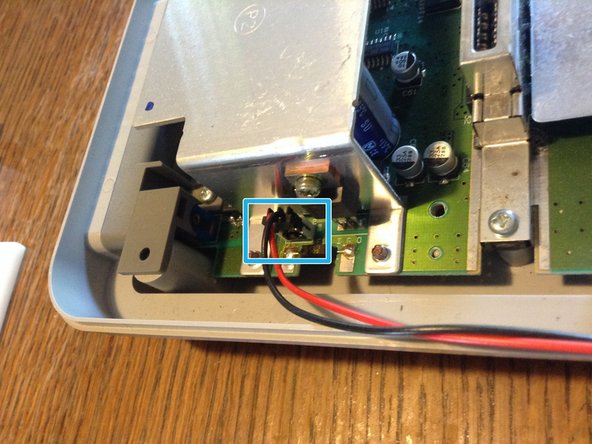
This is part of the cartridge ejecting mechanism.
-
-
-
The mechanism is held back in place by a small spring. It's not too tense but be careful not to lose it. Also, note how it's placed for future reassembly.
-
Remove the mechanism by slightly lifting the axle from the right and pulling it out.
-
-
-
-
We'll need to remove a couple screws with a Phillips #2 screwdriver.
-
It's plugged to the main board with a small plastic socket. Simply pull on it to set it apart.
-
-
-
The front panel is connected to the main board with a ribbon cable. Gently pull it out of its socket.
-
The front panel can then be lifted out.
-
-
-
The shield is held by 4 Philips #2 screws.
-
Lift it by grabbing near the cartridge slot to dislodge the vertical prongs.
-
This reveals the CPU, among other chips.
-
-
-
At this point the main board is only held by 5 Philips #2 screws
-
It can then be lifted by holding it by the caps shield.
-
-
-
First, remove the Philips #2 screw on the side of the shield.
-
Turn the board around and unscrew the 3 Philips #2 screws.
-
Voilà!
-


3 件のコメント
Hello, i found videos on YouTube where people were able to detach the pin connector to better clean it, as well as the main board contacts under it, however on the model I'm trying to fix it well not come off. One difference is that the extremities where the screws come ate in black plastic instead of metal like on your pictures.
Are you aware of such differences and is it right it doesn't come off or do I need to pull harder?
Thanks a lot!
You mean the 2 screws near the cartridge connector (as seen on step 7) are plastic?
I’m not aware of such a difference.