メインコンテンツにスキップ

必要な工具と部品

この分解は修理ガイドでは ありません。 お持ちのNokia 3310を修理する際は、iFixitの修理ガイドをご利用ください。

  1. Original Nokia 3310 Teardown, Original Nokia 3310 Teardown: 手順 1、 2の画像 1 Original Nokia 3310 Teardown, Original Nokia 3310 Teardown: 手順 1、 2の画像 2
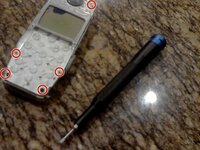
    • This is a teardown of my Nokia 3310.

    • Somehow, I broke the screen.

  2. Original Nokia 3310 Teardown: 手順 2、 2の画像 1 Original Nokia 3310 Teardown: 手順 2、 2の画像 2
    • Push up like in the first picture.

    • Then, lift up and put the back aside.

    • Follow video instructions for removing the battery and SIM card.

    • Follow instructions for removing the front case and keypad.

  3. Original Nokia 3310 Teardown: 手順 5、 3の画像 1 Original Nokia 3310 Teardown: 手順 5、 3の画像 2 Original Nokia 3310 Teardown: 手順 5、 3の画像 3
    • Remove the circled screws with a Torx T6 driver.

    • Pry the clear plastic piece (not the circuit board) with a Spudger.

    • Now pry out the board.

    • Thank you for reading.

作成者

1人の作成者と共同作成されました。

I take things apart

メンバー登録日: 03/06/24

673 ポイント

6のガイドは作成済み

0 件のコメント

コメントを追加

統計データ:

過去 24時間: 20

過去 7 日: 106

過去 30 日: 164

今までの合計 164