はじめに
Google is on a mission to reinvent the router, and we got our hands on their first foray into the home-networking market—the Google OnHub. With a sleek design, hefty price tag, and a whole host of unique features, we're excited to see what this router is rockin'. It's teardown time!
Want to stay connected to the repair world? Follow us on Facebook, Instagram, or Twitter to stay up to date with the latest teardown news!
必要な工具と部品
-
-
Google has promised that the OnHub router will give you a new way to Wi-Fi, and with these specs, it looks like they might be onto something:
-
Dual-core 1.4 GHz CPU
-
4 GB e-MMC flash storage
-
IEEE 802.11 b/g/n/ac
-
Dual band 2.4 GHz and 5 GHz 12-antenna array
-
Congestion-sensing radio and antenna
-
USB 3.0 port + Bluetooth 4.0
-
1 GB DDR3L RAM
-
-
-
No blinking router lights here; let's hope the constant status light isn't blinding in the dark (it's not).
-
This mysterious anomaly in the speaker grille is probably an ambient light sensor enabling dimming.
-
We also spy a small cutaway on the bottom of the cowling for the cabling.
-
A novel idea for cable management, but not great for ease-of-access. You've got to twist the cowling off to plug anything in.
-
-
-
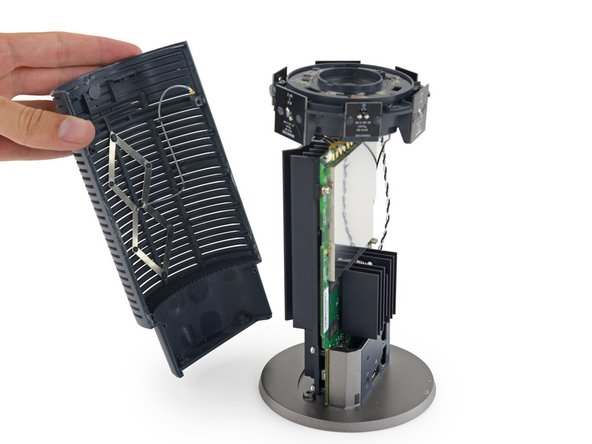
Luckily the outer cowling comes off with a simple twist. You can't plug any cables in without shucking that shield, it better be simple.
-
The
riflingfins along the inside of thebarrelcowling are perhaps there to encourage air circulation, as this tower has no fan to cool itself. -
Under the hood we see the real branding on this guy. Google has contracted with TP-Link for the first iteration of the OnHub.
-
We also get a peek at some components. Is that an antenna we see? We're itching with anticipation.
-
-
-
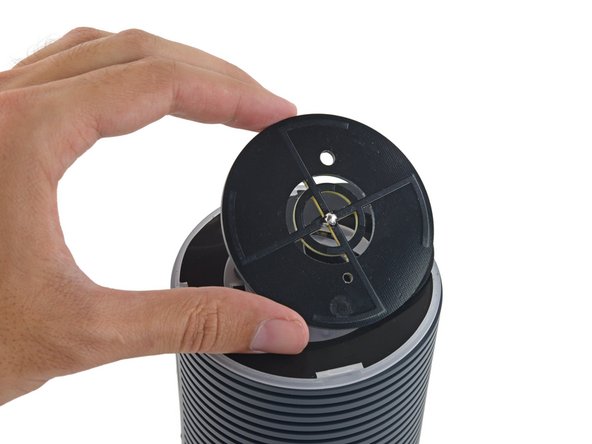
We turn our attention back to what we thought was a solid top, it turns out this was the way in all along.
-
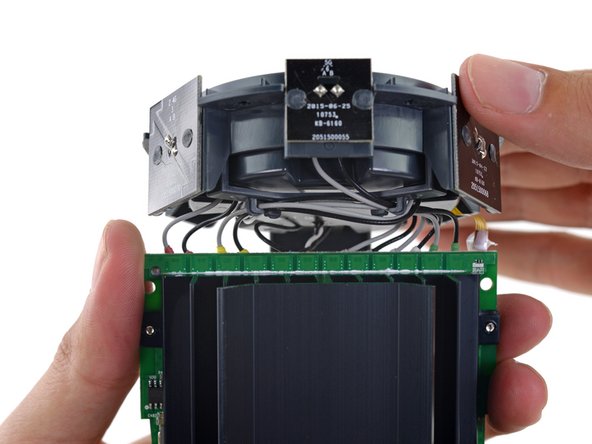
We finally pop the top off this can
of worms, and the first component we spy is the famed congestion-sensing antenna. -
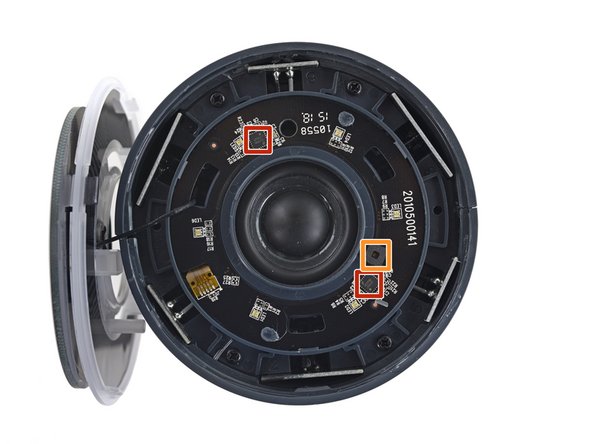
We can't quite remove it yet, so leaving that to dangle gently to the side exposes the LED board with some control hardware:
-
National Semiconductor LP5523 programmable 9-output LED driver
-
Ambient light sensor
-
-
-
-
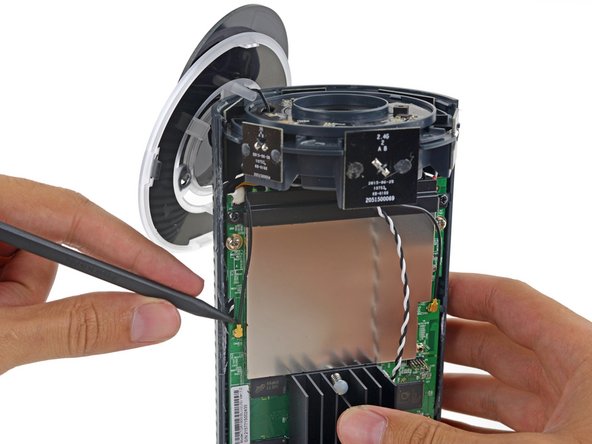
With the top panel neutralized, some screws are revealed.
-
Finally the two halves of the casing are ready to come quietly, revealing the first glimpse of the OnHub's shiny, antenna-filled insides.
-
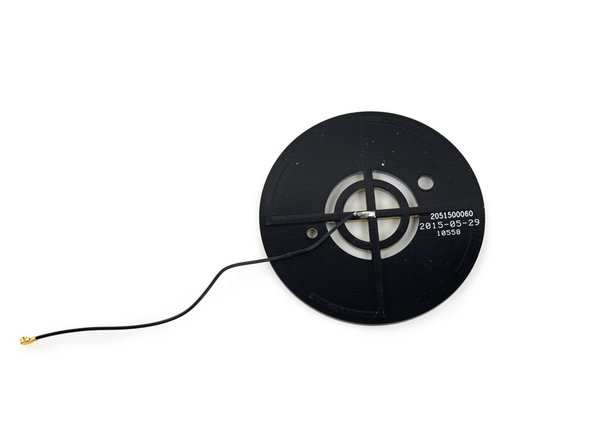
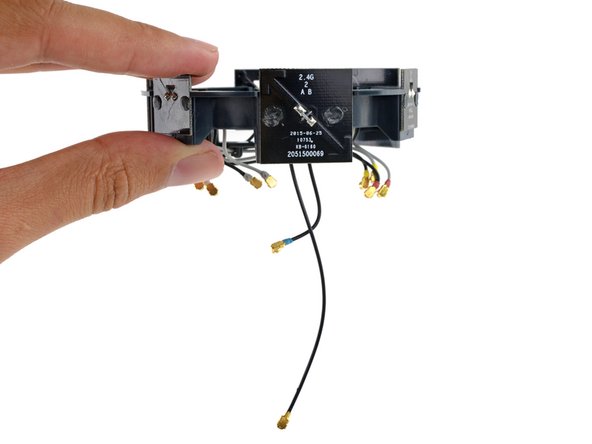
That crazy disk antenna up top, responsible for sniffing out network congestion in the air, is finally free to leave the OnHub.
-
Looks like the OnHub intends to keep unbroken Wi-Fi on target with this bullseye shaped antenna.
-
-
-
There are 12 cables across the top of the device (six 2.4GHz antennas and six 5GHz), plus the congestion antenna along the side, and a final coax cable along the other side.
-
Google seems to have some kind of color coding system, which might help for repair, but the board markings don't give us any hints just yet.
-
Peeling off the second half of the outer shell, we find an interesting antenna arrayed in a double diamond. More on this guy later.
-
The OnHub's antenna array is revealed in all its Lovecraftian glory, the antenna leads looking spookily like tentacles.
-
-
-
With a flick of the spudger, the remaining antenna connectors come free—releasing what we theorize to be a miniature Stargate. That, or the omnidirectional antenna array.
-
Some engineer was probably pretty excited to design antennas in an arrow shape. Looking snazzy!
-
That one extra-long cable runs a bit lower on the motherboard, where it connects next to a ZigBee network co-processor—hello 802.15.4 (coming soon).
-
-
-
Remember that diamond shaped antenna a few steps back? Turns out that's the directional antenna, for boosting the signal in a specific direction.
-
The heatsink serves as a reflector dish, pushing that extra bit of Wi-Fi to the far corner of your house where you need it most.
-
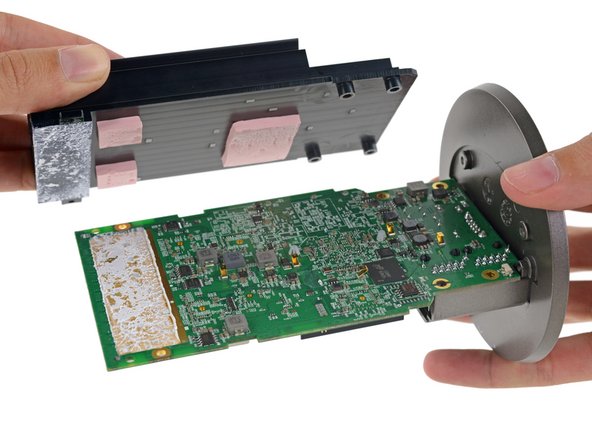
The components in this thing have been pretty big so far, and the heat sink is no different. Prying up the metal mass reveals some equally hefty thermal pads.
-
It looks like the heat sink actually draws heat through the motherboard—we spy the real heavy
hittersheaters on the reverse. -
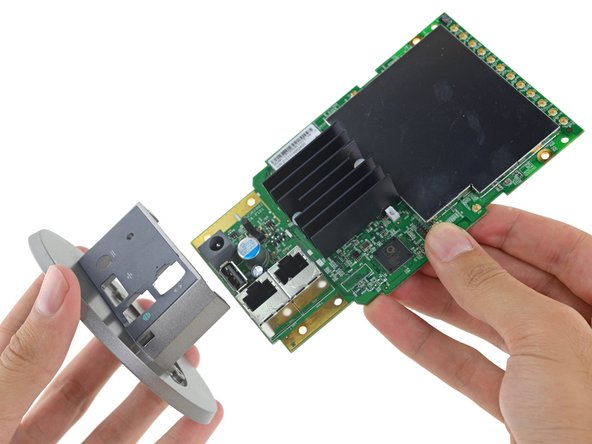
The plastic base and port cover slides off and the motherboard is free!
-
-
-
With the heat sink off and the chips deshielded, we can get to the meat of the matter:
-
Qualcomm Atheros IPQ8064 Internet Processor with 2 Krait 300 CPUs clocked at 1.4 GHz
-
Micron MT41K256M16HA 4 Gb DDR3L SDRAM
-
Qualcomm Atheros QCA8337
-
Qualcomm Atheros QCA9882
-
Qualcomm Atheros QCA9880
-
Silicon Labs EM3581 SOC network co-processor for ZigBee
-
Skyworks 66109 2.4 GHz ZigBee/Smart Energy front-end module
-
-
-
OnHub Repairability Score: 4 out of 10 (10 is easiest to repair)
-
The speaker is replaceable.
-
The device is mostly assembled with clips, which are better than adhesive but can break during disassembly.
-
With all ports on a single board, fixing a loose USB port means a soldering repair.
-
Tiny antenna connectors are fragile and prone to breaking during disassembly.
-
This is a fairly complex device—and with no repair documentation available, disassembly and reassembly are especially difficult.
-


6 件のコメント
Those "arrow" antennas are a type of fractal antenna. With 2.4 GHz ~= 12.5 cm, full size antennas would be 2/3 the height of the entire unit, and would need more shielding from the motherboard.
Great writeup. I have but one question.
Where's the no-way-to-identify mystery chip that routes all of your data back to NSA? And where is the other no-way-to-identify-except-with-rainbow-color-paint chip that sends your traffic data to Google for targeted ads while you browse the Web?
you fool....
Did you notice anything that could at certain angles obstruct a portion of the lights at the top of the unit? Trying to figure out if I have a light that is going bad or if there is an antenna infront or behind it causing it to look dark in one small area. Thanks
Shawn Thor - 返信