はじめに
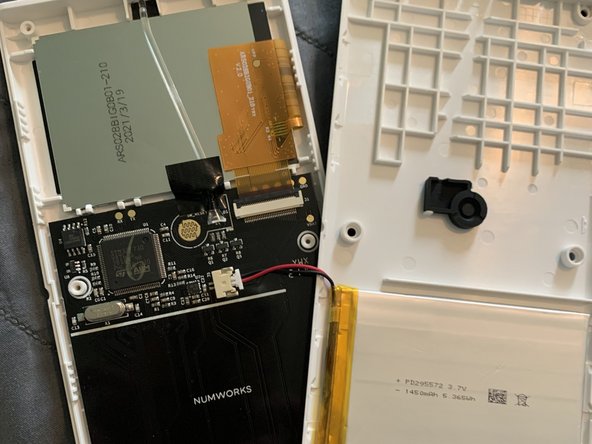
This is a simple guide to removing the back of the Numworks Graphing Calculator. This does not cover removing the board from the front or any instructions as to disconnecting connectors besides the battery connector.
必要な工具と部品
-
-
Peel away the six rubber foots on the back of the calculator using your fingernails.
-
-
-
-
Carefully peel the two case parts away from each other, taking turns on each side disconnecting one at a time for all eight clips. The third row from the bottom up is more secure than the others. DO NOT JERK CASE APART, THERE IS A BATTERY CONNECTOR TO REMOVE instead, slowly open the case 180 degrees with the back facing you.
-


