メインコンテンツにスキップ

この分解は修理ガイドでは ありません。 お持ちのMonoprice Blackbird 4K HDMI 2.0 and USB 3.0 2x1 KVM Switchを修理する際は、iFixitの修理ガイドをご利用ください。

  1. Monoprice Blackbird 4K HDMI 2.0 and USB 3.0 2x1 KVM Switch Teardown, Exterior pics (front, top, back): 手順 1、 3の画像 1 Monoprice Blackbird 4K HDMI 2.0 and USB 3.0 2x1 KVM Switch Teardown, Exterior pics (front, top, back): 手順 1、 3の画像 2 Monoprice Blackbird 4K HDMI 2.0 and USB 3.0 2x1 KVM Switch Teardown, Exterior pics (front, top, back): 手順 1、 3の画像 3
    • Insert wisdom here.

  2. Monoprice Blackbird 4K HDMI 2.0 and USB 3.0 2x1 KVM Switch Teardown, Exterior pics (bottom, left, right): 手順 2、 3の画像 1 Monoprice Blackbird 4K HDMI 2.0 and USB 3.0 2x1 KVM Switch Teardown, Exterior pics (bottom, left, right): 手順 2、 3の画像 2 Monoprice Blackbird 4K HDMI 2.0 and USB 3.0 2x1 KVM Switch Teardown, Exterior pics (bottom, left, right): 手順 2、 3の画像 3
    • Insert wisdom here.

  3. Monoprice Blackbird 4K HDMI 2.0 and USB 3.0 2x1 KVM Switch Teardown, Remove case: 手順 3、 3の画像 1 Monoprice Blackbird 4K HDMI 2.0 and USB 3.0 2x1 KVM Switch Teardown, Remove case: 手順 3、 3の画像 2 Monoprice Blackbird 4K HDMI 2.0 and USB 3.0 2x1 KVM Switch Teardown, Remove case: 手順 3、 3の画像 3
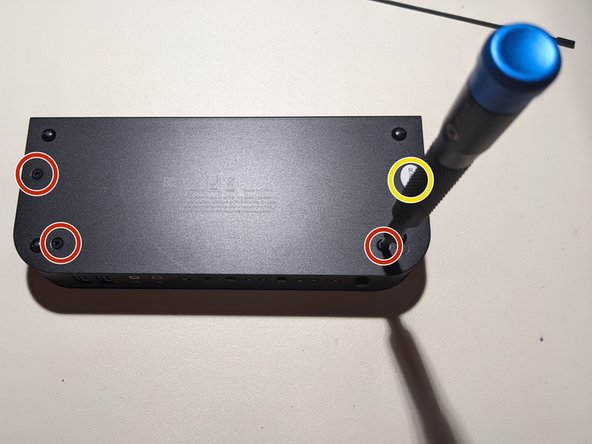
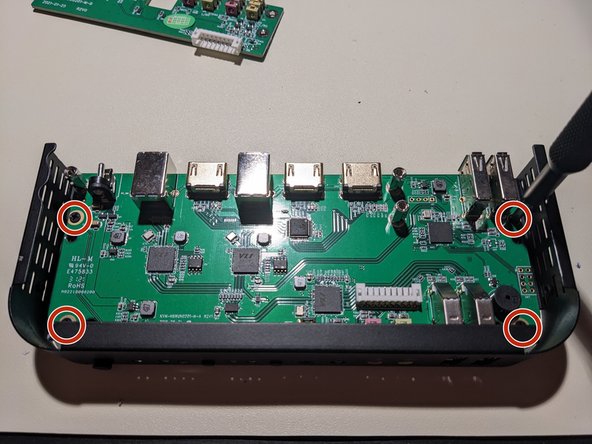
    • Use a phillips #1 bit to remove 4 case screws.

    • For me, 1 was under a sticker, don't miss it

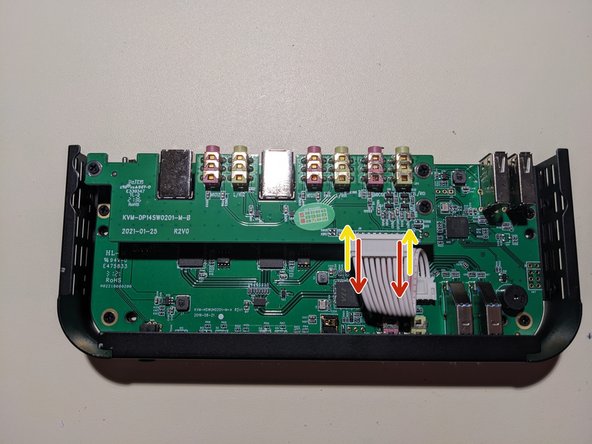
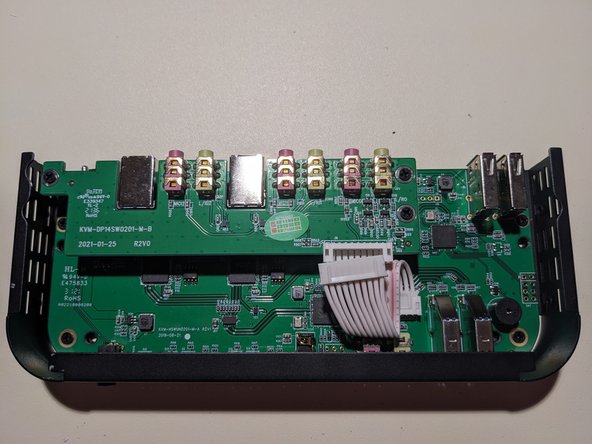
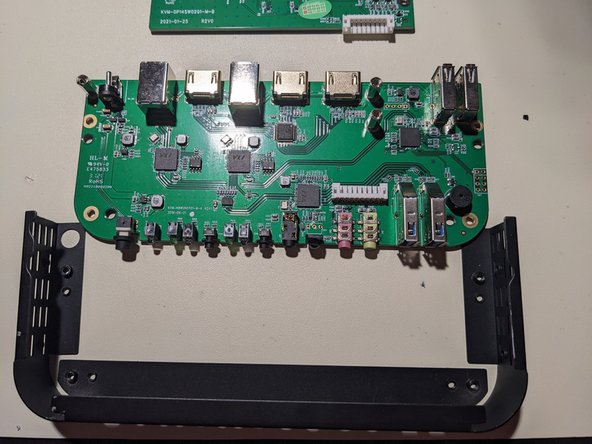
    • The metal case is 2 pieces. The front/sides are attached to the PCB, so slide the back/top/bottom piece off.

  4. Monoprice Blackbird 4K HDMI 2.0 and USB 3.0 2x1 KVM Switch Teardown, Remove daughter board: 手順 4、 3の画像 1 Monoprice Blackbird 4K HDMI 2.0 and USB 3.0 2x1 KVM Switch Teardown, Remove daughter board: 手順 4、 3の画像 2 Monoprice Blackbird 4K HDMI 2.0 and USB 3.0 2x1 KVM Switch Teardown, Remove daughter board: 手順 4、 3の画像 3
    • Pull out cable connector

    • Undo 3 Phillips #1 screws

    • Lift the board out

  5. Monoprice Blackbird 4K HDMI 2.0 and USB 3.0 2x1 KVM Switch Teardown, Daughter board pics: 手順 5、 2の画像 1 Monoprice Blackbird 4K HDMI 2.0 and USB 3.0 2x1 KVM Switch Teardown, Daughter board pics: 手順 5、 2の画像 2
    • Insert wisdom here.

  6. Monoprice Blackbird 4K HDMI 2.0 and USB 3.0 2x1 KVM Switch Teardown, Component identification (top of main board): 手順 6、 1の画像 1
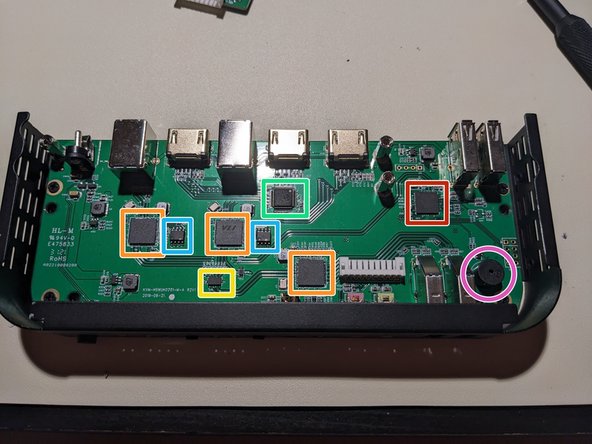
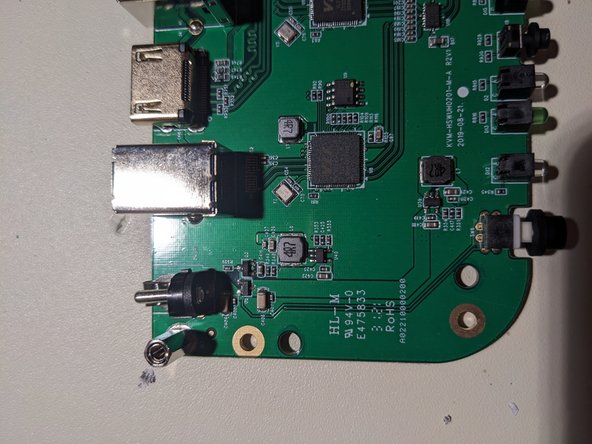
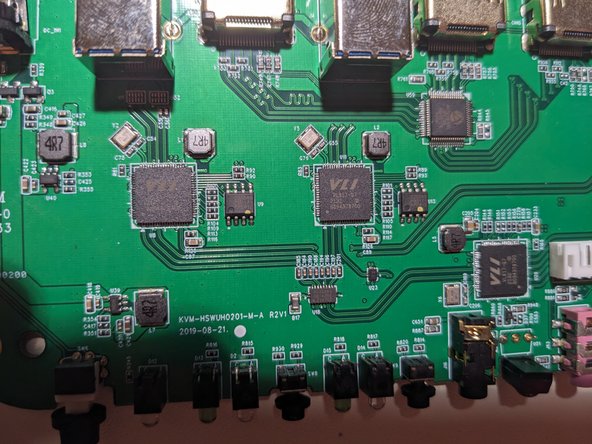
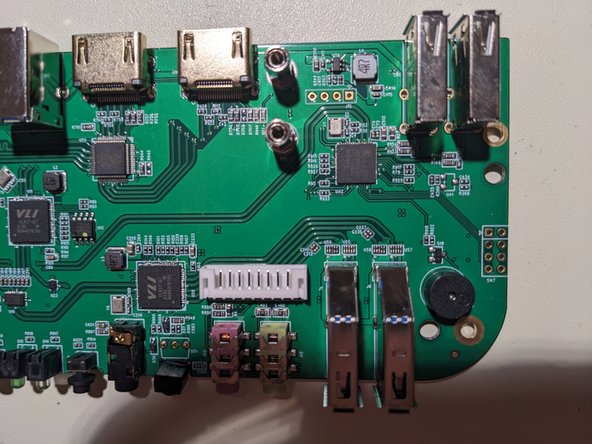
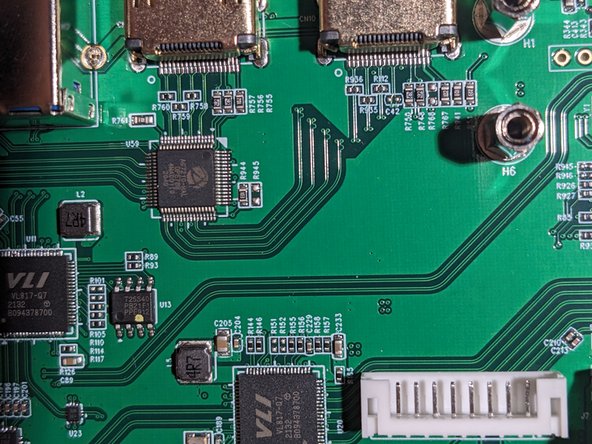
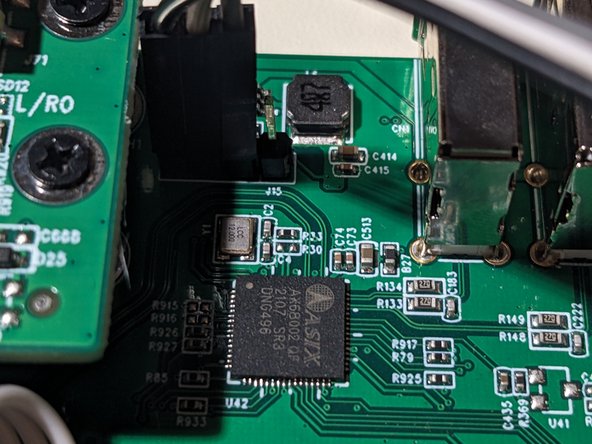
    • Main SoC: ASIX AX68002 product page

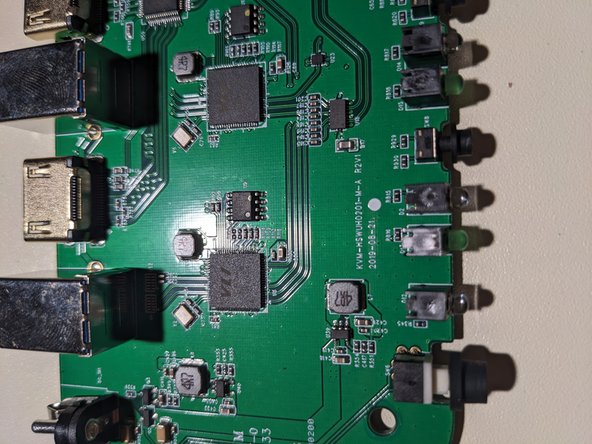
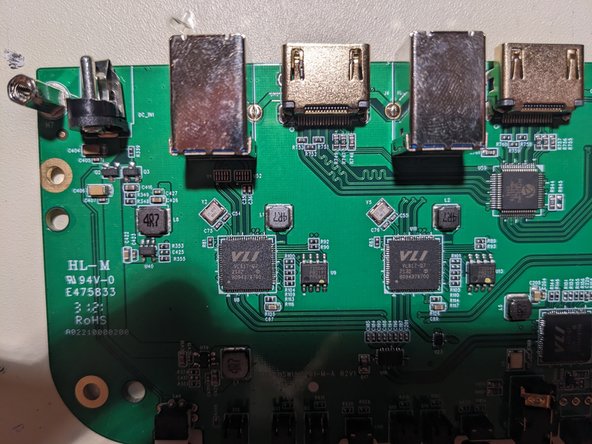
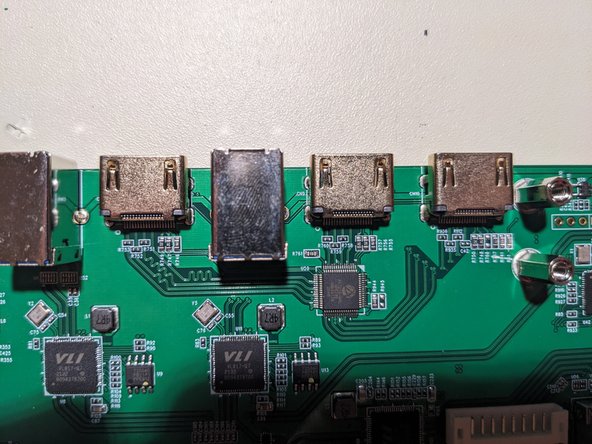
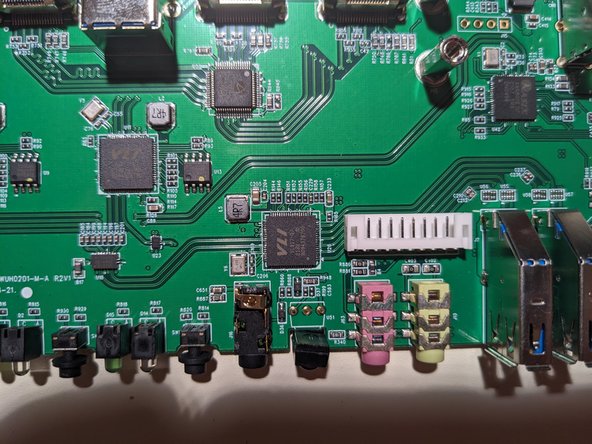
    • USB3 hub controllers (3x): VIA Labs VL817-Q7 datasheet

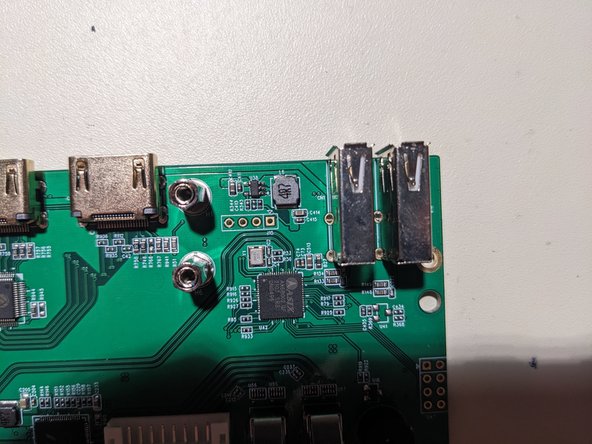
    • USB3 mux/demux switch: Pericom PI3USB302-A product page

    • HDMI2 switch: AlgolTek AG7210 datasheet

    • Serial NOR SPI flashes (4Mb, 2x - third on back): H&M/Bright Moon Semiconductor T25S40 datasheet, flash dump

    • Piezo speaker

  7. Monoprice Blackbird 4K HDMI 2.0 and USB 3.0 2x1 KVM Switch Teardown, Remove main board from case: 手順 7、 2の画像 1 Monoprice Blackbird 4K HDMI 2.0 and USB 3.0 2x1 KVM Switch Teardown, Remove main board from case: 手順 7、 2の画像 2
    • Remove 4x phillips #1 screws

    • Slide PCB out of case

  8. Monoprice Blackbird 4K HDMI 2.0 and USB 3.0 2x1 KVM Switch Teardown, Component identification (bottom of main board): 手順 8、 1の画像 1
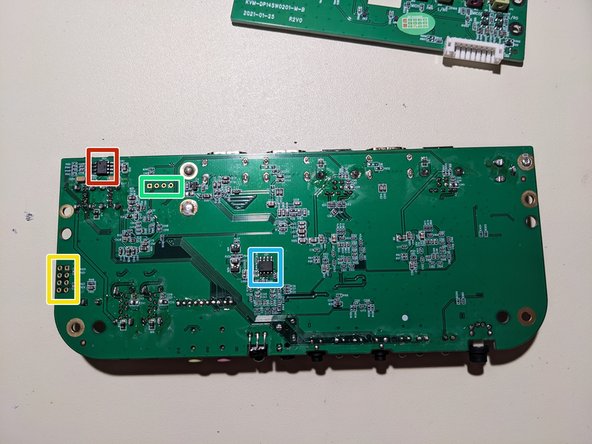
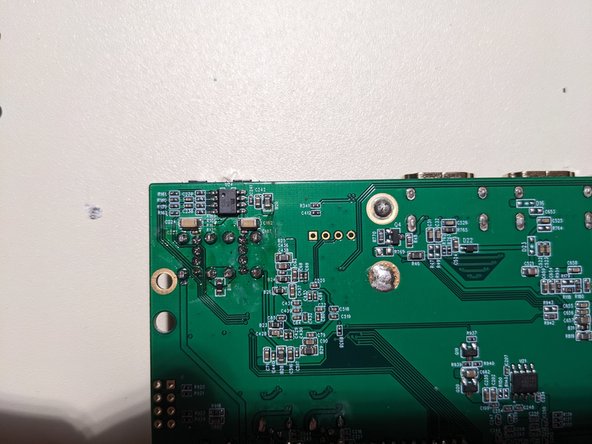
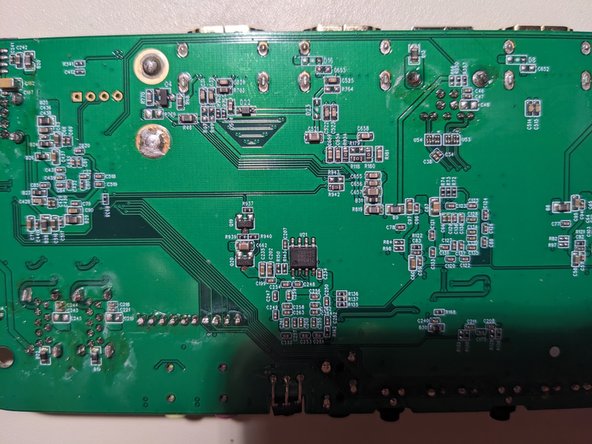
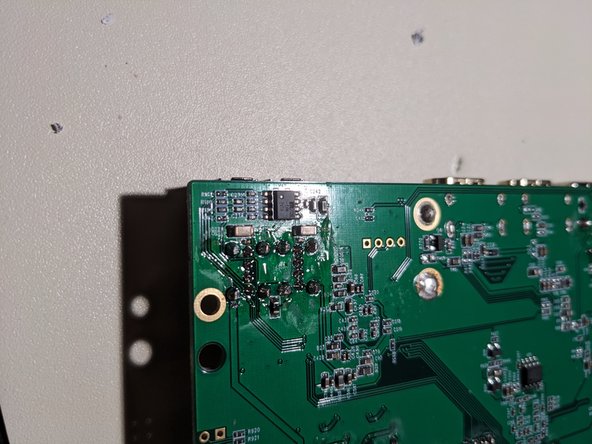
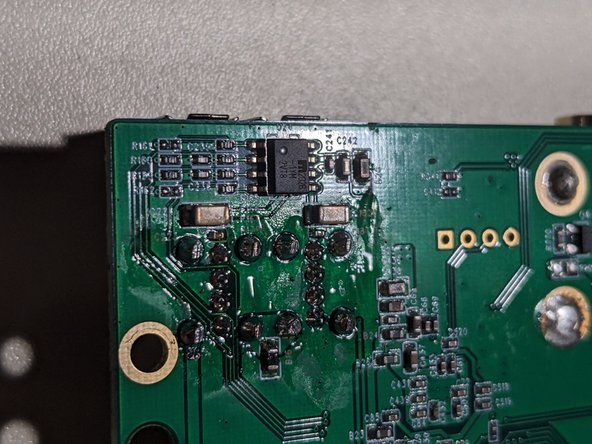
    • Power distribution switch: Microchip MIC2026-1YM product page

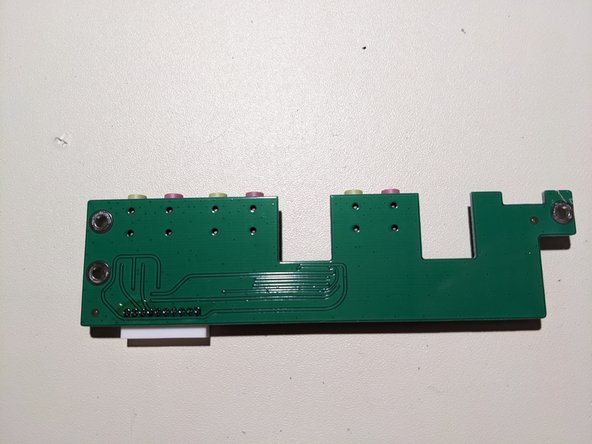
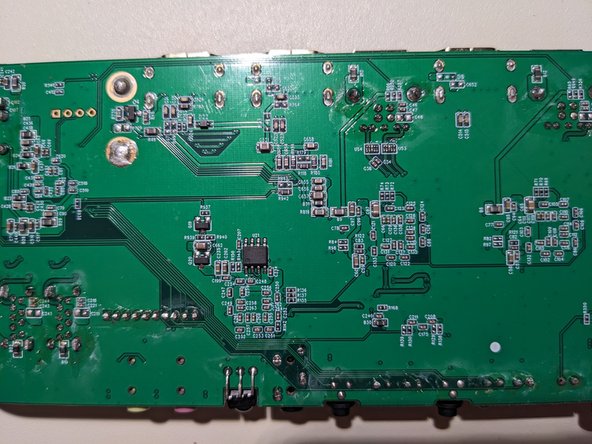
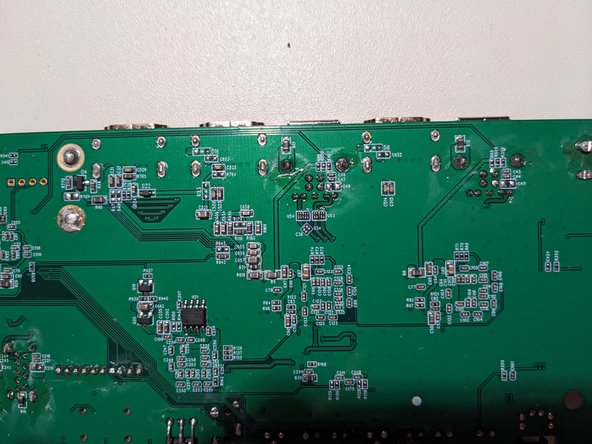
    • Serial NOR SPI flash (1x - other 2 on front): H&M/Bright Moon Semiconductor T25S40 datasheet, flash dump

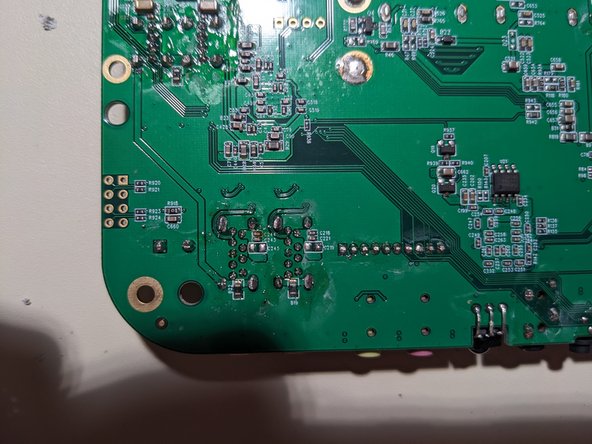
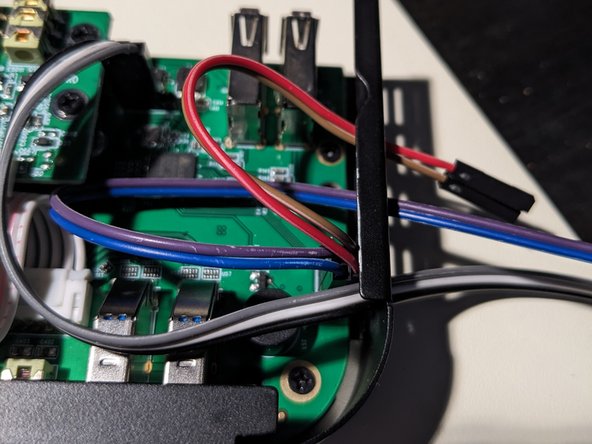
    • UART header. From L to R (remember this is the bottom!): VCC, device RX, device TX, GND. Bootloader and app output at 19200 baud, 8 data bits, 1 stop bit, no parity, no flow control

    • Bootlog

    • Debug jumpers for AX68002. Inner row from back to front: TEST_MODE, SYSCK_SEL, BURN_FLASH_EN, BURN_FLASH_921K

    • Outer row pairs with adjacent inner row pin to alter behavior. From back to front: pull-up (PU), pull-down (PD), PU, PD

  9. Monoprice Blackbird 4K HDMI 2.0 and USB 3.0 2x1 KVM Switch Teardown, Further closeups: 手順 9、 3の画像 1 Monoprice Blackbird 4K HDMI 2.0 and USB 3.0 2x1 KVM Switch Teardown, Further closeups: 手順 9、 3の画像 2 Monoprice Blackbird 4K HDMI 2.0 and USB 3.0 2x1 KVM Switch Teardown, Further closeups: 手順 9、 3の画像 3
    • Insert wisdom here.

  10. Monoprice Blackbird 4K HDMI 2.0 and USB 3.0 2x1 KVM Switch Teardown, Further closeups: 手順 10、 3の画像 1 Monoprice Blackbird 4K HDMI 2.0 and USB 3.0 2x1 KVM Switch Teardown, Further closeups: 手順 10、 3の画像 2 Monoprice Blackbird 4K HDMI 2.0 and USB 3.0 2x1 KVM Switch Teardown, Further closeups: 手順 10、 3の画像 3
    • Insert wisdom here.

  11. Monoprice Blackbird 4K HDMI 2.0 and USB 3.0 2x1 KVM Switch Teardown, Further closeups: 手順 11、 3の画像 1 Monoprice Blackbird 4K HDMI 2.0 and USB 3.0 2x1 KVM Switch Teardown, Further closeups: 手順 11、 3の画像 2 Monoprice Blackbird 4K HDMI 2.0 and USB 3.0 2x1 KVM Switch Teardown, Further closeups: 手順 11、 3の画像 3
    • Insert wisdom here.

  12. Monoprice Blackbird 4K HDMI 2.0 and USB 3.0 2x1 KVM Switch Teardown, Further closeups: 手順 12、 3の画像 1 Monoprice Blackbird 4K HDMI 2.0 and USB 3.0 2x1 KVM Switch Teardown, Further closeups: 手順 12、 3の画像 2 Monoprice Blackbird 4K HDMI 2.0 and USB 3.0 2x1 KVM Switch Teardown, Further closeups: 手順 12、 3の画像 3
    • Insert wisdom here.

  13. Monoprice Blackbird 4K HDMI 2.0 and USB 3.0 2x1 KVM Switch Teardown, Further closeups: 手順 13、 3の画像 1 Monoprice Blackbird 4K HDMI 2.0 and USB 3.0 2x1 KVM Switch Teardown, Further closeups: 手順 13、 3の画像 2 Monoprice Blackbird 4K HDMI 2.0 and USB 3.0 2x1 KVM Switch Teardown, Further closeups: 手順 13、 3の画像 3
    • Insert wisdom here.

  14. Monoprice Blackbird 4K HDMI 2.0 and USB 3.0 2x1 KVM Switch Teardown, Further closeups: 手順 14、 3の画像 1 Monoprice Blackbird 4K HDMI 2.0 and USB 3.0 2x1 KVM Switch Teardown, Further closeups: 手順 14、 3の画像 2 Monoprice Blackbird 4K HDMI 2.0 and USB 3.0 2x1 KVM Switch Teardown, Further closeups: 手順 14、 3の画像 3
    • Insert wisdom here.

  15. Monoprice Blackbird 4K HDMI 2.0 and USB 3.0 2x1 KVM Switch Teardown, Further closeups: 手順 15、 2の画像 1 Monoprice Blackbird 4K HDMI 2.0 and USB 3.0 2x1 KVM Switch Teardown, Further closeups: 手順 15、 2の画像 2
    • Insert wisdom here.

  16. Monoprice Blackbird 4K HDMI 2.0 and USB 3.0 2x1 KVM Switch Teardown, Accessible debug pins: 手順 16、 1の画像 1
    • Insert wisdom here.

作成者

1人の作成者と共同作成されました。

Kyle Westhaus

メンバー登録日: 05/15/20

786 ポイント

3のガイドは作成済み

0 件のコメント

コメントを追加

統計データ:

過去 24時間: 0

過去 7 日: 2

過去 30 日: 22

今までの合計 306