メインコンテンツにスキップ

必要な工具と部品

この分解は修理ガイドでは ありません。 お持ちのLogitech 2-MP Webcam C600を修理する際は、iFixitの修理ガイドをご利用ください。

  1. Logitech 2-MP Webcam C600 Teardown, Teardown: 手順 1、 3の画像 1 Logitech 2-MP Webcam C600 Teardown, Teardown: 手順 1、 3の画像 2 Logitech 2-MP Webcam C600 Teardown, Teardown: 手順 1、 3の画像 3
  2. Logitech 2-MP Webcam C600 Teardown: 手順 2、 3の画像 1 Logitech 2-MP Webcam C600 Teardown: 手順 2、 3の画像 2 Logitech 2-MP Webcam C600 Teardown: 手順 2、 3の画像 3
    • Pry off the button mounted on the side

    • Green arrow indicates the location of screw hole

    • Use a #0 Phillips head screwdriver to remove the screw

  3. Logitech 2-MP Webcam C600 Teardown: 手順 3、 3の画像 1 Logitech 2-MP Webcam C600 Teardown: 手順 3、 3の画像 2 Logitech 2-MP Webcam C600 Teardown: 手順 3、 3の画像 3
    • Remove the screw indicated by the green arrows

    • The lens can be screwed and unscrewed to adjust focus. However it is glued in place and should be reglued after adjustment

  4. Logitech 2-MP Webcam C600 Teardown: 手順 4、 3の画像 1 Logitech 2-MP Webcam C600 Teardown: 手順 4、 3の画像 2 Logitech 2-MP Webcam C600 Teardown: 手順 4、 3の画像 3
    • The screws indicated by the blue arrows hold the lens module in place

    • The infrared filter is accessible from the back of the lens module. It is the shiny piece of reddish glass.

  5. Logitech 2-MP Webcam C600 Teardown: 手順 5、 2の画像 1 Logitech 2-MP Webcam C600 Teardown: 手順 5、 2の画像 2
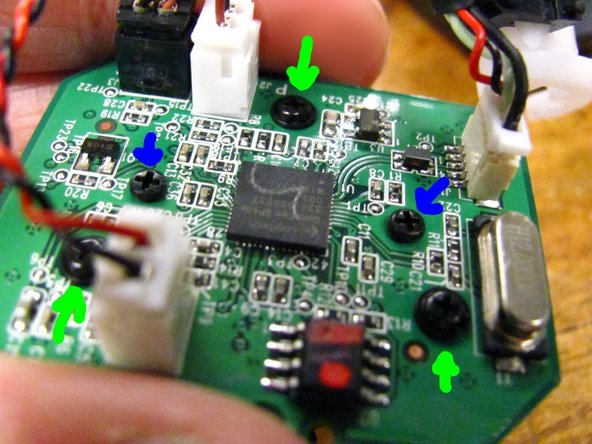
    • Attached to the white plastic is the privacy shade position sensor.

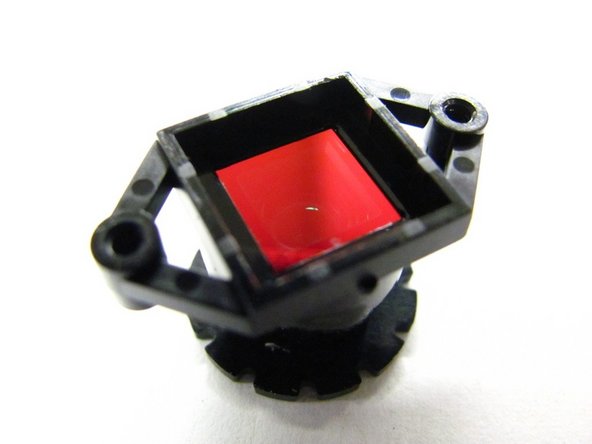
    • The ccd sensor appears to be 1/3.2" Type sensor with 4:3 aspect ratio. With is 4.536mm x 3.416mm. Focal length is currently undetermined.

    • The lens is threaded M10x0.5, and testing seems to indicate that the sensor is a CCD with global shutter.

I Heart Robotics

メンバー登録日: 11/09/09

210 ポイント

3のガイドは作成済み

0 件のコメント

コメントを追加

統計データ:

過去 24時間: 0

過去 7 日: 4

過去 30 日: 17

今までの合計 27,510