はじめに
Kindle 3 is a great ebooks reader from Amazon.com.
必要な工具と部品
-
-
Pry the back open. The back is kept in place by a dozen tabs around the sides.
-
Pry it out with an X ACTO blade or a spludger.
-
I used my finger nails since part of the back had already popped open after I crushed it.
-
-
-
-
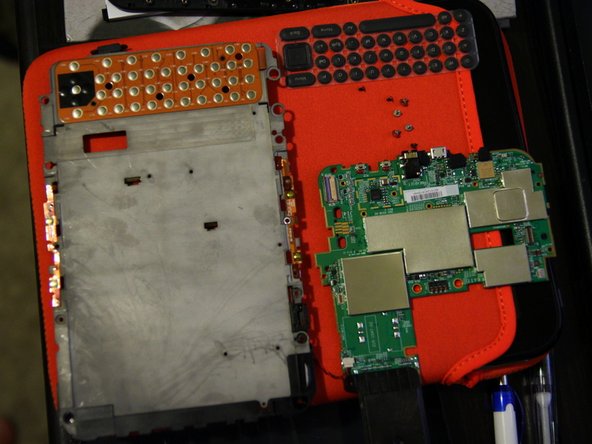
Remove the two cables on the left side. They are held in place by a piece of plastic. Use your finger nail and flip it out. It should be very easy and require very little force.
-
Circled in red is the cable to the side buttons.
-
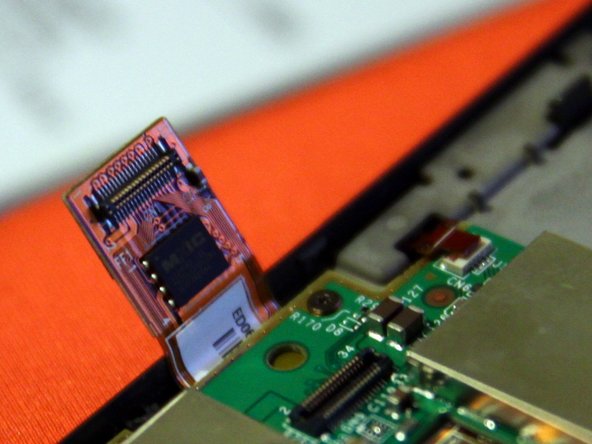
Circled in blue is the cable to the e-ink display. This cable is pretty fancy, it even has a couple of ICs embedded in it.
-
-
-
Remove the cable on the bottom right corner. This is the cable to the keypad.
-
Above it is a black piece of plastic that connects the circuit board to an external slot for the optional cover and light that Amazon sells.
-
Above that (not shown) is the other small cable that connects to the other side buttons.
-


8 件のコメント
The wife dropped her Kindle the other day and now it's stuck on the same screen. I've pulled the battery and the screen stayed on the entire time the battery was out of the housing. Completely confused now. Any suggestions?
cedarwolf@yahoo.com
That's normal. It only needs power to change the contents of the screen. It sounds the power switch or the cable to the screen is disconnected. If it's neither than email amazon tech support and see if they'll replace your kindle for free. That's what they did for me.
Si Li -
Thanks for this guide, quite informative. I managed to disassemble the Kindle completely and replace the display. For other users, just be patient and wiggle the ports and connectors slowly until they come out. The same applies when putting back, it all comes nicely to the right place, just be patient. There is useful comment above about screen removal (prying the adhesive), when assembling the screen I used the insulation tape to fix it in position. After putting all the screws back, it will be fitted tightly by means of pressure from other parts, no need to apply adhesive or glue to to secure the screen.