メインコンテンツにスキップ

必要な工具と部品

この分解は修理ガイドでは ありません。 お持ちのKeystone Lighting HID to LED retrofit bulbを修理する際は、iFixitの修理ガイドをご利用ください。

  1. Keystone Lighting HID to LED retrofit bulb Teardown, Introduction: 手順 1、 1の画像 1
    • This is a 400W replacement HID to LED retrofit bulb from Keystone Lighting. It doesn't work anymore and has been replaced, so why not tear it down?

  2. Keystone Lighting HID to LED retrofit bulb Teardown, Remove the light lens: 手順 2、 1の画像 1
    • Using a P2 Phillips screwdriver, you can remove the (easily visible) screws holding the clear lens on. After all the screws have been removed, you can lift the light straight out of the lens.

    • I wasn't super careful about the diode matrix here because I was going to recycle it anyway, but if you're trying to repair one of these, I'd advise either to put a towel or something under the light or to wait on taking the lens cover off.

  3. Keystone Lighting HID to LED retrofit bulb Teardown, Opening the light+ driver access: 手順 3、 3の画像 1 Keystone Lighting HID to LED retrofit bulb Teardown, Opening the light+ driver access: 手順 3、 3の画像 2 Keystone Lighting HID to LED retrofit bulb Teardown, Opening the light+ driver access: 手順 3、 3の画像 3
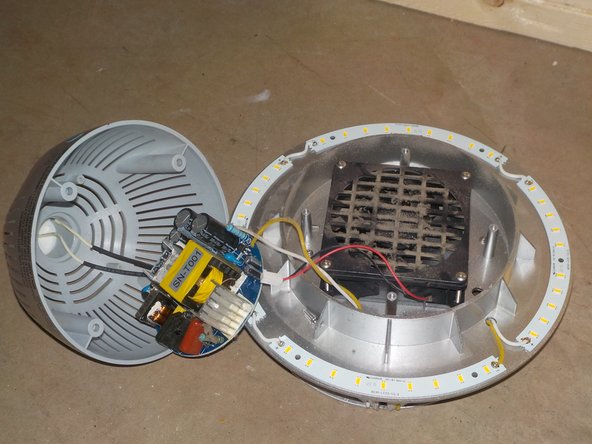
    • Using the same P2 screwdriver as before, you can open up the light by removing the screws recessed within the plastic. Once those are removed, you can carefully lift the top off and hang the top off the side of the light.

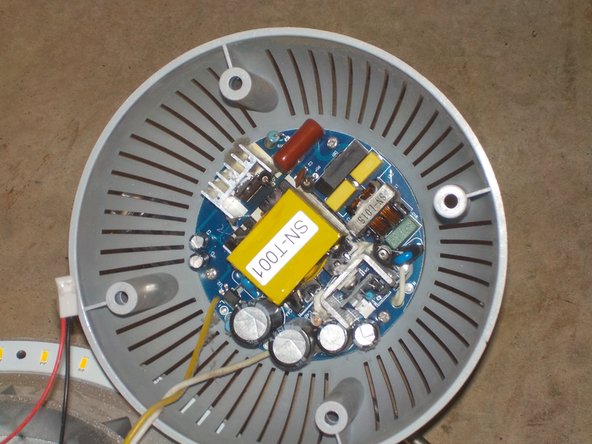
    • Next, you will want to unplug the fan from the driver board and remove all the screws from said driver. They are also P2.

    • Finally, you can lift the driver away from the plastic and either cut or desolder the wires going to the socket.

  4. Keystone Lighting HID to LED retrofit bulb Teardown, Removing the fan: 手順 4、 1の画像 1
    • You can now remove the 4 P2 screws holding the fan down and then remove it from the light.

  5. Keystone Lighting HID to LED retrofit bulb Teardown, Removing the LEDs: 手順 5、 2の画像 1 Keystone Lighting HID to LED retrofit bulb Teardown, Removing the LEDs: 手順 5、 2の画像 2
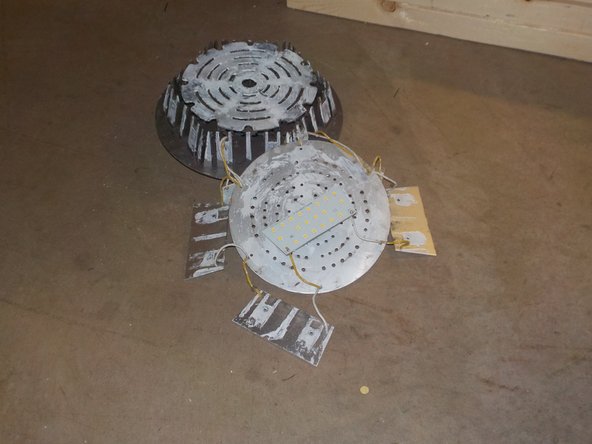
    • All of the LED modules are held on with P2 phillips screws. You can unscrew these and lift the modules off the metal base.

    • Make sure to look out for thermal paste, because it goes everywhere.

    • To remove both the driver and these LEDs, you will want to either desolder or cut the wires.

  6. Keystone Lighting HID to LED retrofit bulb Teardown, Removing the (other) LEDs.: 手順 6、 2の画像 1 Keystone Lighting HID to LED retrofit bulb Teardown, Removing the (other) LEDs.: 手順 6、 2の画像 2
    • If you followed the previous step, you should have already disconnected the wires, so just go ahead and use a spudger to unstick the last few LEDs.

  7. Keystone Lighting HID to LED retrofit bulb Teardown, Conclusion: 手順 7、 1の画像 1
    • To reassemble your device, follow this guide in the reverse order, making sure to re-connect all disconnected wires.

作成者

1人の作成者と共同作成されました。

nerdbug96

メンバー登録日: 06/17/21

1,462 ポイント

8のガイドは作成済み

コメント 1 件

Thanks for the look inside one of these industrial-size high bay lights!

It would be fun to make it go again … the driver looks like a relatively simple device, and a bit of probing with an oscilloscope, and a lot of thinking and schematic sketching, might reveal which component died. :)

iEvan - 返信

コメントを追加

統計データ:

過去 24時間: 0

過去 7 日: 1

過去 30 日: 12

今までの合計 594