メインコンテンツにスキップ

必要な工具と部品

この分解は修理ガイドでは ありません。 お持ちのIBM Travelstar DJSA-220 2.5"を修理する際は、iFixitの修理ガイドをご利用ください。

  1. IBM Travelstar DJSA-220 2.5'' Hard Drive Teardown, IBM Travelstar DJSA-220 2.5'' Hard Drive Teardown: 手順 1、 3の画像 1 IBM Travelstar DJSA-220 2.5'' Hard Drive Teardown, IBM Travelstar DJSA-220 2.5'' Hard Drive Teardown: 手順 1、 3の画像 2 IBM Travelstar DJSA-220 2.5'' Hard Drive Teardown, IBM Travelstar DJSA-220 2.5'' Hard Drive Teardown: 手順 1、 3の画像 3
    • My Victim: a dead IBM Deathstar DJSA-220

    • 20.00GB ATA/IDE

    • 5V 500mA

    • 4200RPM

    • Original Apple OEM!

    • Let's remove the 7 T6 screws!

  2. IBM Travelstar DJSA-220 2.5'' Hard Drive Teardown, The Opened Drive: 手順 2、 2の画像 1 IBM Travelstar DJSA-220 2.5'' Hard Drive Teardown, The Opened Drive: 手順 2、 2の画像 2
    • The disc surface is mirror-like. You can even see my iPhone 3GS!

    • Parts Of The Device

    • Heads.

    • Head Motor

    • A little bag that absorbs humidity.

  3. IBM Travelstar DJSA-220 2.5'' Hard Drive Teardown, Taking off the Logic Board: 手順 3、 3の画像 1 IBM Travelstar DJSA-220 2.5'' Hard Drive Teardown, Taking off the Logic Board: 手順 3、 3の画像 2 IBM Travelstar DJSA-220 2.5'' Hard Drive Teardown, Taking off the Logic Board: 手順 3、 3の画像 3
    • Turn the disc over and remove the 7 T4 screws.

    • Then comes the logic board.

    • The black tape is only foam. It doesn't stick.

    • Contacts for data transfer and head control

    • Contacts for motor power

    • If my scanner wants to work again, i'll post a high res scan of the board.

  4. IBM Travelstar DJSA-220 2.5'' Hard Drive Teardown, Looking at the Drive: 手順 4、 1の画像 1
    • You now see the back, without the logic board.

    • Heads connector, transfers head-moves commands and data to store and read

    • Motor connector, brings power to move the discs at 4200RPM

  5. IBM Travelstar DJSA-220 2.5'' Hard Drive Teardown, Let's attack the inside!: 手順 5、 2の画像 1 IBM Travelstar DJSA-220 2.5'' Hard Drive Teardown, Let's attack the inside!: 手順 5、 2の画像 2
    • Let's attack the inside!

    • remove the two T6 screws.

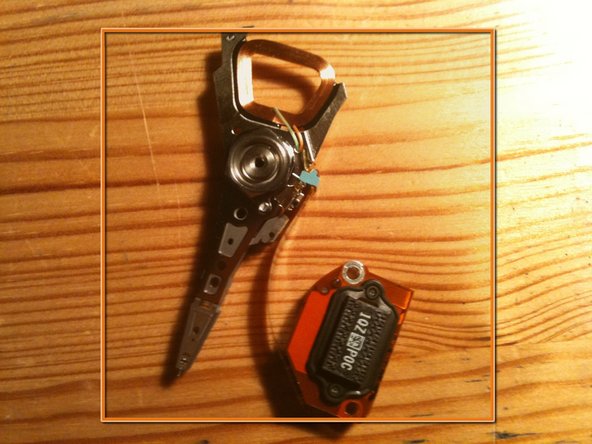
    • This piece is a powerful magnet!

    • This is a PCB with a ribbon cable sticked on it

    • Remove the two T6 screws.

    • The screw is on the back, T6 too.

    • I was unable to remove that T8 screw that holds the platters. They keep turning with my screwdriver and i couldn't block it strong enough.

  6. IBM Travelstar DJSA-220 2.5'' Hard Drive Teardown, The Head: 手順 6、 1の画像 1
    • The head with its connector.

  7. IBM Travelstar DJSA-220 2.5'' Hard Drive Teardown, All Done: 手順 7、 1の画像 1
    • Done!

    • The Screws:

    • 7 T4 screws.

    • 13 T6 screws.

    • 1 T8 screw

    • There are more screws in this hard disc than in a new MacBook!

    • Thank you for reading my first teardown :-)

作成者

8人の作成者と共同で作成されました。

joelc

メンバー登録日: 01/26/10

222 ポイント

1ガイドが承認済み

10 件のコメント

is there a replacement for this drive, mine just went bad...

julie - 返信

Hi, of course, there is! Any 2.5'' ATA hard drive should fit. Beware, some computers have a 128GB capacity limit.

joelc - 返信

is there anything reusable from the parts aside from the magnets? can you help me figure it out where I could probably use them?

Sheena - 返信

To be honest, not much. If the logic board is fine, you could keep it just in case a same model drive went bad on this side. The screws may be useful if you are dealing with small electronic devices. But for sure, the most interesting part is that strong magnet.

joelc -

Do you happen to know where I can find drivers to get this hard drive to work on my win 7 pc? I need to extract some data from it, thank you in advance

Ville Ahonen - 返信

コメントを追加

統計データ:

過去 24時間: 5

過去 7 日: 26

過去 30 日: 68

今までの合計 38,769