メインコンテンツにスキップ

必要な工具と部品

この分解は修理ガイドでは ありません。 お持ちのHome Essentials Sandwich Pressを修理する際は、iFixitの修理ガイドをご利用ください。

  1. Home Essentials Sandwich Press Teardown, Home Essentials Sandwich Press Teardown: 手順 1、 2の画像 1 Home Essentials Sandwich Press Teardown, Home Essentials Sandwich Press Teardown: 手順 1、 2の画像 2
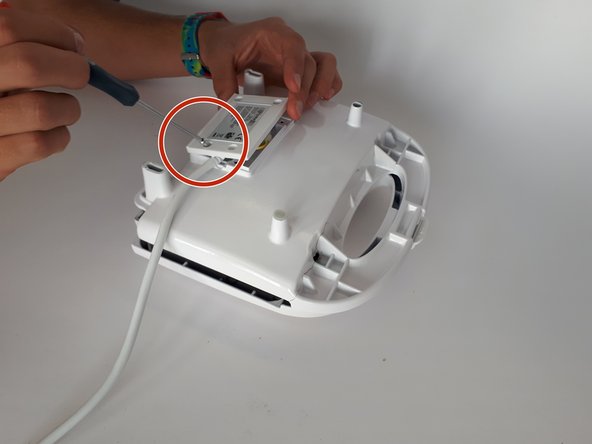
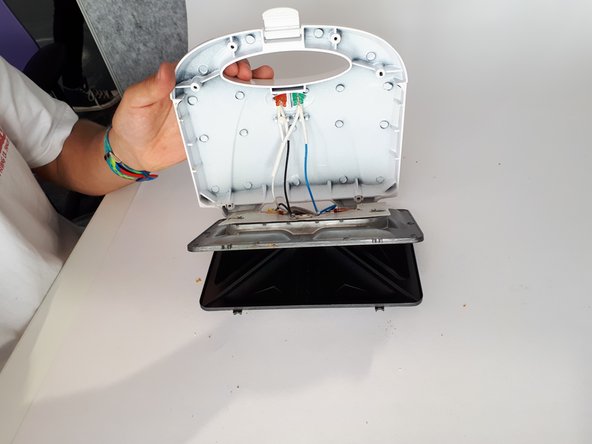
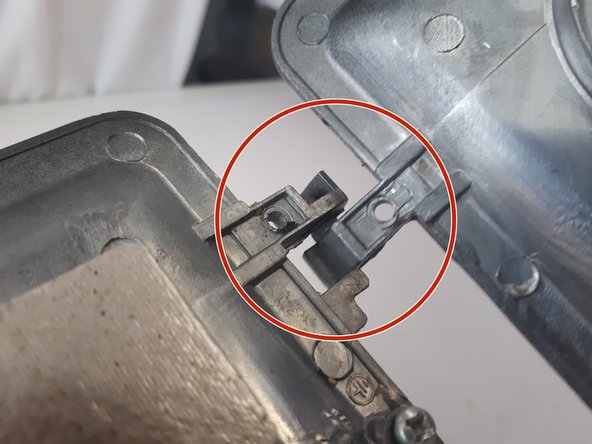
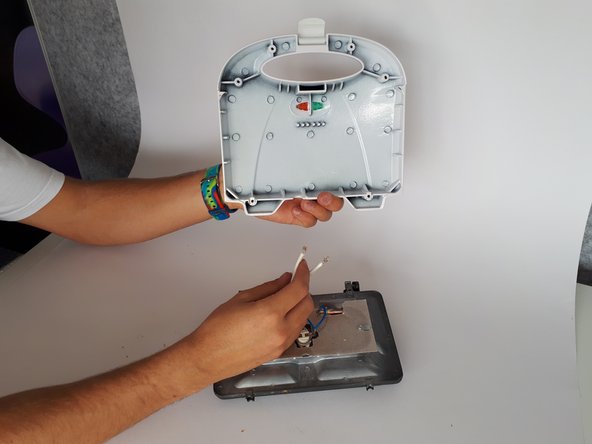
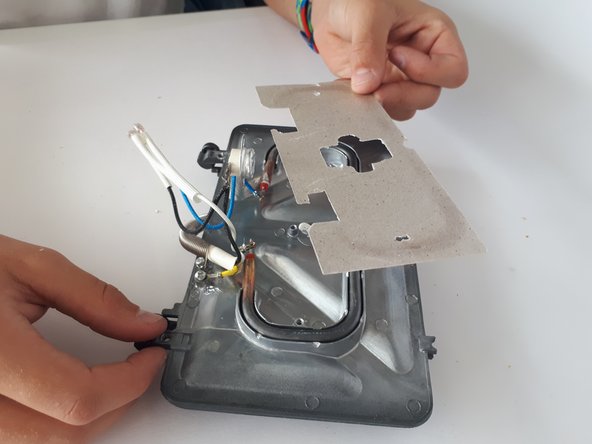
    • Unscrew the 10mm screws securing the plastic handle cover using a size PH1 screwdriver.

    • These screws are very loose and easy to remove.

  2. Home Essentials Sandwich Press Teardown: 手順 2、 3の画像 1 Home Essentials Sandwich Press Teardown: 手順 2、 3の画像 2 Home Essentials Sandwich Press Teardown: 手順 2、 3の画像 3
    • Unscrew the metal hot plates from the plastic covering using a size PH1 screwdriver.

    • The screws are 12 mm long.

  3. Home Essentials Sandwich Press Teardown: 手順 3、 3の画像 1 Home Essentials Sandwich Press Teardown: 手順 3、 3の画像 2 Home Essentials Sandwich Press Teardown: 手順 3、 3の画像 3
    • Unscrew the plastic handle cover using a Special Key Tri-wing.

    • One screw was very hard to unscrew, so grip paste had to be used.

    • The screws are 9 mm long.

  4. Home Essentials Sandwich Press Teardown: 手順 4、 1の画像 1
    • Remove the plug-in cord caps using a pair of pliers.

    • The metal caps have to be bent a bit to remove the plug-in cord caps, which means the metal caps will not work anymore.

  5. Home Essentials Sandwich Press Teardown: 手順 5、 3の画像 1 Home Essentials Sandwich Press Teardown: 手順 5、 3の画像 2 Home Essentials Sandwich Press Teardown: 手順 5、 3の画像 3
    • Now the metal plates are loose from the plastic cover. The plates need to be moved until the end of their hinge slots to slide them apart.

    • The hinges are very easy to take apart, once it is loose from the plastic cover.

  6. Home Essentials Sandwich Press Teardown: 手順 6、 3の画像 1 Home Essentials Sandwich Press Teardown: 手順 6、 3の画像 2 Home Essentials Sandwich Press Teardown: 手順 6、 3の画像 3
    • Separate the snap fit and remove the light covers.

    • Remove the cords of the lights by pulling them out of their snap fit.

    • Remove the light covers by pushing them out of the plastic cover.

    • The lights are being taken out very easily with not much pressure.

  7. Home Essentials Sandwich Press Teardown: 手順 7、 2の画像 1 Home Essentials Sandwich Press Teardown: 手順 7、 2の画像 2
    • Remove the press latch by using a screwdriver; add some pressure to it to get the latch loose.

    • Removing the press latch is hard and requires extra effort.

  8. Home Essentials Sandwich Press Teardown: 手順 8、 3の画像 1 Home Essentials Sandwich Press Teardown: 手順 8、 3の画像 2 Home Essentials Sandwich Press Teardown: 手順 8、 3の画像 3
    • Unscrew the heating element covers using a size PH1 screwdriver.

    • Remove the heating element covers from the plates.

    • These screws are very loose and easy to remove

    • The screws are 5 mm long.

  9. Home Essentials Sandwich Press Teardown: 手順 9、 3の画像 1 Home Essentials Sandwich Press Teardown: 手順 9、 3の画像 2 Home Essentials Sandwich Press Teardown: 手順 9、 3の画像 3
    • Unscrew the heating element wires from the hot plates using a PH1 screwdriver. The screws are 5 mm long.

    • Remove the heating elements using a Phillips head screwdriver, and put this screwdriver under the heating elements.

    • Removing the heating elements requires some more pressure because they are put in with a tight snap fit. The heating element will also deform when removed.

作成者

1人の作成者と共同作成されました。

Anna Stapor

メンバー登録日: 03/07/18

169 ポイント

1ガイドが承認済み

チーム

0 件のコメント

コメントを追加

統計データ:

過去 24時間: 0

過去 7 日: 1

過去 30 日: 13

今までの合計 684