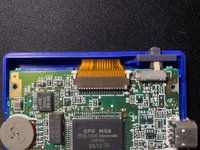
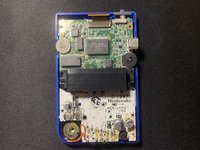
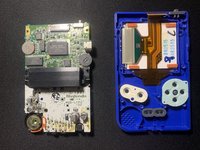
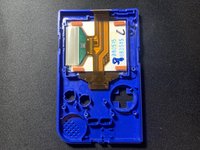
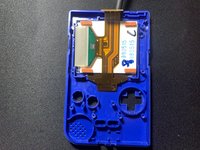
メインコンテンツにスキップ

必要な工具と部品

この分解は修理ガイドでは ありません。 お持ちのGame Boy Pocketを修理する際は、iFixitの修理ガイドをご利用ください。

  1. Game Boy Pocket Teardown, Game Boy Pocket Teardown: 手順 1、 2の画像 1 Game Boy Pocket Teardown, Game Boy Pocket Teardown: 手順 1、 2の画像 2
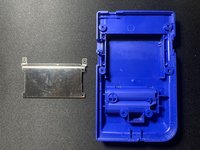
    • Turn the game boy pocket around and remove the battery cover and batteries.

    • Please do note that I don’t have a battery cover.

  2. Game Boy Pocket Teardown: 手順 2、 2の画像 1 Game Boy Pocket Teardown: 手順 2、 2の画像 2
    • Using a Y00 screw, remove 6 screws from the back.

  3. Game Boy Pocket Teardown: 手順 3、 1の画像 1
    • Remove back cover.

  4. Game Boy Pocket Teardown: 手順 4、 2の画像 1 Game Boy Pocket Teardown: 手順 4、 2の画像 2
    • Remove 4 screws from the cartridge panel using a JIS000 screw.

    • Remove cartridge panel.

  5. Game Boy Pocket Teardown: 手順 5、 1の画像 1
    • Remove 3 screws on the motherboard using a JIS00 screw

  6. Game Boy Pocket Teardown: 手順 6、 1の画像 1
    • Push on two lock pins that are locking the ribbon cable for the screen using a spudger.

  7. Game Boy Pocket Teardown: 手順 7、 3の画像 1 Game Boy Pocket Teardown: 手順 7、 3の画像 2 Game Boy Pocket Teardown: 手順 7、 3の画像 3
    • Using a plastic tweezer, remove the ribbon cable.

    • Be careful not to scratch or break the ribbon cable!

  8. Game Boy Pocket Teardown: 手順 8、 2の画像 1 Game Boy Pocket Teardown: 手順 8、 2の画像 2
    • Remove motherboard.

  9. Game Boy Pocket Teardown: 手順 9、 2の画像 1 Game Boy Pocket Teardown: 手順 9、 2の画像 2
    • Remove covering on buttons.

    • Remove buttons.

  10. Game Boy Pocket Teardown: 手順 10、 2の画像 1 Game Boy Pocket Teardown: 手順 10、 2の画像 2
    • Remove display using a spudger.

    • Be careful not to break the display!

  11. Game Boy Pocket Teardown: 手順 11、 1の画像 1
    • Done!

作成者

2人の作成者と共同で作成されました。

John

メンバー登録日: 07/04/22

376 ポイント

2のガイドは作成済み

コメント 1 件

Came here because I thought I missed a screw in the back or something. Nope, still had a game inserted which holds the two parts together, haha.

Bart - 返信

コメントを追加

統計データ:

過去 24時間: 9

過去 7 日: 35

過去 30 日: 140

今までの合計 1,182